- Layout adjustment and updated screenshots
This article includes descriptions of third-party software and is based on the status at march 2023 (Windows Server 2022).
Changes to the user interface on the part of Microsoft are possible at any time and must be taken into account accordingly in the implementation.
All information without warranty.
Introduction
Virtualization software makes it possible to install different systems on a physical computer and use them simultaneously.
The individual system is made to believe that it is the sole user of the physical hardware.
The Aim:
- Divide up the resources of a computer
- Operate several separate systems without having physically separate hardware
- Individual systems are created as virtual machines (VM)
- The physical computer is called the host
- The virtualization software is installed on this
- Manages the computer resources such as processor performance, RAM and network connections and allocates them to the individual VMs
Through the Hyper-V Manager, it is possible to connect to the server and administer the host
Create a virtual machine
In order to install the Securepoint Unified Mail Archive, a guest system, namely a virtual machine, is required on the server.
Requirements
- Up to version 2.1.2, two network cards must be available to the virtual machine. These network cards must be connected to different networks (virtual switches).
- As of version 2.1.3, only one network card is required.
- At least 4GB of main memory must be available.
- At least 4 vCPUs must be integrated for productive use (current Xeons are recommended).
- 4GB as first hard disk for the UMA firmware
- Depending on the email traffic, sufficient hard disk space must be available. At least 150GB.
Rough calculation basis for archive storage with the recommended 50% safety buffer on the increment:
Inventory data to be imported + data growth for 3 - 5 years x 3.5 = archive storage size
Discrepant size information in screenshots should be ignored.
Create a new virtual computer
Via the selection menu on the right side under New -> Virtual Computer..., the wizard for creating a new virtual machine is started.
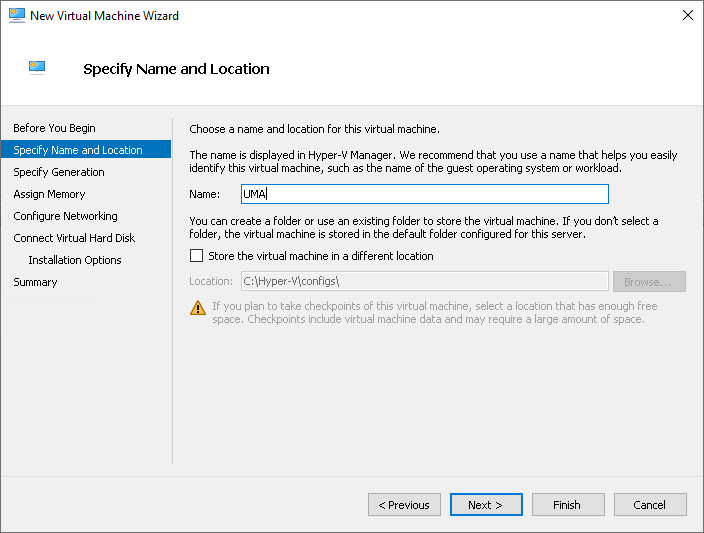
Wizard Step 1 - Specify name and path
- The first step is to enter a Name: for the virtual machine
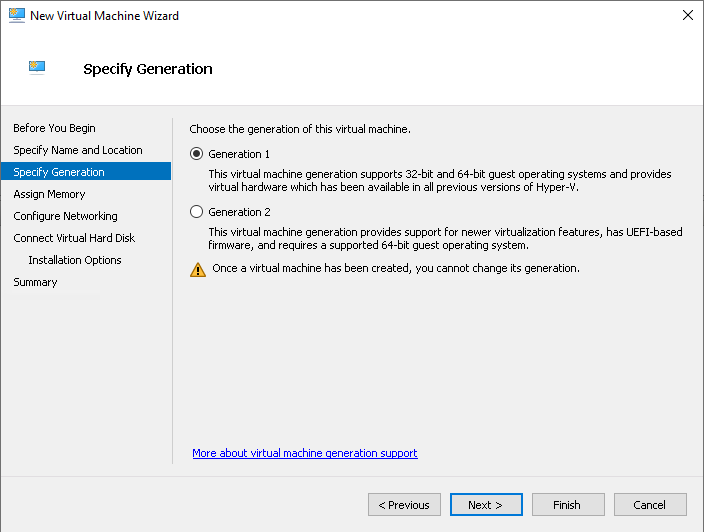
Wizard Step 2 - Specify generation
- For the operation of the UMA it is necessary to run the virtual system as a Generation 1 VM.
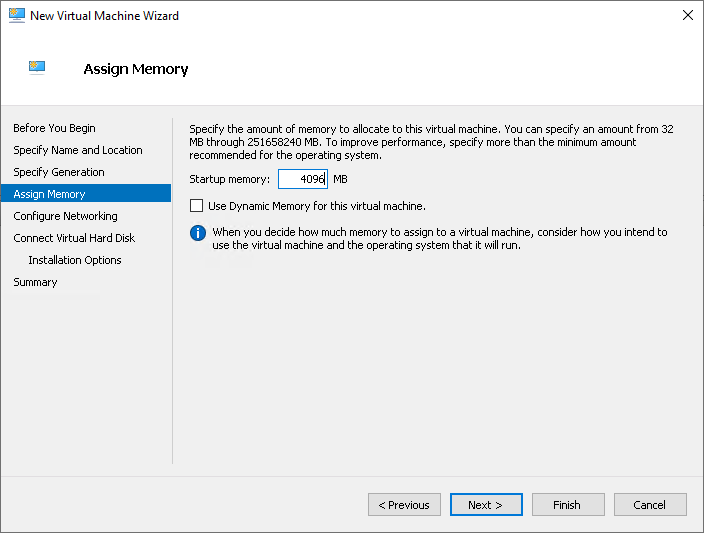
Wizard Step 3 - Assign memory
- Memory is assigned to the VM. Observe the above minimum requirements
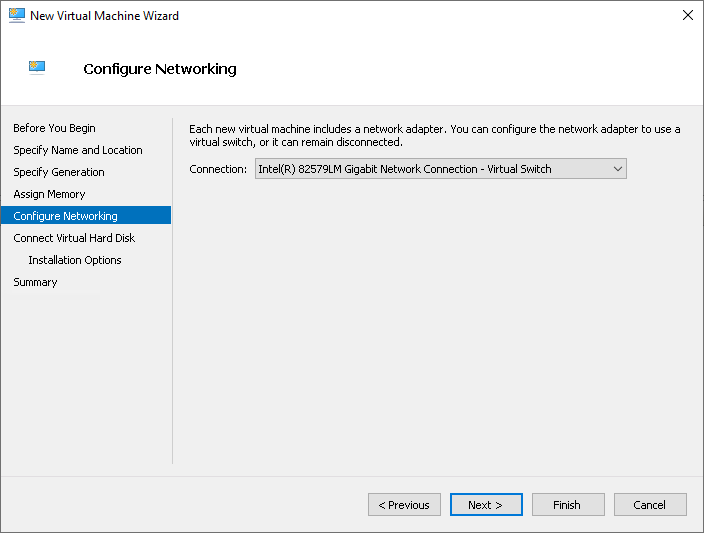
Wizard Step 4 - Configure network
- Now you need to assign a network adapter to the virtual machine
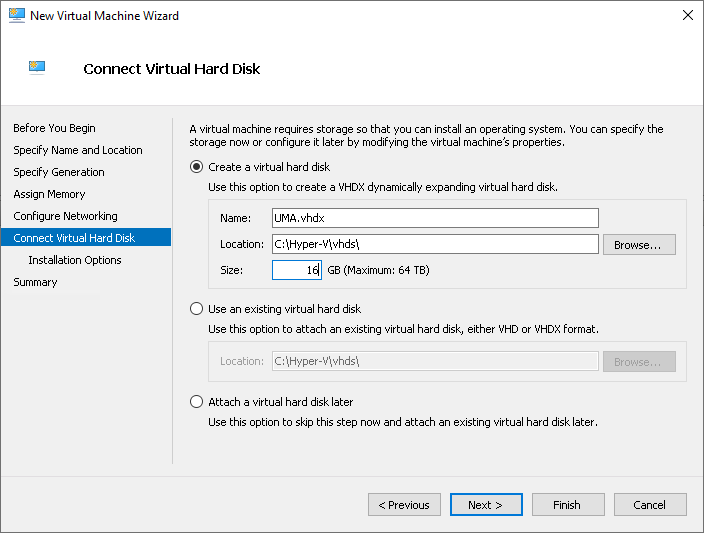
Wizard Step 5 - Connect virtual hard disk
- Specify the memory for the system hard disk. Name:, Path: and Size: of the hard disk entered
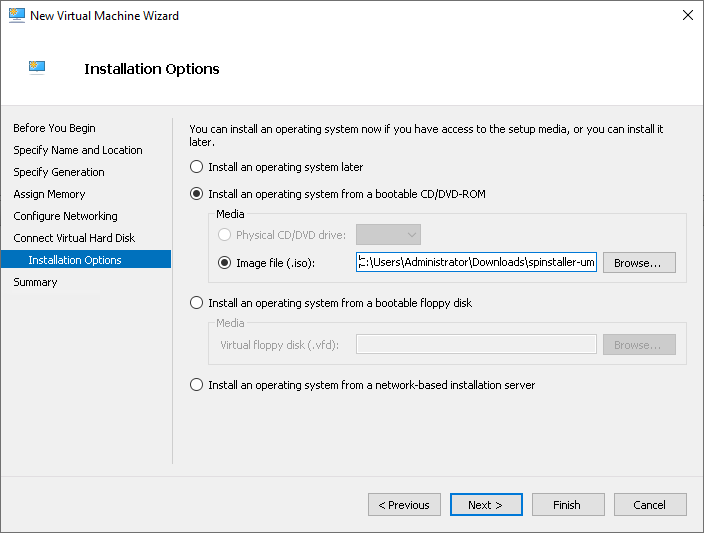
Wizard Step 6 - Installation options
- Select UMA-ISO for the installation. Create the VM in the summary by Finish
Adjustment of the configuration
Expansion of the main memory
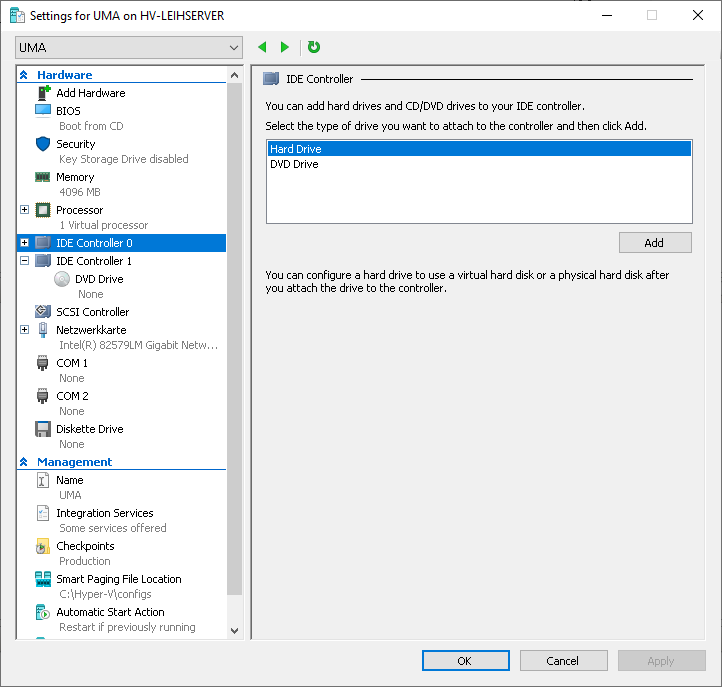
Expansion Step 1 - Adding a new hard disk
- Open the Settings window:
- right column at the UMA VM, or
- Right click on the VM
- Under IDE Controller select Hard Disk and click on Add.
- Click on New for Virtual hard disk
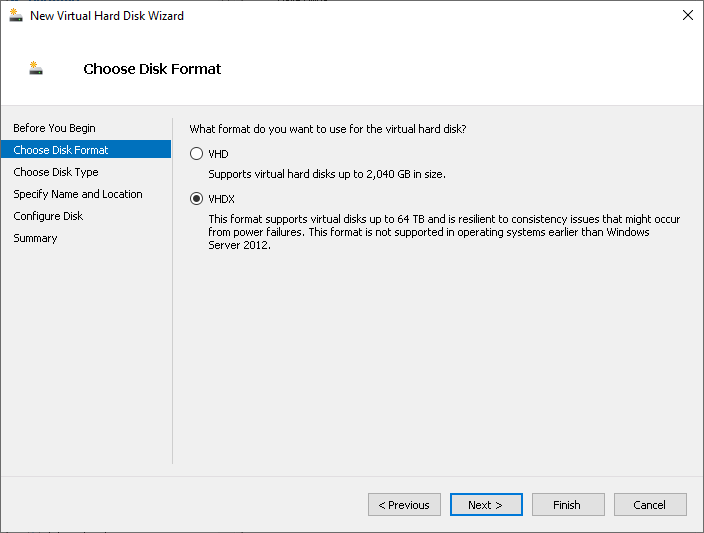
Expansion Step 2 - Select disk format
- After the preliminary remark, you can choose between the format VHD (only up to a size of 2TB) or VHDX
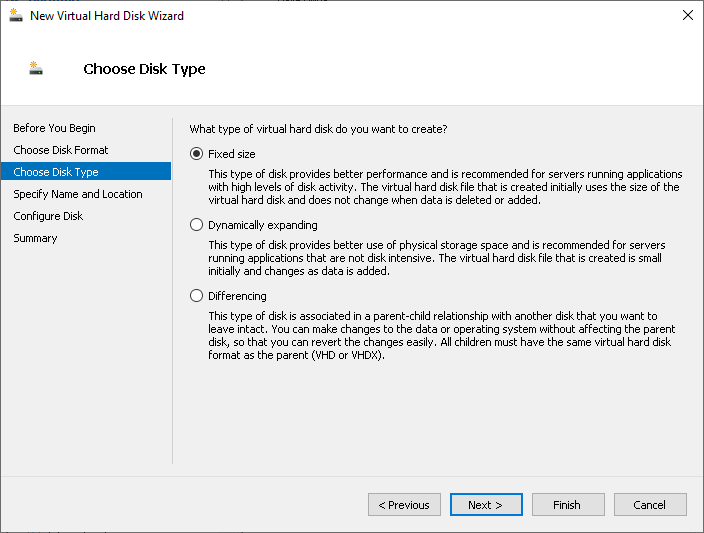
Expansion Step 3 - Select data disk type
- Select storage hard disk. In this example, Fixed-size'
- For an encrypted file system with many read/write accesses, it is the more secure and performant solution
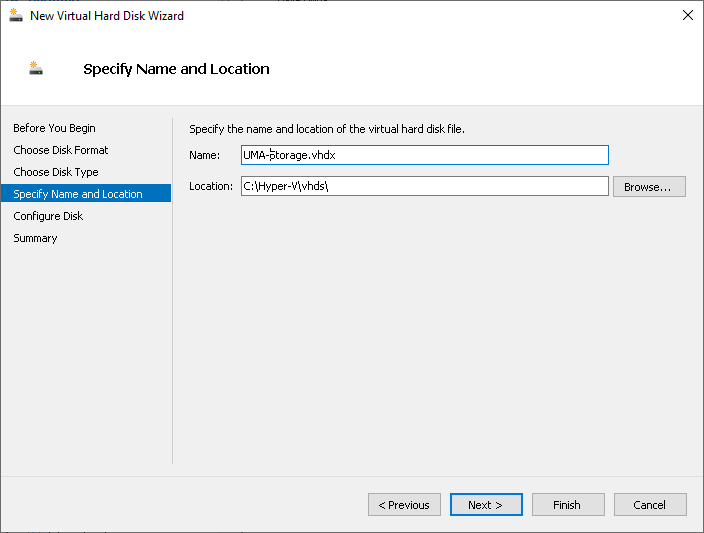
Expansion Step 4 - Specify name and path
- Now the hard disk must be given a name and the storage location must be specified
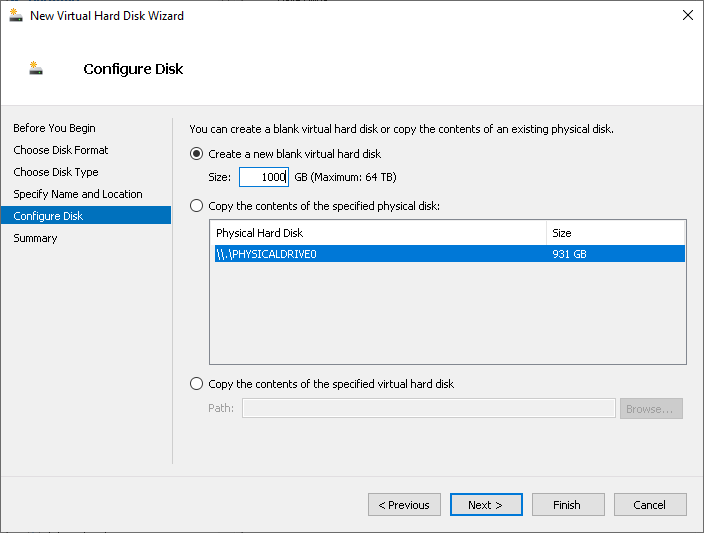
Expansion Step 5 - Configure data disk
- Set the size of the storage.
- Here, the calculation formula given under Requirements must be observed!
- Check the settings under Summary.
- Create hard disk with Finish
The UMA-VM is now ready for operation.
