notempty
Konfiguration of the Captive-Portals
Last adaptation to the version: 11.8.7
- New:
- Article updated
- English translation
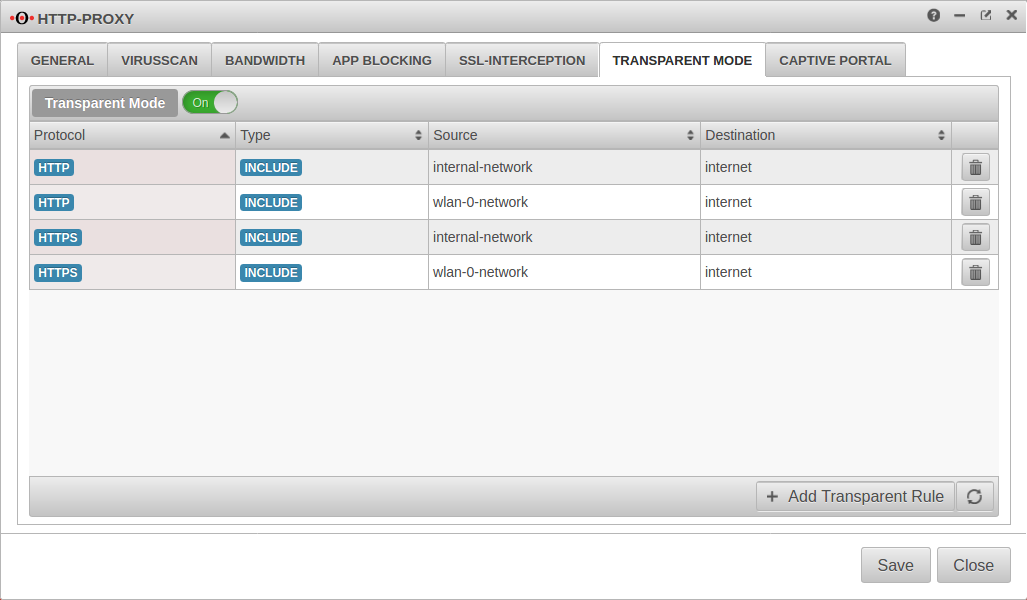
- Added rule for HTTPS with SLL interception
Previous versions: -
Server settings
Menü Reiter Server settings
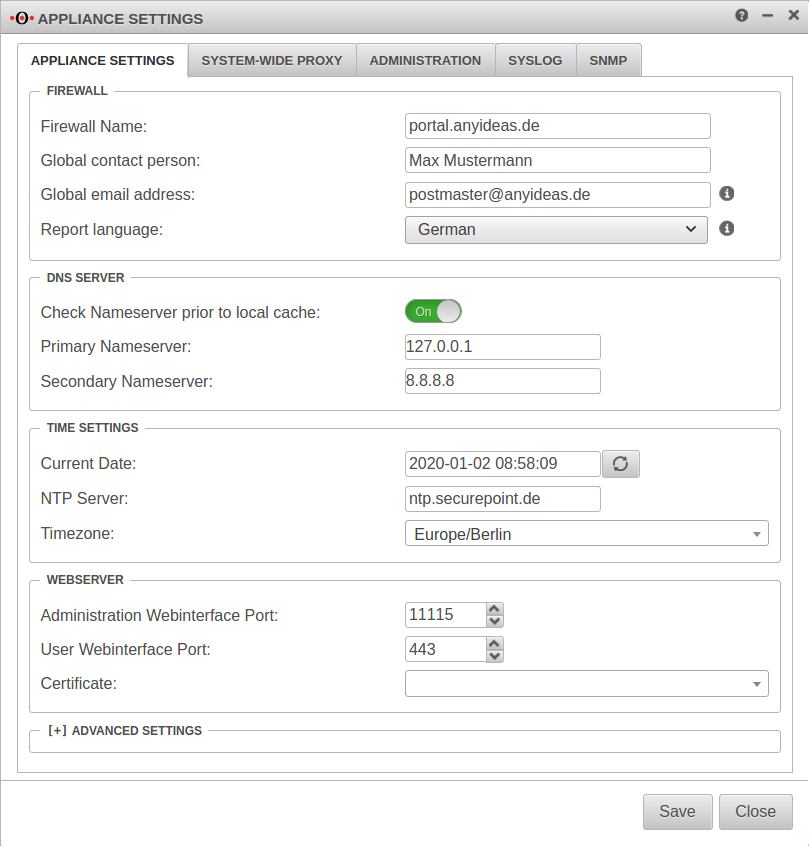
Customize Firewall Name
The firewall name should be defined as FQDN. (In the example portal.anyideas.de)
This is necessary so that later the resolution of the landing page of the captive portal is compatible with the certificate.
Firewall
| ||
| Firewallname | portal.anyideas.de | FQDN compliant firewall name |
Entering the DNS serverThe localhost (here 127.0.0.1) is entered as the primary name server. In the past, 'google-public-dns-a.google.com' has proven itself as a secondary name server with its fast response time and high availability. DNS server | ||
| Primary name server | 127.0.0.1 | Localhost |
| Secondary name server | 8.8.8.8 | Possible name server: google-public-dns-a.google.com |
Importing certificates
Since the landing page of the captive portal is a HTTPS website, the next step is to provide the required certificate. We strongly recommend to buy a certificate from an official CA (or to use an existing wildcard certificate) to avoid later irritations because of browser warnings.
Basically there are two options:
- A Certificate for a FQDN
- in this case the common name of the certificate would be portal.anyideas.de
- A wildcard certificate
- in which case the common name of the certificate would be *.anyideas.de
In the first step, the CA provided together with the certificate must be imported into the UTM.
Menu Tab CA ButtonIn the first step, the CA provided together with the certificate must be imported into the UTM.
Menu Tab CA Button
The CA and the certificate must be in .pem format !
Certificates can be converted with the tool openssl - available for all common platforms (part of Linux, call via console) - and the following commands:
| Certificate | Command |
|---|---|
| X509 to PEM | openssl x509 -in certificatename.cer -outform PEM -out certificatename.pem |
| DER to PEM | openssl x509 -inform der -in certificate.cer -out certificate.pem |
| P7B to PEM | openssl pkcs7 -print_certs -in certificate.p7b -out certificate.pem |
| PFX to PEM | openssl pkcs12 -in certificate.pfx -out certificate.pem -nodes |
Create group if necessary
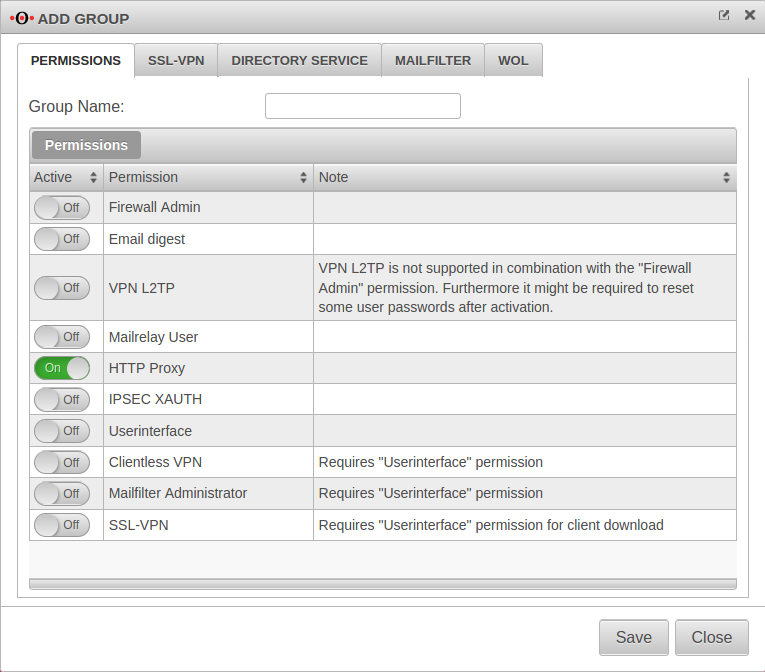
Menü Tab Groups Button Tab Authorizations
If users are to be authenticated at the captive portal, the next step is to create a group with the required permission HTTP-Proxy On.
This explains how to create a user group.
If desired and with an existing integration in an Active Directory], the group can also be mapped to a group existing in AD or to be generated.
Implicit rules
Menu Group Ein Captive Portal
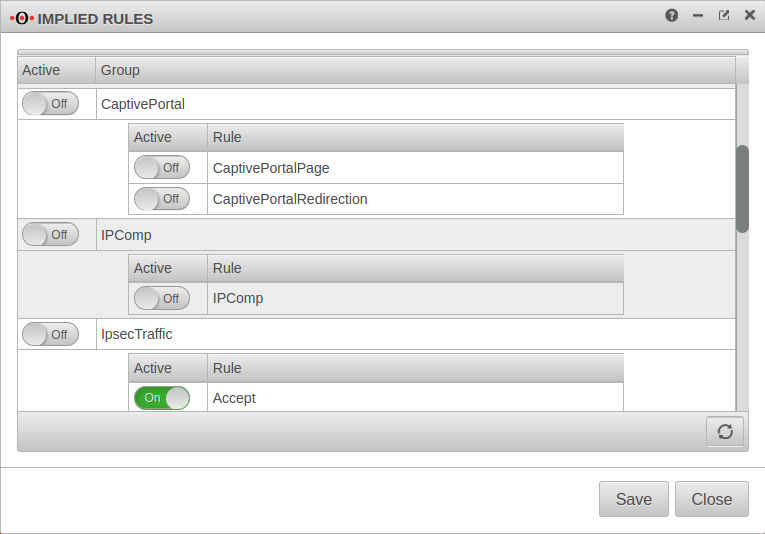
At the item Captive Portal in the menu Implicit Rules you have to make sure that both rules are activated.
The switch CaptivePortalPage opens an incoming port on the corresponding interface of the firewall, which is intended for the Captive Portal to be able to display the landing page.
The switch CaptivePortalRedirection is, as the name suggests, responsible for the corresponding redirection of the traffic to the port mentioned above.
Settings in the Captive Portal
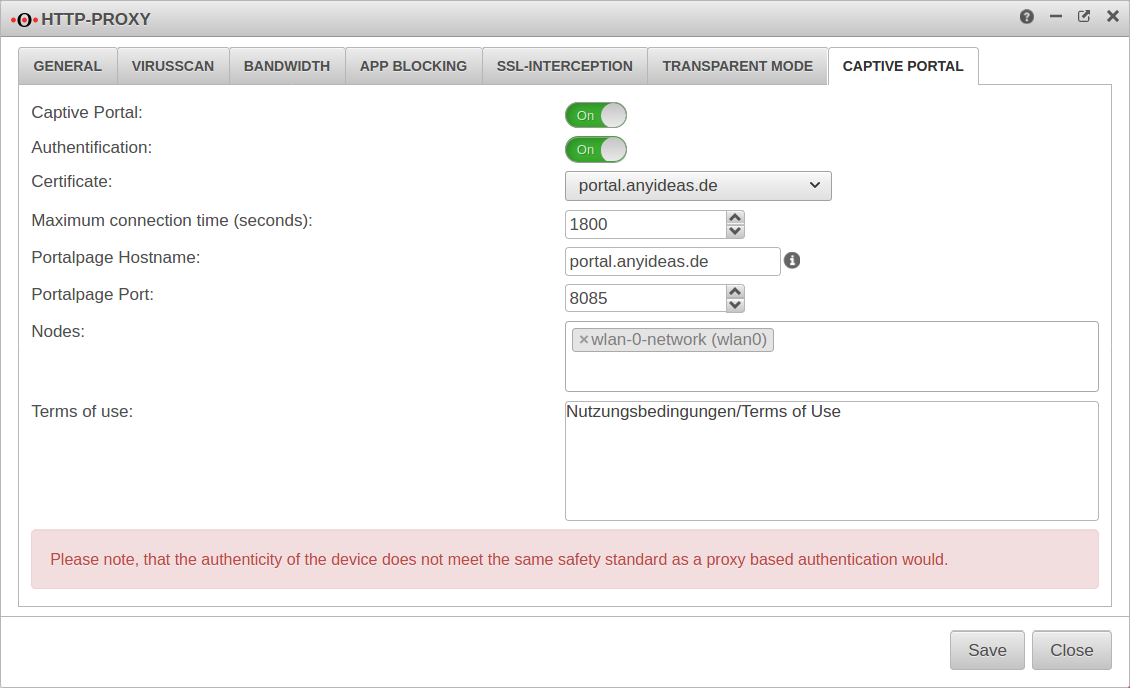
Menu Tab Captive Portal
| Caption | Value | Description |
|---|---|---|
| Captive Portal: | On | This switch enables or disables the captive portal |
| Authentication | On | Certificate |
| Certificate | Please select the certificate mentioned above. | |
| Maximum connection time (seconds): | 1800 | The time frame in which a registration in the captive portal is valid. If the default time has expired, web access to the Internet is blocked and a reconfirmation of the terms of use (and, if desired, authentication) is required. |
| Portalpage Hostname: | portal.anyideas.de | In the case of a certificate for an FQDN, this should correspond to the Common Name of the certificate. In the case of a wildcard certificate, the host name must correspond to the response to a DNS query of the client. |
| Portalpage Port: | 8085 | A port must be defined for the captive portal, but this can be changed. |
| Nodes: | × wlan-0-network (wlan0) | In this field please select the network objects that represent the networks that should be redirected to the landing page. |
| Terms of use: | Nutzungsbedingungen/Terms of Use | Here own terms of use have to be listed. For liability reasons we can not provide them. For the same reasons we recommend to consult a lawyer. |
Nameserver
Menu Tab Zones
If the firewall name cannot be changed to an FQDN, for example because the UTM is used as outgoing mail relay, the name server of the firewall must also be used: In this example, it is assumed that the firewall for the network of the captive portal is the responsible DHCP server and is set up as primary DNS server.
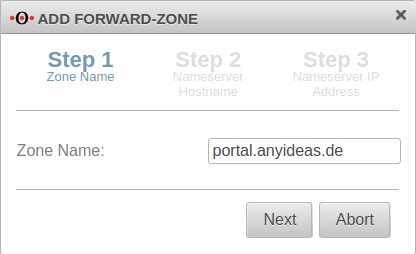
Add Forward Zone
Button
The zone name to be assigned corresponds to the FQDN of the firewall.
In the example portal.anyideas.de.
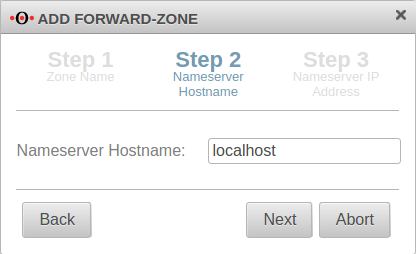
localhost is used as the host name of the name server.
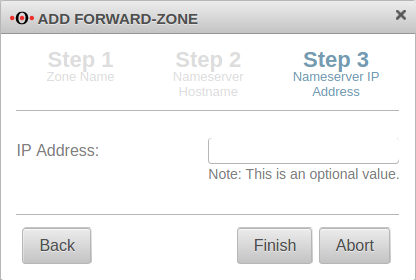
The IP address field can be left empty.
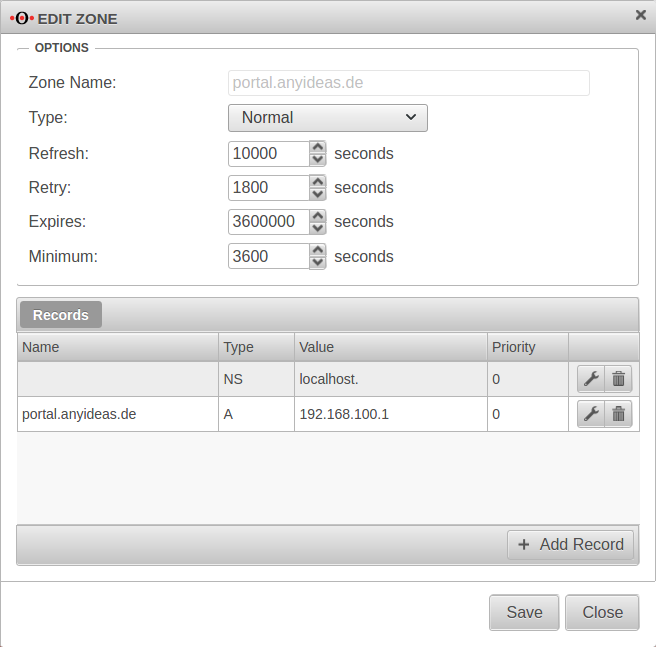
Edit Forward Zone
The following entry is added to the zone just created → Button :
| Caption | Value | Description |
|---|---|---|
| Name: | portal.anyideas.de | FQDN of the firewall |
| Type: | A-Record | |
| Value | 192.168.100.1 | IP of the interface (here wlan0 ) |
Transparent mode
Menu Tab Transparent mode
To access the Internet via the required HTTP proxy, at least one rule is necessary (HTTP), better two (additionally HTTPS)
| Caption | Value |
|---|---|
| Protocol: | |
| Type: | |
| Source: | |
| Destination: |
| Caption | Value |
|---|---|
| Protocol: | |
| Type: | |
| Source: | |
| Destination: |
Portfilter
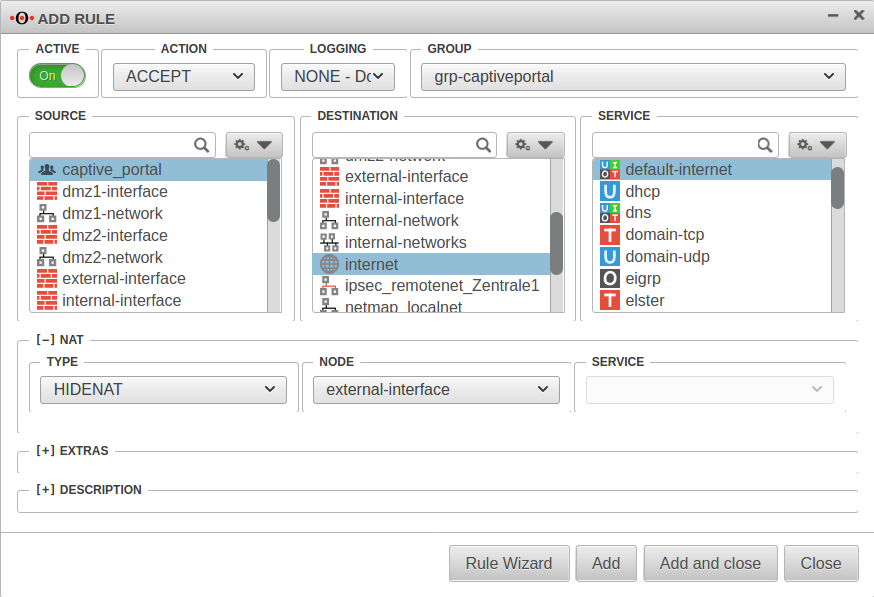
Two additional rules are required in the port filter:
Rule 1 Source: |
captive_portal |
Destination: |
internet |
Service |
default-internet |
[–] NAT
| |
Type: |
|
Network object |
|
Rule 2 | |
Source: |
wlan-0-network |
Destination: |
wlan-interface |
Service |
proxy |
Webfilter
Finally, the web filter should be configured, since surfing through the proxy is possible without rules in the port filter access to e.g. internal web servers:
with authentication
- Tab Network objects Button
Create a group (e.g. grp_CP_webfilter) that contains the wlan-0-network network object - Button
- Network or user group: Select the newly created group
- Edit newly generated rule record
- webserver.anyideas.de URL of the (internal) server to which access via the captive portal should be blocked
- Leave action on block
without authentication
- Button
- Select the user group
- Edit newly generated rule record
- webserver.anyideas.de URL of the (internal) server to which access via the captive portal should be blocked
- Leave action on block
