Jump to:navigation, search
Wiki


De.png
En.png
Fr.png


Creation and managment of certificates
Last adaptation to the version: 12.6.0
New:
  • Updated to Redesign of the webinterface
notempty
This article refers to a Resellerpreview

12.5.1 12.4 11.7

Access: UTM-IP:Port or UTM-URL:Port
Port as configured at Network / Appliance Settings / Webserver
Default-Port: 11115
i.e.: https://utm.ttt-point.de:11115
Default: https://192.168.175.1:11115
Authentication Certificates

General

The Securepoint firewall uses digital certificates for authentication for various functions:

  • VPN connections
  • SSL Interception
  • Captive Portal
  • Mailrelay
  • Reverse Proxy
The certificates comply with the x.509 standard.

Certificates are intended to certify the identity of the holder.
They are

  • issued by the Securepoint Appliance and signed by the appliance's own CA (Certification Authority; also called root certificate).
    • The CA itself is also a certificate that must first be created on the Apliance in order to create certificates, because certificates must be signed with the CA when they are created.
  • issued by a Automatic Certificate Management Environment service and certified by it. Available here Let's Encrypt

    .
This signing confirms the authenticity of the certificate. Thus, the user can be sure that the certificate was really issued by the appliance.

To be able to uniquely assign the certificate, a distinguished name (DN) is generated from the individual details that must be set when the certificate is created.
. This includes:

  • Name of the certificate (CN) Common Name
  • Country (CO) Country
  • State/Region (ST) State
  • City (LO) Location
  • Company (OR) Organization
  • Department (OU) Organization Unit
  • E-mail (email-address)
  • An alias can still be specified to strengthen the uniqueness. This alias is either an email address, a DNS name or an IP address.
  • Some VPN software requires this alias for proper functionality (e.g. Windows 7 IPSec Client).
  • In addition, a validity period must still be specified, whose start and expiration time is composed of time and date. The validity period is not prescribed and can be adapted to your own needs. After the expiration of this period, the certificate can no longer be used.
  • A flag can also be set, which identifies the certificate as a server certificate. This is required by OpenVPN for the server. OpenVPN always requires a server system with server certificate for a site, even for site-to-site connections. Other VPN protocols do not require this flag.

The following shows how certificates are created and signed by the UTM.


Create CA

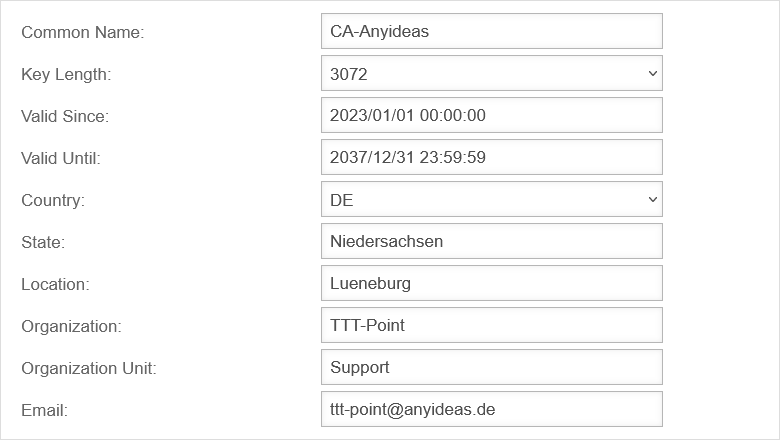
  • Menu Authentication Certificates  Area CA Button Add CA

Value Description CA hinzufügen UTMuser@firewall.name.fqdnAuthentifizierungCertificates UTM v12.6 Zertifikate CA erstellen-en.png Dialog Add CA
Common Name Distinctive name. The following scheme should be used for clear assignment of certificates:
  • CA-xyz for Certificate Authorities
  • CS-xyz for server certificates (Certificate Server)
  • CC-xyz for client certificates (Certificate Client)
  • ACME-xyz for ACME certificates (xyz corresponds to the service for which the certificate is to be used)
Key length: Key length of the certificate. Possible values: 1024 / 2048 / 3072 (default) notempty
New as of v12.5.1
/ 4096
Valid until The date must be entered in the following format YYYY/MM/DD hh:mm:ss. If the mouse is clicked in the input field, a calendar opens automatically, on which the date and time can be selected.
  • When the CA expires, the validity of the certificates signed with this CA also expires.
  • Create the CA with the button.


    Create server and client certificate

    Nun kann ein Zertikikat für einen Server oder Client erstellt werden. Dies geht unter: Authentication Certificate  Area Zertifikate Button Zertifikat hinzufügen

    notempty
    Erst nachdem eine CA angelegt wurde, können Server- und Clientzertifikate angelegt werden.

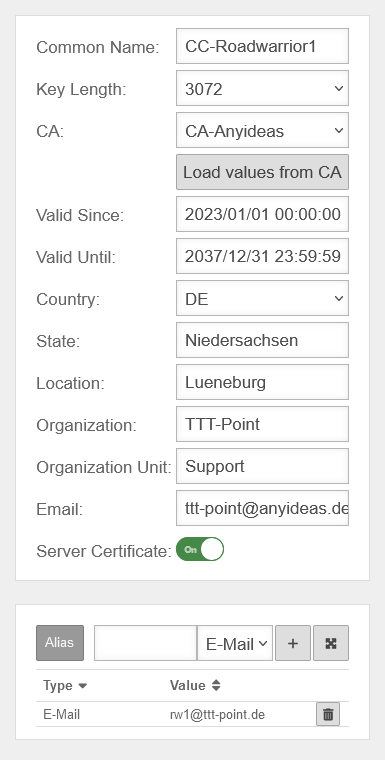
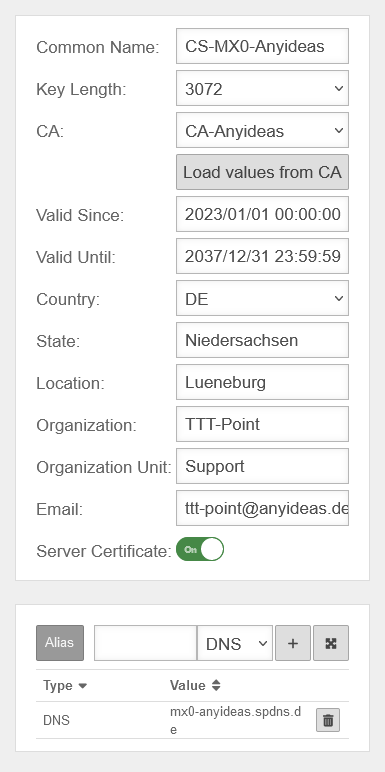
    Value Description Zertifikat hinzufügen UTMuser@firewall.name.fqdnAuthentifizierung UTM v12.6 Zertifikate Clientzertifikat erstellen-en.png Create client certificate Zertifikat hinzufügen UTMuser@firewall.name.fqdnAuthentifizierung UTM v12.6 Zertifikate Serverzertifikat erstellen-en.png Create server certificate
    Common Name Distinctive name. The following scheme should be used for clear assignment of certificates:
    • CA-xyz for Certificate Authorities
    • CS-xyz for server certificates (Certificate Server)
    • CC-xyz for client certificates (Certificate Client)
    • ACME-xyz for ACME certificates (xyz corresponds to the service for which the certificate is to be used)
    Key length: Key length of the certificate. Possible values: 1024 / 2048 / 3072 (default) notempty
    New as of v12.5.1
    / 4096
    CA: CA-Anyideas Selection of the CA that will sign the certificate
    Werte aus CA laden Adopts the values from the CA. Subsequent changes are possible.
    Server certificate Off Not used for a client certificate
    OnIs activated for a server certificate.
  • In addition, at least one further alias is required.
  •  Alias 
    • DNS DNSName of the server (e.g. example.spdns.en).
    • E-mail Email address
    • IP IP address of the server

    Adding the alias with the button.

    Create the certificate with the button.


    ACME certificates (Let's Encrypt)


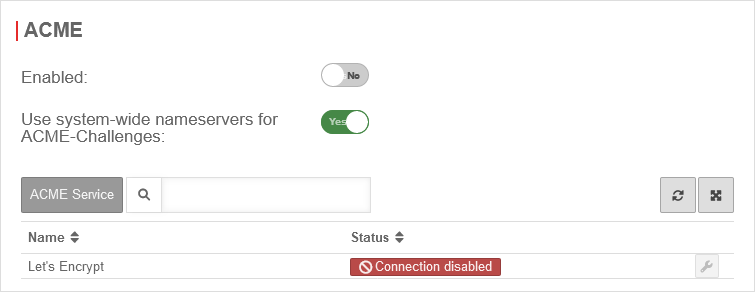
    Authentication Certificates  Area ACME


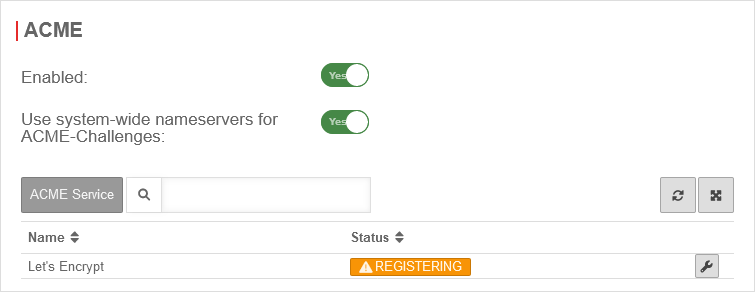
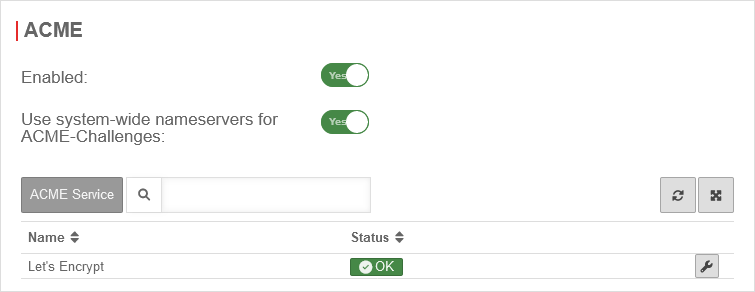
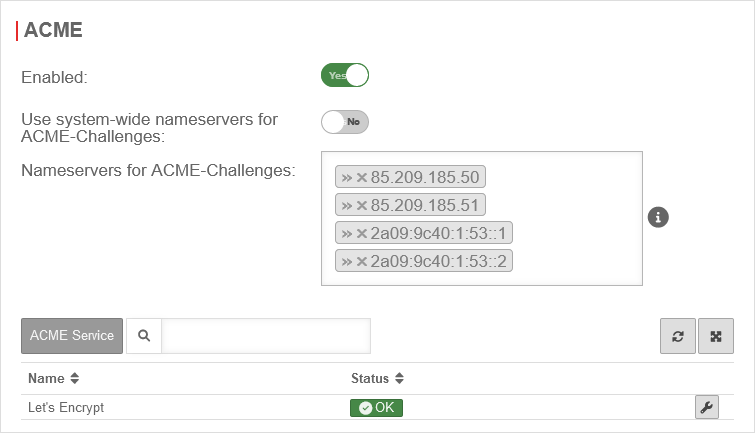
    Caption Value Description Certificates UTMuser@firewall.name.fqdnAuthentifizierung UTM v12.6 Zertifikate ACME Nameserver-en.png
    Activated: Yes Enables the use of ACME certificates.
    For more information see below Activate ACME service.
    Use system-wide nameservers for ACME challenges: Yes If the addresses for the servers for the extension of the ACME challenges cannot be resolved via the system-wide nameserver (e.g. due to configured relay or foreward zones), alternative nameservers can be entered by deactivating No.
    Nameserver for ACME challenges:
    Can be used for ACME challenges when system-wide nameserver is disabled
    »85.209.185.50»85.209.185.51»2a09:9c40:1:53::1»2a09:9c40:1:53::2 Here you can enter the nameservers for the ACME-Challenges.


    Activate ACME service

    Activate ACME service

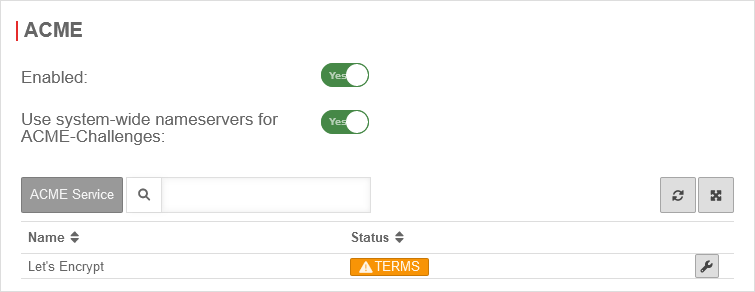
    Um ACME Zertifikate nutzen zu können, muss dies unter Authentication Certificate  Area ACME Aktiviert: Ja aktiviert werden.

    • Sobald der Dienst aktiviert wurde und dies mit gespeichert wurde, wird der Link zu den Nutzungsbedingungen geladen und es lassen sich die Einstellungen aufrufen.
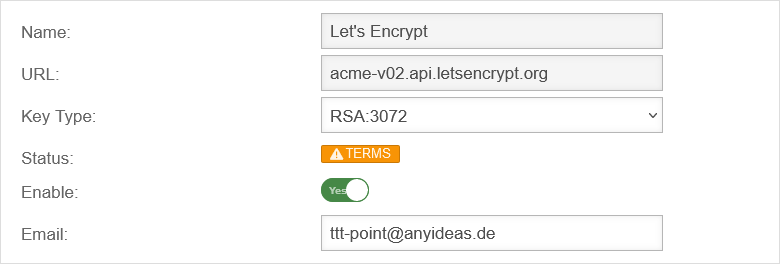
    • With the button Activate Yes and the storage of an Email address for notifications by the ACME service provider (here: Let's Encrypt), the information can be saved with
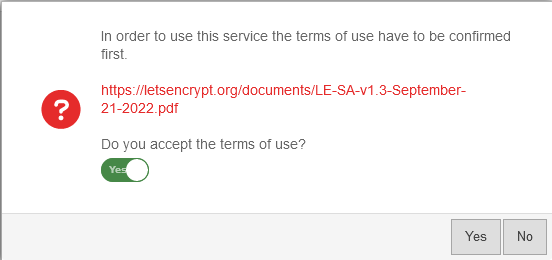
    • A dialog will appear with a link to the Terms of Use, which must be accepted Yes.

    Generate token

    Generate token

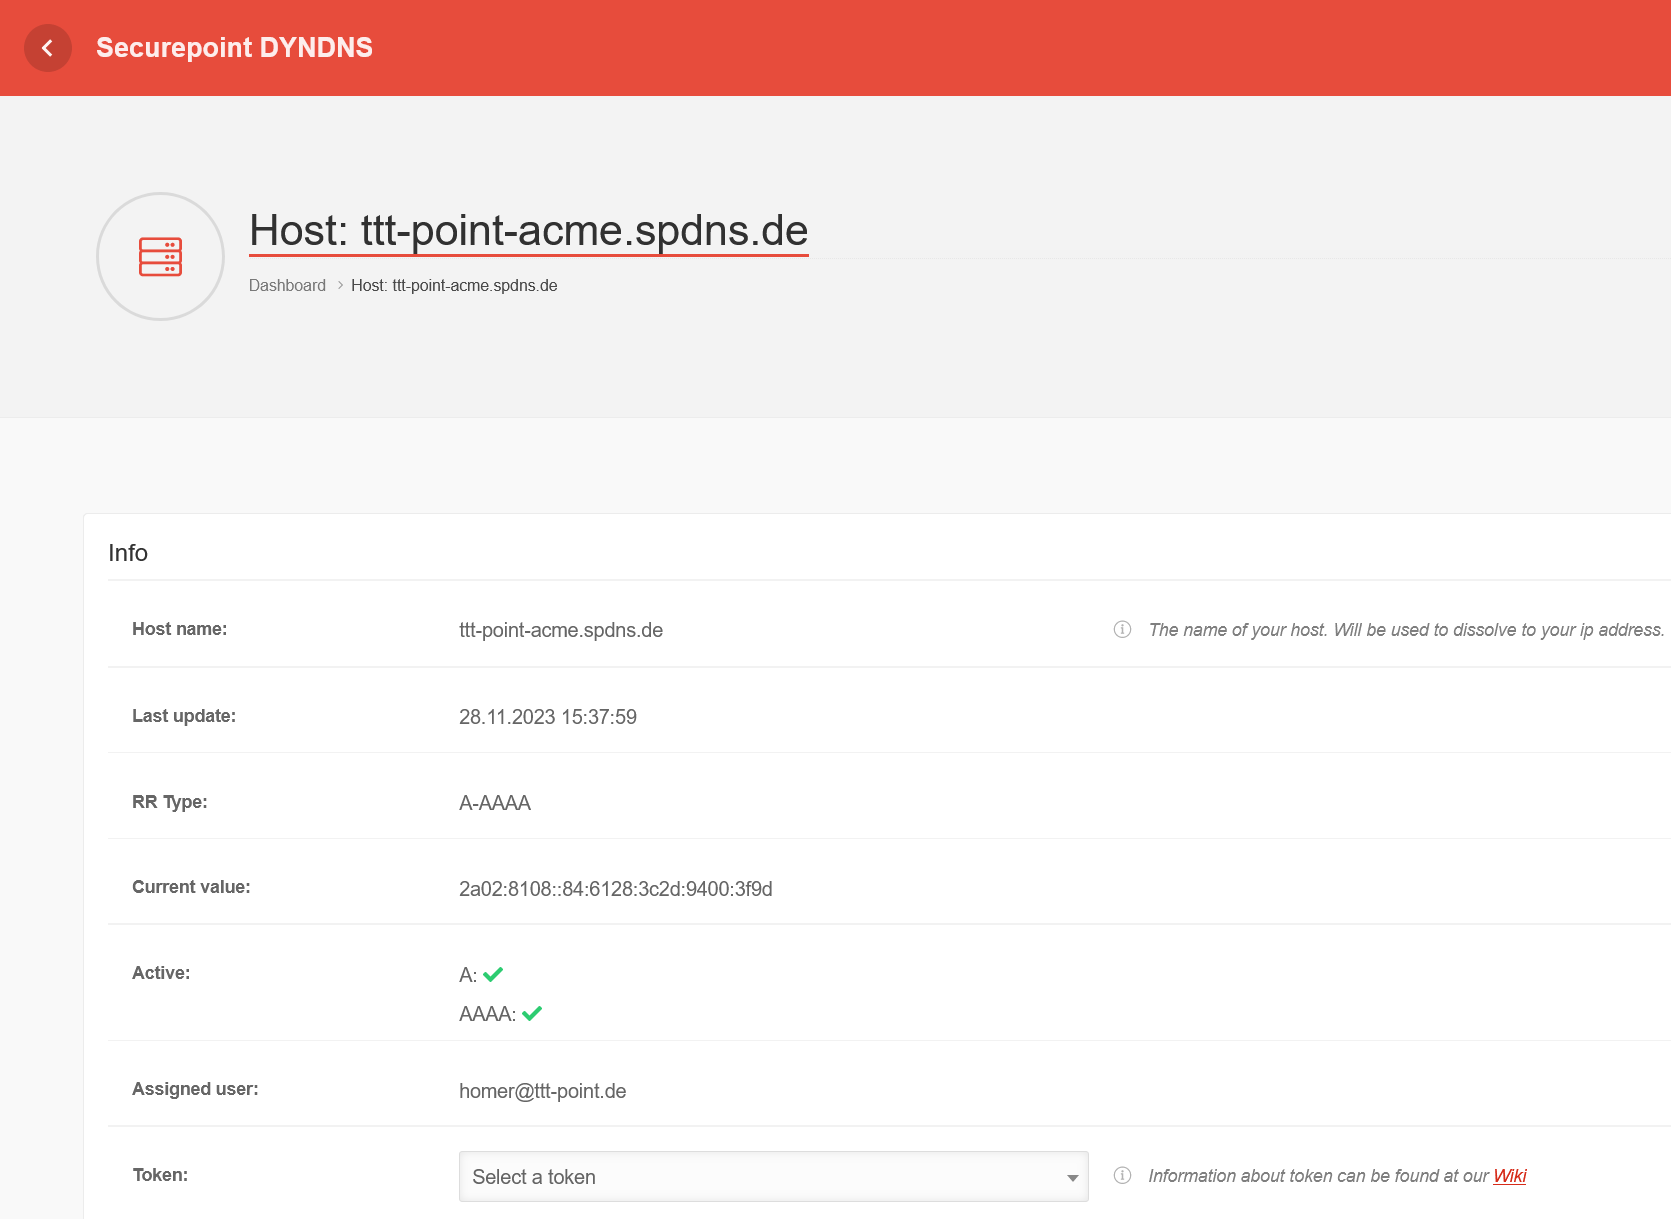
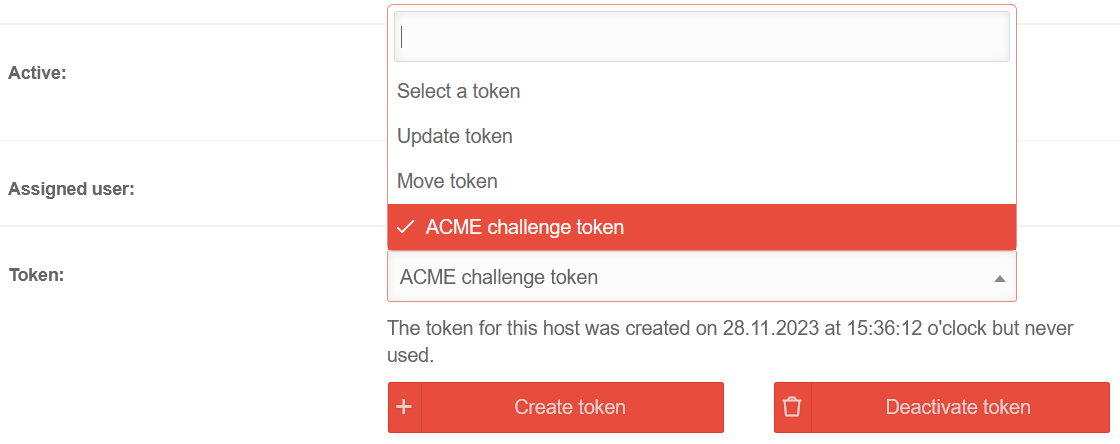
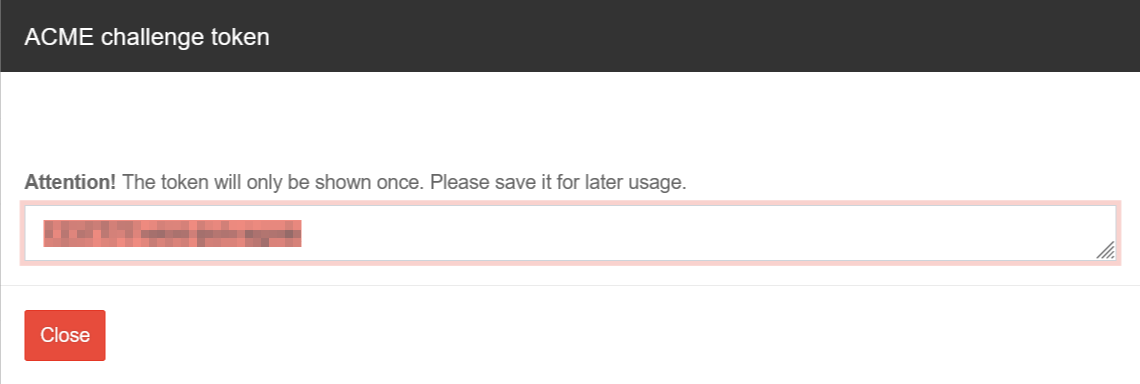
    spDYN To generate the certificates, the ACME token must first be generated in the spDYN portal.
    Within the spDYN portal, the corresponding host must be opened.

    • Call up spDyn Host
    • Select the ACME Challenge Token from the Token drop-down menu.
    • Generate token
      notempty
      The token is displayed once during generation and cannot be displayed again.

      The token should be noted and stored safely.

    Renewal of ACME certificates

    Renewal of ACME certificates

    notempty
    New as of 12.4
    The renewal of the ACME/Let's Encrypt certificates takes place via the nameservers used, which are configured under Authentication Certificates  Area ACME (see above)


    ACME Certificates

    ACME Certificates

    After completing the previous steps, the actual certificate can now be generated. A click on Add ACME certificate in the Certificates tab opens the corresponding dialog.
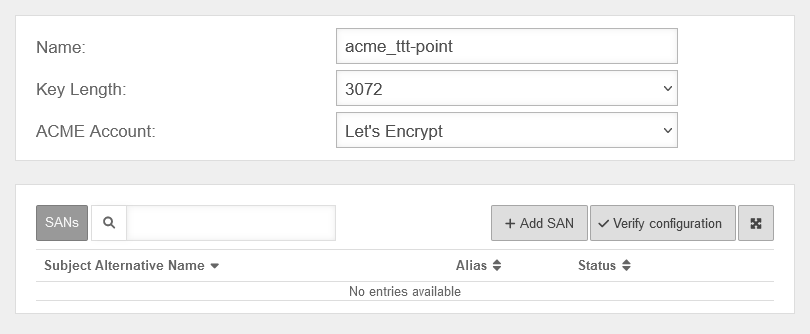
    Caption Value Description Add ACME certificate UTMuser@firewall.name.fqdnAuthentifizierungCertificates UTM v12.6 Zertifikate ACME hinzufuegen-en.pngAdd ACME certificate

    Add ACME certificate

    UTM Dialog Authentication Certificates  Area Certificates  Button Add ACME certificate
    Name acme_ttt-Point Name to identify the certificate
    Key length: 2048 Key length of the certificate. Possible values:
    ACME Account Let's Encrypt ACME account which should be used
    Subject Alternative Name configure with Add SAN

    Add Subject Alternative Name

    Subject Alternative Name »ttt-point.spdns.org The Subject Alternative Name ('SAN) is stored in the certificate and corresponds to the called URL UTM v12.6 Zertifikate ACME SAN-en.pngAdd Subject Alternative Name
    »*.ttt-point.spdns.org
  • Wildcard SANs can also be used.
  • Wildcard certificates are strongly recommended for use with a captive portal
    If a forward zone is required for the captive portal in the nameserver and an A record is then entered for it, this is no longer resolved in the public DNS.
    Verification and renewal of an ACME certificate with this name will then fail.
      
  • Alias ttt-point.spdns.org If the SAN is a spDYN hostname it is automatically taken on as alias.
    (Also for wildcard domains without * )
    Token ••••••••••••• The token from the spDYN portal (see above) proves to the ACME service that you are allowed to dispose of the hostname.
    displays the token.
    When inserting the token from the clipboard it can happen that there are blanks before or after the actual token. These must be removed

    Check configuration

    Check configuration
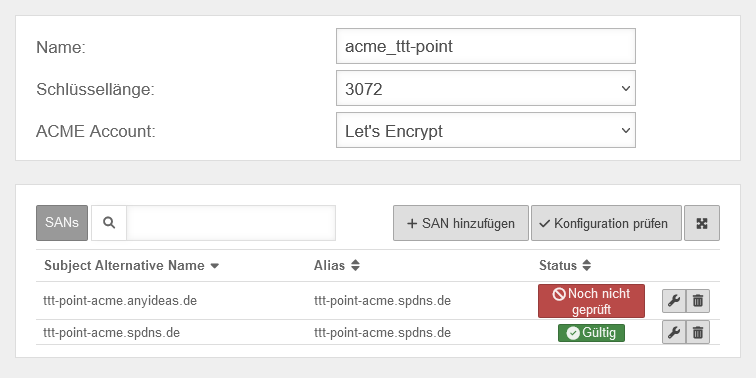
    Status Not yet checked Before the actual generation of the certificate, the configuration must first be checked. This is done by clicking on the Check configuration button. Add ACME certificate UTMuser@firewall.name.fqdnAuthentifizierungCertificates UTM v12.6 Zertifikate ACME SAN initialisiert.png
    initialize
    Initializes
    The check can take several minutes. During this process, the dialog is updated regularly.
    Valid If the check is successful, the status Valid is displayed.
    DNS error Possible causes:
    • wrong token
    • DNS resolution disturbed
    • zone forwarding configured in DNS
    • local DNS zone configured in DNS
    • If there is a zone in the nameserver of the UTM for a domain that also uses the ACME certificate, the DNS resolution fails. Solution: Create a CNAME record for this domain.
      • Search for the zone under Menu/Applications/Nameserver/Zones
      • click on Edit
      • Click on +Add Entry in the window
      • enter a suitable name under Name:'
      • select CNAME under Type:
      • enter the domain under Value:
        
    Configure Subject Alternative Name for an external DNS zone with Add SAN

    Add SAN for external DNS zone

    Subject Alternative Name ttt-point.anyideas.org The Subject Alternative Name (SAN) from the external DNS zone. UTM v12.6 Zertifikate ACME SAN extern-en.png
    Alias ttt-point.spdns.org The alias must also be the spDYN name for the external DNS.
    DNS-Provider Basically, an additional CNAME record with the prefix _acme-challenge and the subsequent host name must be created at the DNS provider hosting the external zone (here: ttt-point.anyideas.org). _acme-challenge.ttt-point.spdns.org. (With "." at the end!)
    An example excerpt from a Zonefile for the configuration of the two hostnames mx.ttt-point.de and exchange.ttt-point.de looks like this:
    _acme-challenge.mx.ttt-point.anyideas.org. IN CNAME _acme-challenge.ttt-point.spdns.org.
    _acme-challenge.exchange.ttt-point.anyideas.org. IN CNAME _acme-challenge.ttt-point.spdns.org.

  • The hostname must be resolvable in the public DNS.
    Certificate creation for .local, .lan, etc. zones is not possible.
  • The UTM must be able to resolve the host name correctly via external nameservers.
    notempty
    If the internal and the external/public domain are identical, the zone must also be delegated to the internal DNS.
  • Check configuration Additional SANs can be added and checked as long as the Save button has not been pressed. Add ACME certificate UTMuser@firewall.name.fqdnAuthentifizierungCertificates UTM v12.6 Zertifikate ACME SAN überprüft.png
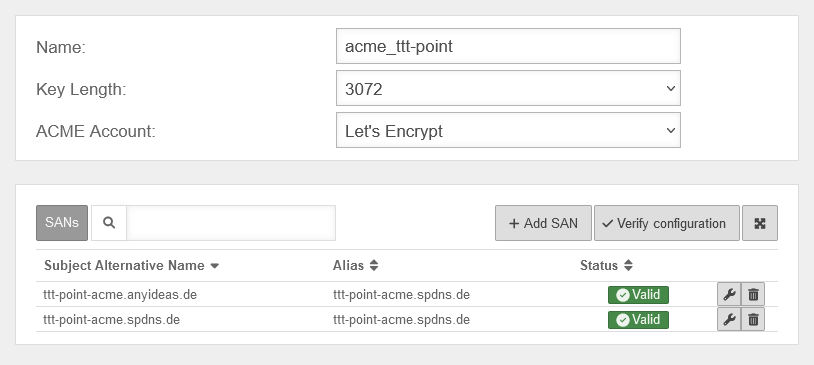
    Status Valid Once all the required SANs have been successfully checked, the certificate can be saved. Add ACME certificate UTMuser@firewall.name.fqdnAuthentifizierungCertificates UTM v12.6 Zertifikate ACME SAN gültig-en.png
    notempty
    Once the certificate has been saved, no more changes can be made. Only the alias and the token can be changed for existing SANs.
  • If additional or different SANs are required, a new certificate must be created and the existing one has to be revoked.
  • Creation of the ACME certificate

    Creation of the ACME certificate
    If the previous steps have been completed successfully, the actual process for validating and generating the certificate is triggered by clicking Save.


    This process may take some time. To update the status, the dialog must be reloaded manually.

    Certificates UTMuser@firewall.name.fqdnAuthentifizierungCertificates UTM v12.6 Zertifikate ACME SAN final-en.png

    Status values

    Status values
    The following status values can occur
    Status Description Note
    Valid The ACME certificate is valid
    Not yet verified The ACME certificate still needs to be verified
    Internal error An internal error has occurred Possible causes:
    • Broken hardware
    • Software error
    • Configuration error
    Connection error No connection possible / present Check the connection settings
    Invalid The ACME certificate is invalid and cannot be used
    DNS error A DNS error has occurred Possible causes:
    • wrong token
    • DNS resolution disrupted
    • zone forwarding configured in DNS
    • local DNS zone configured in DNS
    • If there is a zone in the nameserver of the UTM for a domain that also uses the ACME certificate, the DNS resolution fails. Solution: Create a CNAME record for this domain.
      • Search for the zone under Menu/Applications/Nameserver/Zones
      • click on Edit
      • Click on +Add Entry in the window
      • enter a suitable name under Name:'
      • select CNAME under Type:
      • enter the domain under Value:
        
    Banned The ACME certificate has been revoked Either it has been manually revoked, or it has lost its validity. For example, the ACME certificate expired and was not renewed.
    Initializing The verification of the ACME certificate is initiated This can take several minutes. The status is updated regularly.
    Deferred The verification of the ACME certificate is postponed Refreshing the status will take some time, since the limit of requests was already reached
    Initialized The ACME certificate is being verified The verification of the ACME certificate is initiated

    Import certificates / CAs

    Certificates and CAs can be imported with the Import CA or Import Certificate button.


    Import format

    Certificates and CAs to be imported into a UTM must be in the format .pem or .p12 (pkcs12).

    Certificates can be converted with the tool openssl - available for all common platforms (part of Linux, call via console) - and the following commands:

    Certificate Command
    X509 to PEM openssl x509 -in certificatename.cer -outform PEM -out certificatename.pem
    DER to PEM openssl x509 -inform der -in certificate.cer -out certificate.pem
    P7B to PEM openssl pkcs7 -print_certs -in certificate.p7b -out certificate.pem


    Error message during import

    During import, the error message "The certificate format is not supported..." may appear.
    Password protected certificates in pkcs12 format (.p12 , .pfx , .pkcs12) in conjunction with older ciphers can trigger this error.

    Import is usually possible if in the tab General notempty
    New as of v12.5.1
    the option Support legacy cryptographic algorithms On is enabled. notempty
    Requires a This will interrupt all connections (incl. VPN connections) to the UTM!

    Options for importing certificates:

    • Convert certificate to *.pem
      Certificates can be converted with the tool openssl - available for all common platforms (part of Linux, call via console) - and the following commands:
      openssl pkcs12 -in Zertifikat.pfx -out Zertifikat.pem -nodes
      Alternatively with the help of an online service

    • CLI commands to allow certificate import with obsolete ciphers in the UTM
      extc global set variable GLOB_ENABLE_SSL_LEGACY value 1
      appmgmt config application "securepoint_firewall"
      appmgmt config application "fwserver"
      system reboot

      notempty
      Requires a This will interrupt all connections (incl. VPN connections) to the UTM!
    cli> extc global get variable GLOB_ENABLE_SSL_LEGACY 
    variable              |value
    ----------------------+-----
    GLOB_ENABLE_SSL_LEGACY|0  
    
    cli> extc global set variable GLOB_ENABLE_SSL_LEGACY value 1
    OK
    
    cli> extc global get variable GLOB_ENABLE_SSL_LEGACY
    variable              |value
    ----------------------+-----
    GLOB_ENABLE_SSL_LEGACY|1
    
    cli> appmgmt config application "securepoint_firewall"
    cli> appmgmt config application "fwserver"


    Frequent status messages:

    Status Description Note
    KEY The public and private key are present It can be encrypted and decrypted:
    VALID The certificate is valid It can be encrypted and decrypted:
    INIT The certificate is being initialized (ACME certificates only)
    KEY The private key is not present It can only be encrypted, but not decrypted.
  • When importing e.g. a public CA, only the PublicKey is imported
  • UNABLE TO GET CERTIFICATE CRL No current CRL could be found.
  • A CRL is not relevant for operation in the web server or mail relay.
  • UNABLE TO GET LOCAL ISSUER CERTIFICATE The local issuer cannot be found.
    This occurs when the issuer certificate of an untrusted certificate cannot be found.
  • For imported CAs, there can be no local issuer
  • certificate has expired The certificate has expired. The notAfter date is before the current time.
    • For certificates used exclusively locally: Check whether the validity date can be adjusted.
    • If necessary, create a new certificate (have it created)
    • For ACME certificates: Check why the certificate could not be renewed (e.g.: hard disk in read-only mode).
    certificate is not yet valid The certificate is not yet valid: the notBefore date is after the current time.
    CRL is not yet valid CRL is not yet valid
    CRL has expired CRL has expired
    certificate revoked The certificate has been revoked. In production environments, revoked certificates should not be restored.
    In this case, creating a new certificate is usually the better solution.
    unsupported or invalid name syntax
    UNSUPPORTED_CONSTRAINT_SYNTAX
    Unsupported or invalid name constraint syntax The name constraint format is not considered: for example, an email address format of a form not mentioned in RFC3280. For example, a -.
    CRL lokal generiert The CRL was created on this device Either it is a certificate that was created locally, or no matching CRL has been imported (yet).
    CRL importiert The CRL was imported


    notempty
    Further status messages can be found in the Documentation of OpenSSL©.


    Export certificates / CAs

    notempty
    New as of: v12.5
    Button Description Certificates UTMuser@firewall.name.fqdnAuthentication UTM v12.6 Zertifikate CA Export-en.pngCA export
    PEM
    • Starts the export in PEM format with the extension .crt.
    • Base64 encoded format
    • Contains the public and the private key in one file
      Labeling of the two keys are with the labels:
      • -----BEGIN CERTIFICATE----- and -----END CERTIFICATE-----
        for the public key.
      • -----BEGIN PRIVATE KEY----- and -----END PRIVATE KEY-----
        for the private key.
  • If the CA is also required, it can be exported separately in PEM or PKCS12 format via the CA tab
  • The file contains the private key. This should be deleted from the file before passing on the data.
  • PKCS12
    • Starts the export in PKCS12 format with the extension .p12
      . Since the CA is also exported here, a password should be assigned for security reasons.
    • The file contains the private key. This should be deleted from the file before passing on the data.
    • When used on third-party devices, problems may occur if they do not use the same (latest) hashing and encryption methods as the UTM. A solution can be to convert the certificates e.g. with openssl in 2 steps:
      openssl pkcs12 -nodes < CC-Roadwarrior1.p12 > CC-Roadwarrior1-tmp.pem
      openssl pkcs12 -keypbe PBE-SHA1-3DES -certpbe PBE-SHA1-3DES -nomac -export -in CC-Roadwarrior1-tmp.pem -out CC-Roadwarrior1-neu.p12 -name "CC-Roadwarrior1"
    CRL Starts the export in CRL format (Certificate Revocation List)

    Revoke certificates / CAs

    Tab CA / Certificates
    Revokes a certificate or a CA.
    The security prompt must be confirmed with Yes.
    If multiple certificates are to be revoked, the display of the security prompt can be temporarily disabled.
    • If certificates are no longer to be used even though the validity period is still active, the certificates are not deleted but revoked.
    • Revoked certificates remain in the system, but are declared invalid and are no longer accepted
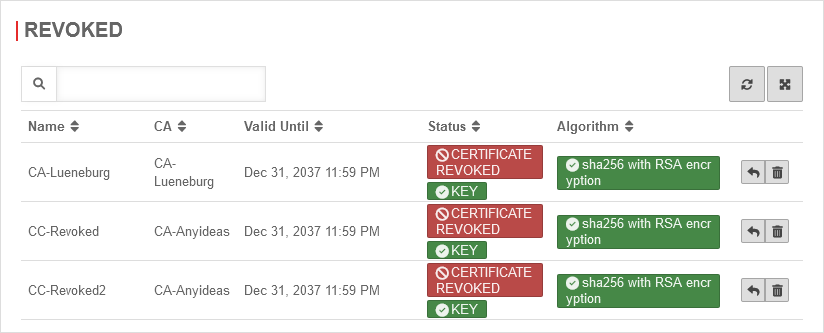
    • Revoked certificates are managed in the certificate management under the Revoke tab and can be restored there.
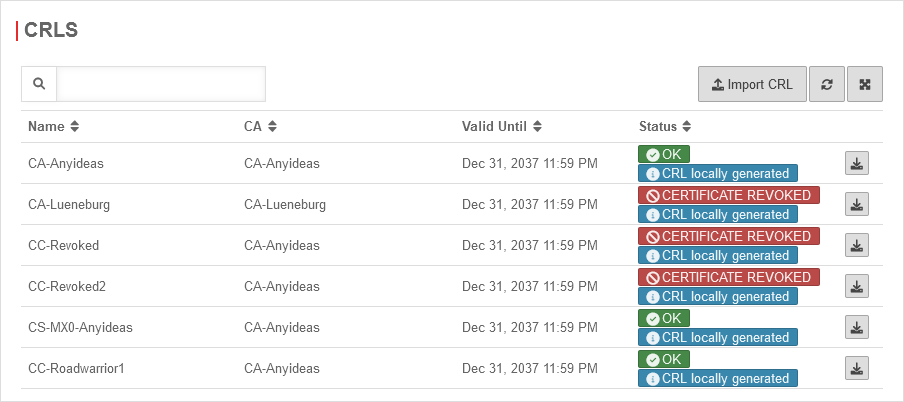
    • Revoked certificates are included in the certificate revocation list on the CRLs tab. (Certificate Revocation List).
    • The revocation list is created at the same time as the CA. If a certificate is revoked, it is deposited as invalid in the list corresponding to the signing CA.
    • The revocation list can also be exported to be loaded onto other systems Import CRL so that they also do not accept the revoked certificates.
    Certificates UTMuser@firewall.name.fqdnAuthentication UTM v12.6 Zertifikate CA wiederrufen-en.pngRevoke certificates / CAs
    Revoke
    Displays all revoked CAs and certificates with associated CAs UTM v12.6 Zertifikate wiederrufene Zertifikate-en.png
    Widerrufene Zertifikate
    Unblocks a CA or certificate and restores it.
  • This should only be done for local CAs or certificates whose CRL has not yet been exported!
  • Deletes the certificate
  • This should only be done for local CAs or certificates that have not been used in production environments!
  • CRLs
    Displays all CAs and certificates with their status and the type of CRL UTM v12.6 Zertifikate CRLs-en.png
    CRLs
    Exports the CRL of a CA or certificate
    Import CRL Imports a CRL
    ACME
    On Enables ACME services (Automatic Certificate Management Environment)
    See ACME Certificates