Jump to:navigation, search
Wiki


De.png
En.png
Fr.png


Netmap setup for an SSL-VPN Roadwarrior
Last adaptation to the version: 12.6.0
New:
  • Layout adjustment
  • Screenshots updated
notempty
This article refers to a Resellerpreview

11.7 11.6.12


Introduction

In this wiki, we want to deal with the case where a road warrior establishes a VPN connection to different destinations at the same time, but they all use the same subnet. Furthermore, the VPN client also receives an address from the same roadwarrior pool from the VPN servers. In this case, the client would of course have the problem that it cannot distinguish between the destinations.

The NAT type NETMAP can help here.


Netmap-SSL-RW-en.png

In our example, we assume the following specifications:

Roadwarrior Pool: 192.168.0.0/24
Internal network of the locations: 192.168.175.0/24
Netmap network of the first location: 192.168.1.0/24
Netmap network of the second location: 192.168.2.0/24

We also assume that the SSL-VPN Roadwarrior connection is already set up and working.


Configuration of the SSL-VPN roadwarrior server with Netmap

Preparations

Firewall Network Objects  Button Edit Network Object UTMuser@firewall.name.fqdnFirewallNetwork Objects UTM v12.6 SSL-VPN VPN-Roadwarrior-Netmap Netzwerkobjekt bearbeiten-en.png Change network object to address
The following conditions must be observed when using the NETMAP function:
  • The subnets of the objects involved in the NETMAP must all have the same size, for example all /24.
  • All objects involved must have a defined network IP address entered. This means that no interfaces may be selected.

The network object of the internal network must not be set to the interface. If necessary, this can be changed to Address by entering the address in the drop-down button. In this example, we have the network 192.168.175.0/24 on both sides.

Setting in the SSL-VPN server

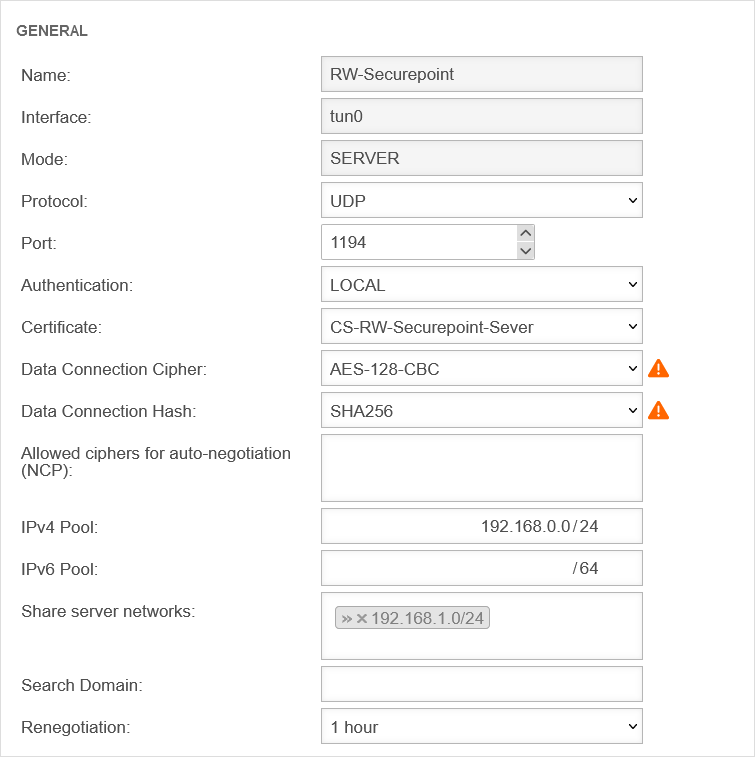
VPN SSL-VPN  Button Edit SSL-VPN connection UTMuser@firewall.name.fqdnVPNSSL-VPN UTM v12.6 SSL-VPN VPN-Roadwarrior-Netmap Verbindung bearbeiten-en.png Netmap address on the Roadwarrior server
Only the Netmap network is entered under Share server networks and not the original subnet of the internal network.

If other subnets are to be transmitted to the client, it must first be checked that these are not also available on other targets.

Create network objects

In addition to the existing network object for the Roadwarrior, another one is required for the Netmap network with the following properties in order to create a corresponding packet filter rule:


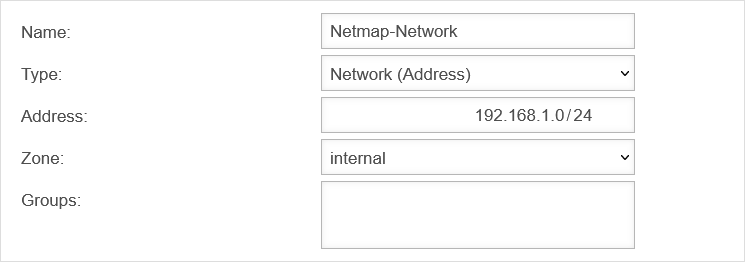
Designation Value Description Add network object UTMuser@firewall.name.fqdnFirewallNetwork Objects UTM v12.6 SSL-VPN VPN-Roadwarrior-Netmap Netzwerkobjekt hinzufuegen-en.png Network object for Netmap network
Name: Netmap-Network Is freely selectable.
Type: Network (address)
Address: 192.168.1.0/24 The subnet to be used for Netmap.
Zone: internal The network zone in which the network with whose hosts the client is to establish a connection via VPN is located.

Packet filter rules

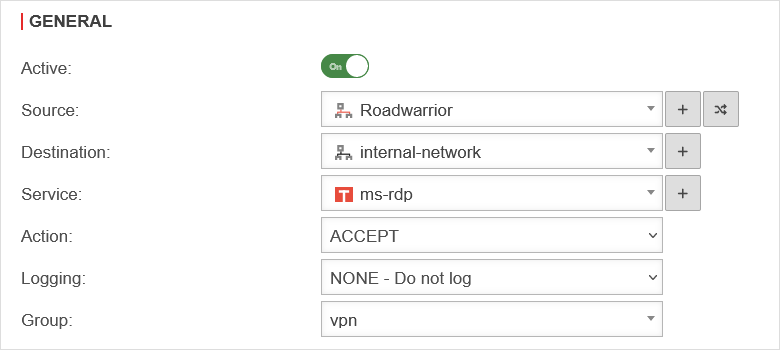
The first packet filter rule will already be in place, because the SSL-VPN connection has already been created and works if the client does not establish another connection to another destination with the same subnet at the same time.

This packet filter rule is about the basic control of data transmission from the Roadwarrior to the internal network with certain services. Nothing changes here either.

Edit rule UTMuser@firewall.name.fqdnFirewallPacket filter UTM v12.6 SSL-VPN VPN-Roadwarrior-Netmap Regel bearbeiten-en.png Packet filter rule for Roadwarrior
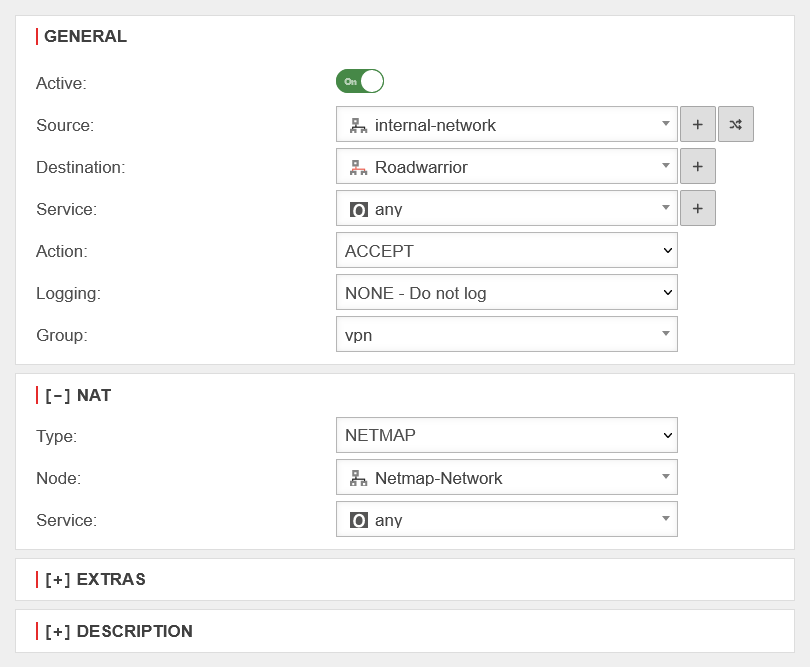
The second packet filter rule is new and relates to the Netmap. It has the following properties:
Designation Value Description Add rule UTMuser@firewall.name.fqdnFirewallPacket filter UTM v12.6 SSL-VPN VPN-Roadwarrior-Netmap Regel erstellen-en.png Packet filter rule for Netmap
General
Source: Network.svginternal-network Network to which the Roadwarrior should have access.
Destination: Vpn-network.svgRoadwarrior Network of the Roadwarrior.
Service: Other.svgany The any rule should only be used with Netmap, as it has no restrictions.
Action: ACCEPT
[ - ] NAT
Type: NETMAP
Network object: Network.svgNetmap network
Service: Other.svgany The any rule should only be used with Netmap, as it has no restrictions.

The packet filter overview should now contain the following lines:

# Source Destination Service NAT Action Active
Dragndrop.png 5 Vpn-network.svg Roadwarrior Network.svg internal-network Tcp.svg ms-rdp Accept On
Dragndrop.png 6 Network.svg internal-network Vpn-network.svg Roadwarrior Other.svg any NM Accept On

Notes

The VPN client must re-establish the connection so that it also receives the correct subnet.

Access from the client to a host in the internal network then takes place via the IP address 192.168.2.x, as the subnet mask /24 has been defined here. The last octet is therefore the original host IP.
So if we want to address the host with the original IP address 192.168.0.1 in this example, the client must use the IP address 192.168.2.1 to reach it.

The client can only access the hosts in the internal network with IP addresses. A DNS query would result in the original IP of the host being transferred and the client would no longer be able to access it.