notempty
Last adaptation to the version: 3.0.4
- New:
- New backup type: mirror
- New menu structure
Previous versions: 2.5.10
Introduction
The UMA is an audit-proof archiving system. All archived information should be kept unchanged and be easily and permanently available to users.
When considering a holistic backup strategy, this information must be considered so that it can be made available again in the event of a failure of the UMA and the subsequent reinstallation.
The backup strategy is extended by one of the following backup options of the UMA.
The menu of the UMA backup function is located under Maintenance / Backup.
Backup of the UMA configuration
Section Configuration Import/Export
Since the archive store of the UMA is encrypted and the backup files are also encrypted during creation, it is necessary to backup this key.
The container encryption information is located in the UMA configuration. Therefore it must be backed up first.
The button creates a file which can then be . A click on this button saves the UMA configuration as a file named "uma-config.db" in the folder designated for your downloads.
A backup copy should absolutely be kept in a further safe place.
Only in this way it is guaranteed that this is also available in case of emergency.
Additionally, the Encryption Key, which can also be found on the Backup tab, can also be backed up.
With it, a restore is also possible without configuration data.
Backup devices
The archive system can either be backed up on a network storage or on an external storage medium. External storage media are connected to the appliance via an USB port. Both external hard drives and flash storage media (USB sticks, etc.) are supported.
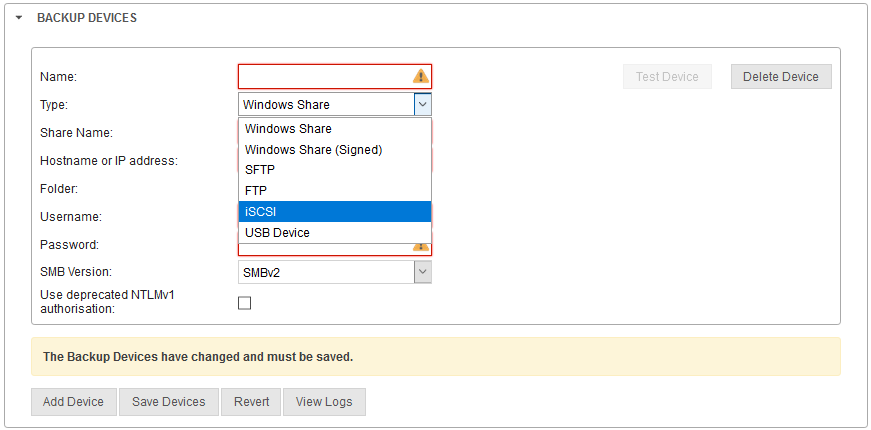
First, in the section Backup Devices the device or devices to which the backups are to be saved are defined. The following types are distinguished:
- iSCSI (Recommended)
- Windows Share
- Windows Share (signed)
- SFTP
- FTP
- USB device
iSCSI (Recommended)
Establishment
First, an iSCSI target must be set up on a NAS or server. Please follow the instructions for the corresponding storage devices or servers.
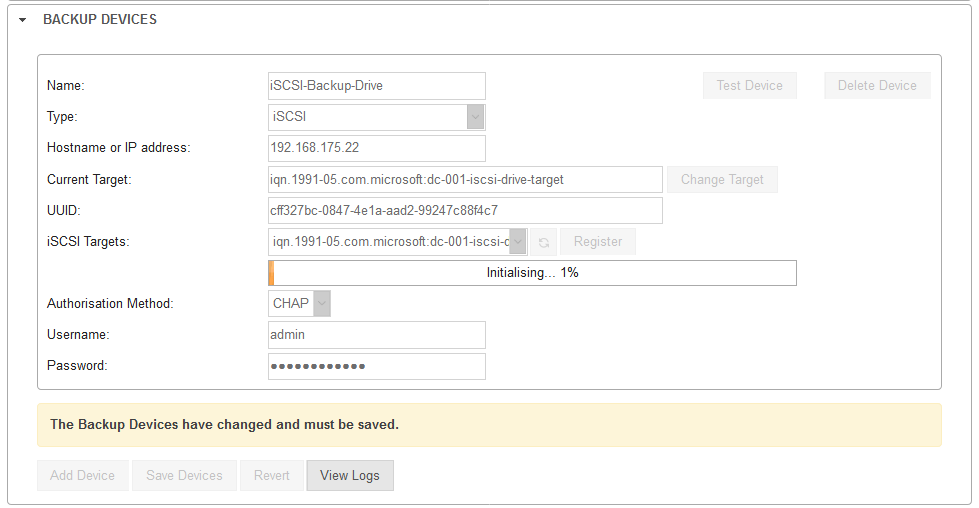
The following settings must be made in the UMA:
- Choose a meaningful name
- select backup type iSCSI
- Enter the IP address of the drive or server on which the iSCSI Target was created
- Via the button the connection is established and the information about the target is requested
- Complete the process by pressing the button
- All previous data on this drive will be overwritten
- After completing the registration, the created backup device must be saved using the button
- Finally a test must be performed using the button, which should of course be confirmed with a success message from the UMA
The port used for this is 3260
iSCSI (internet Small Computer System Interface) is a very efficient network data transfer method.
The storage devices on which the data are then to be stored are called "targets". Many server systems or NAS (Network Attached Storage) can be set up as iSCSI targets.
| Caption | Value | Description |
|---|---|---|
| Name | iSCSI-Backup-Drive | Meaningful name with which a backup job can access this device |
| Type | iSCSI | Device type |
| Host name or IP address: | 192.168.192.192 | Host name or IP address of the drive or server where the iSCSI Target was created |
| Current Target | Value is determined and entered automatically | |
| UUID: | Value is determined and entered automatically | |
| Searches for iSCSI targets under the specified host name or IP address | ||
| iSCSI Targets: | Please select an iSCSI target | Since it is possible to set up multiple iSCSI targets on a target drive, the desired target must be selected here. |
| Establishes the connection and enters the UUID | ||
| Authorisation Method: | CHAP | If an authentication method was configured, the access data for the target can be stored here. |
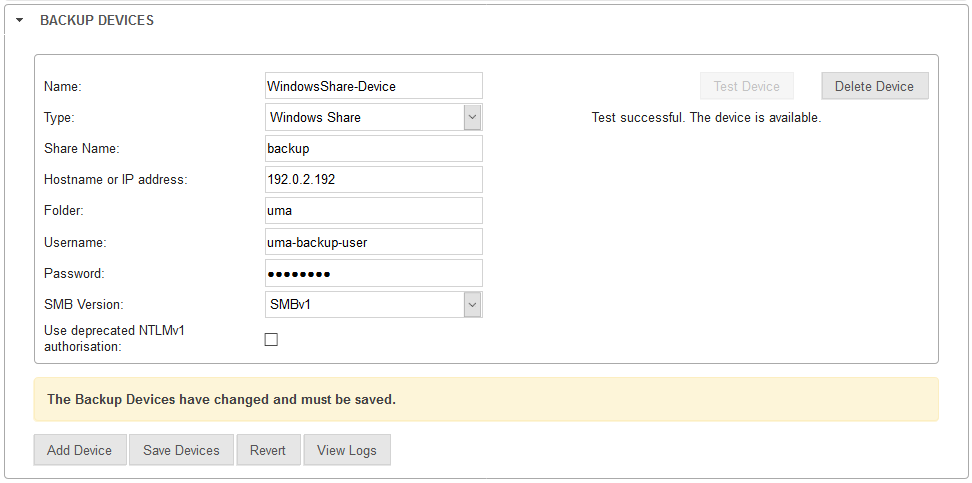
A Windows share is a shared drive or folder accessible over a network using the SMB (Server Message Block) protocol, usually on a Windows server or on a NAS.
It is important that the correct share name is entered.
| Caption | Value | Description |
|---|---|---|
| Name | WindowsShare-Device | Meaningful name with which a backup job can access this device |
| Type | Windows Share | Device type |
| Share Name | backup | The name of the shared folder |
| Host name or IP address: | 192.168.192.192 | Host name or the IP address of the device on which the share was set up |
| Folder | uma | If you want to save in a subdirectory of the share, enter the name of the corresponding folder here
|
| or |
If you save directly to the release, the field can remain empty or contain a slash /. | |
| Username | uma-backup-user | Credentials on the target server for the backup |
| Password | ••••• | |
| SMB Version | SMBv1 SMBv2 SMBv3 |
Used SMB version. |
| Use deprecated NTLMv1 authorisation: | Enables the NTLMv1 authorization
|
Uses SMB signatures for the connection.
The same settings apply as for Windows Share
exception:
- No SMB version is specified
- NTLMv2 is always used for authorization
FTP
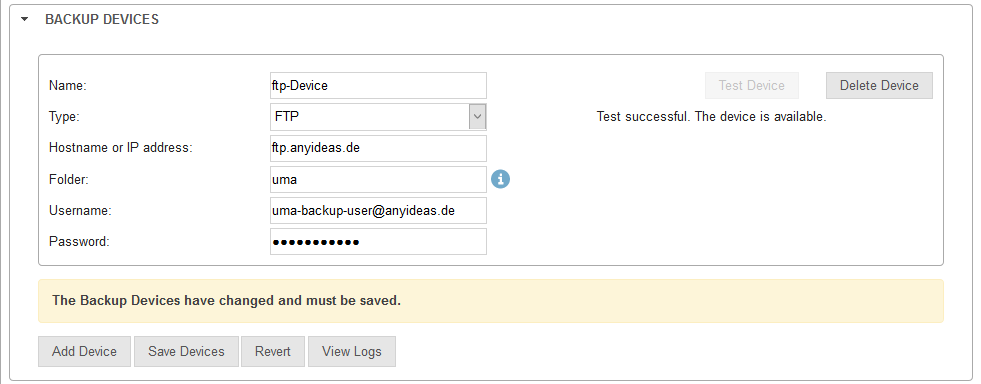
If an FTP server (File Transfer Protocol) is available, it can also be used for backing up the UMA archive.
When using FTP, the data will not be transferred encrypted.
Please note for which folders FTP has been shared with the user on the server.
.
| Caption | Value | Description |
|---|---|---|
| Name | FTP-Device | Meaningful name with which a backup job can access this device |
| Type | FTP | Device type |
| Host name or IP address: | ftp.anyideas.de | Host name or IP address of the ftp server |
| Folder | /Backup/UMA/ | When sharing the entire host and a folder structure Hostname/Backup/UMA |
| or |
If only the UMA folder is shared in a Hostname/Backup/UMA folder structure, the field may remain empty or contain a / slash. | |
| Username | uma-backup-user | Credentials on the target server for the backup |
| Password | ••••• |
The port used for this is 21
SFTP
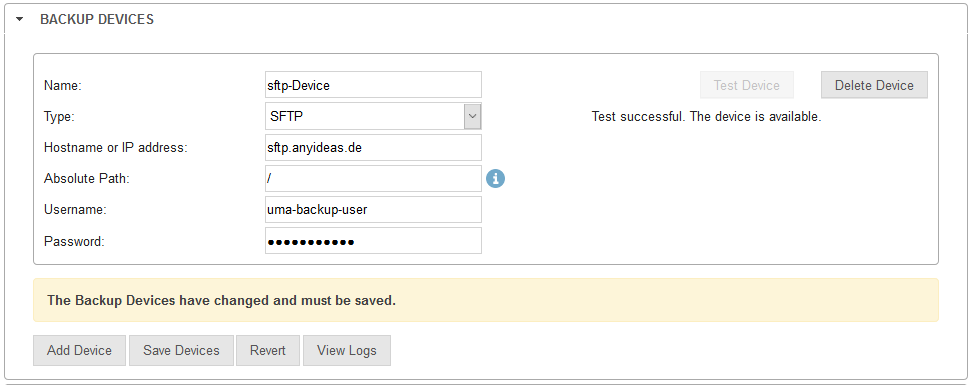
The complete path must be entered here in any case.
| Caption | Value | Description |
|---|---|---|
| Name | SFTP-Device | Meaningful name with which a backup job can access this device |
| Type | SFTP | Device type |
| Host name or IP address: | sftp.anyideas.de | Host name or IP address of the sftp-server |
| Absolute Path: | /Backup/UMA/ | When sharing the entire host and a folder structure Hostname/Backup/UMA |
| / | When sharing only the UMA folder in a Hostname/Backup/UMA folder structure, the field must contain a / slash. The field Absolute path must not be left empty. | |
| Username | uma-backup-user | Credentials on the target server for the backup |
| Password | ••••• |
The port used for this is 22
USB
A USB drive is always practical when a backup is to be created "just quickly". Both hard disks and flash memory such as USB sticks are supported here.
Always disconnect USB devices from the UMA before rebooting. An inserted USB device could be recognized by the BIOS as a boot drive and then block the restart of the UMA.
The following settings must be made in the UMA:
- Choose a meaningful name
- select backup type USB Device
- Via the button the connection is established and the information about the target is requested
- Complete the process by pressing the button
- After completing the registration, the created backup device must be saved using the button
- Finally a test should be performed using the button, which should of course be confirmed with a success message from the UMA
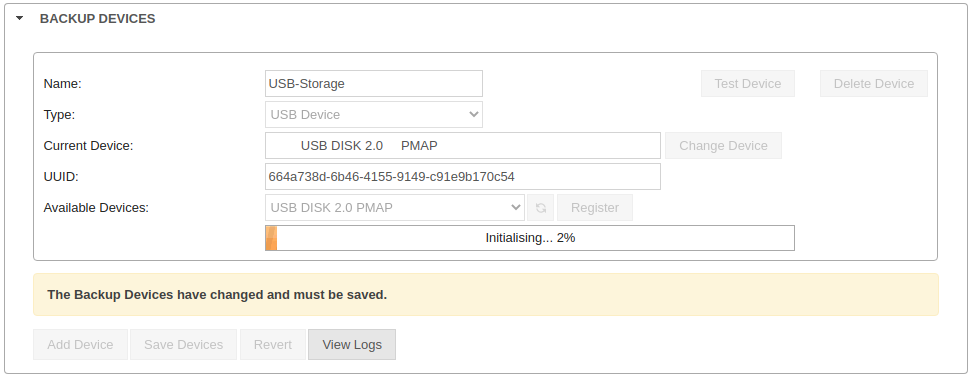
| Caption | Value | Description |
|---|---|---|
| Name | USB Backup Device | Meaningful name with which a backup job can access this device |
| Type | USB device | Device type |
| Current device | Value is determined and entered automatically | |
| UUID: | Value is determined and entered automatically | |
| Triggers a search of the connected USB devices | ||
| Available devices: | Please select an USB device | If several USB devices are connected, the desired device can be selected |
| Establishes the connection and enters the UUID | ||
Test device
After saving the created backup device, the connection to this device must be tested. To do so, press the button, which will trigger a success message after a short time.
Backup Jobs
A backup job controls when, on which device and with which backup format a backup should be created. Furthermore, it is defined here how many backups are to be kept for the restore process.
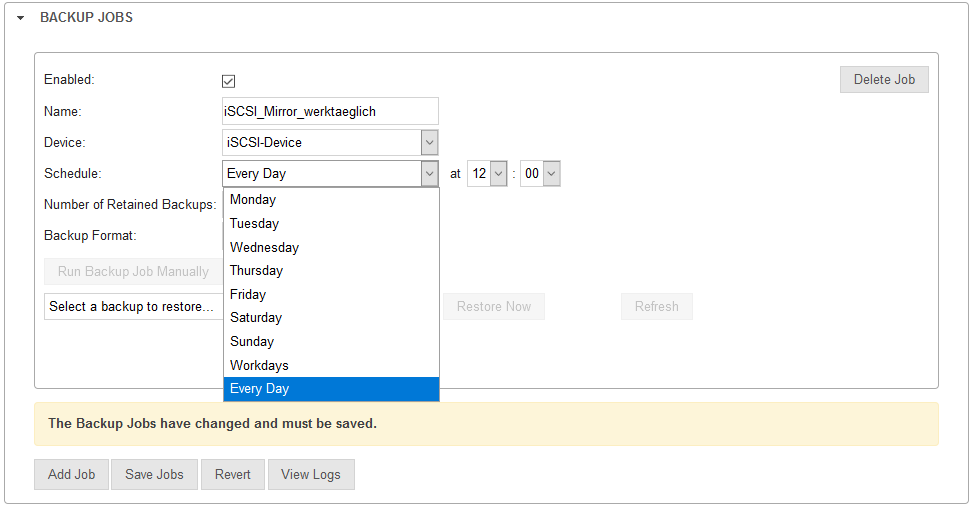
First, the job is given a name and a device is selected on which the backups are to be stored.
Schedule
For scheduling, it is important to consider some of the features of the UMA.
If a backup is performed, a snapshot of the archive is created first.
Before creating this snapshot, some services on the UMA will be stopped.
These include, among others:
- Dovecot:
This checks the user name and email address, the filter rules and initiates the indexing of incoming emails- LTA-Push:
This service takes care of the transport from the LTA folders to the XML long-term archive- LTA service:
Converts the emails into XML format, creates a "hash tree" and retrieves the qualified timestamp.
This is fetched daily from 22:00 on.
Furthermore, the backup can be performed every working day (Monday - Friday) or every day.
After the backup is completed, a confirmation email will be sent to the address specified under System Settings / System Users / System Administrator.
Number of Retained Backups
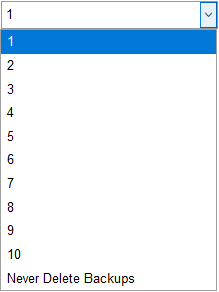
Besides the creation of a single backup, it is also possible to keep several of different days. You can choose between the last one (1) and the ten last ones (10).
It is also possible to keep all backups, but this is only useful when using the Time Machine backup format.
For the format Mirror there is always only one backup.
Backup Format
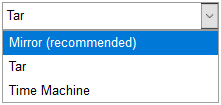
To be selected here:
| Caption | Description |
|---|---|
Mirror (recommended)Mirror (recommended)
|
Erstellt mittels rsync ein inkrementelles Backup. Dieses Verfahren ist besonders stabil und tolerant bei Verbindungsabbrüchen. Requires an encrypted drive and can therefore only be used with the backup devices iSCSI and USB |
Tar Tar
|
With this archive format a complete backup file is always created |
Time Machine Time Machine
|
An incremental format that saves only the changes after an initial full backup. You can select any point in time when restoring. Requires an encrypted drive and can therefore only be used with the backup devices iSCSI and USB |
Create Backup
With the button of the same name the can be started at any time
Checking the backup
If the first backup was created, it must be ensured that it can be restored. This can be done with the button .
A specific backup can be selected depending on the number of backups held: Choose a backup to restore
Desaster Recovery
To ensure that the backup can also be restored on newly installed hardware, a disaster recovery test is always included in a full backup.
For example, a UMA can be installed on a virtual machine. The previously backed up UMA configuration file is then imported on this virtual machine. Using the installation wizard or under System Settings / Archive Storage the mounted archive hard disk is initialized and then the backup is restored via .
Once the backup is successful, it can be assumed that it works.
Restore Backup
Restoring a backup is only possible with the configuration that was active during the backup run, since the backup depends on the configuration ID.
Since the backup jobs have different formats and/or different locations, the function is inserted with the individual jobs.
A backup must be selected beforehand: Select a backup to restore
The will update the list of backups and a click on will start the restore.
Final information
Contained are in an archive backup
- all emails
- Email attachments
- Documents
- and backup information (e.g. the encryption key)
Not included are
- Index databases
These must be recreated again.
This usually happens when the user wants to access his documents via the UMA user interface for the first time after restoring a backup.
The first login will then take a little longer than usual, because the index database for this user has to be created again first.

