- Neue notwendige API Berechtigungen für Azure AD für den SEWS Import
- Änderung der Konfiguration der Exchange-Online Einstellungen
Introduction
The Exchange Web Services interface of Microsoft Exchange is used for this purpose.
Conditions for use
- UMA version 2.5.10 or higher
- Exchange Server 2010 or higher
- Microsoft Windows 7 or higher
- .NET Framework 4.0 or higher
- Configured email accounts in UMA that can be imported into.
- Access enabled via https (port 443)
Preparation of the UMA
In the UMA, the use of the SEWS tool must be enabled Import / SEWS / section SEWS Import.
Preparation of Exchange and Active Directory
In order to use the SEWS tool, a user in the Active Directory is required who has the right to access the mailboxes of other users. In the Exchange Server, the mailbox permission for the import must also be set.
The settings items may be located in a different place, depending on the Exchange Server version.
Set mailbox permission in Exchange:
Exchange Server 2010
The simplest setting is done with the Exchange Management Shell.
The command to grant the user superuser in the domain securepointdemo.local permission for full access to the mailbox User1 is:
Add-MailboxPermission User1 -User 'Securepointdemo\superuser' -AccessRights 'FullAccess'
In the Exchange Management Console this can be set under Recipient Configuration / Mailbox in the context menu of the respective mailbox recipient with the entry: Manage "Full Access" Permission....
Exchange Server 2013
As of Exchange Server 2013, this can also be set in the user management.
Exchange Server 2016
Add-MailboxPermission User1 -User 'Securepointdemo\superuser' -AccessRights 'FullAccess' -InheritanceType All
Exchange Online / Azure
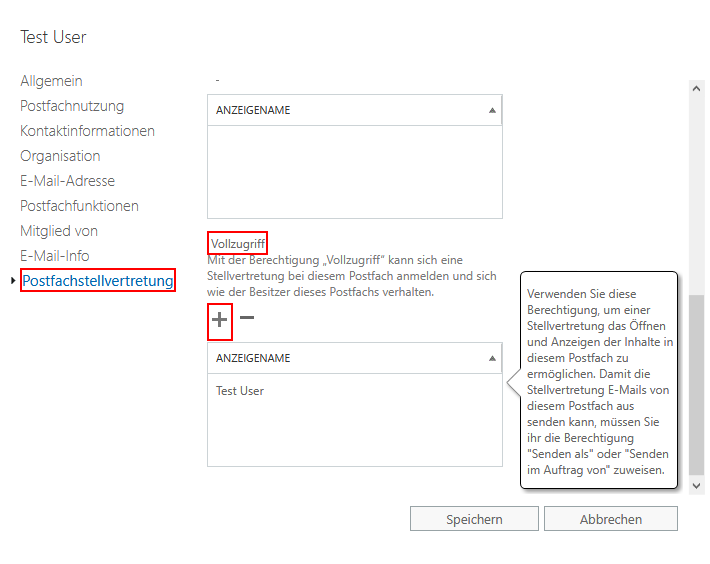
Grant user permission in Exchange online
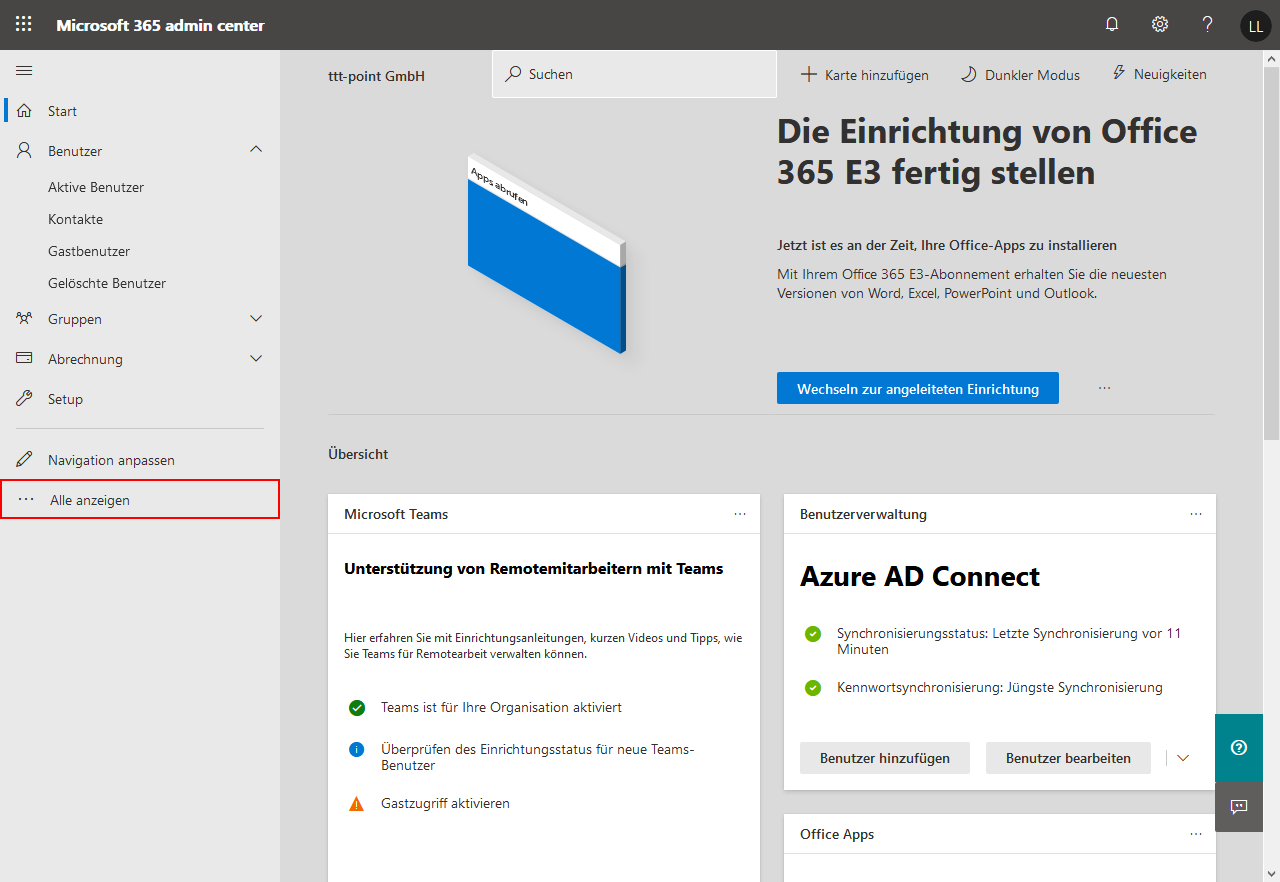
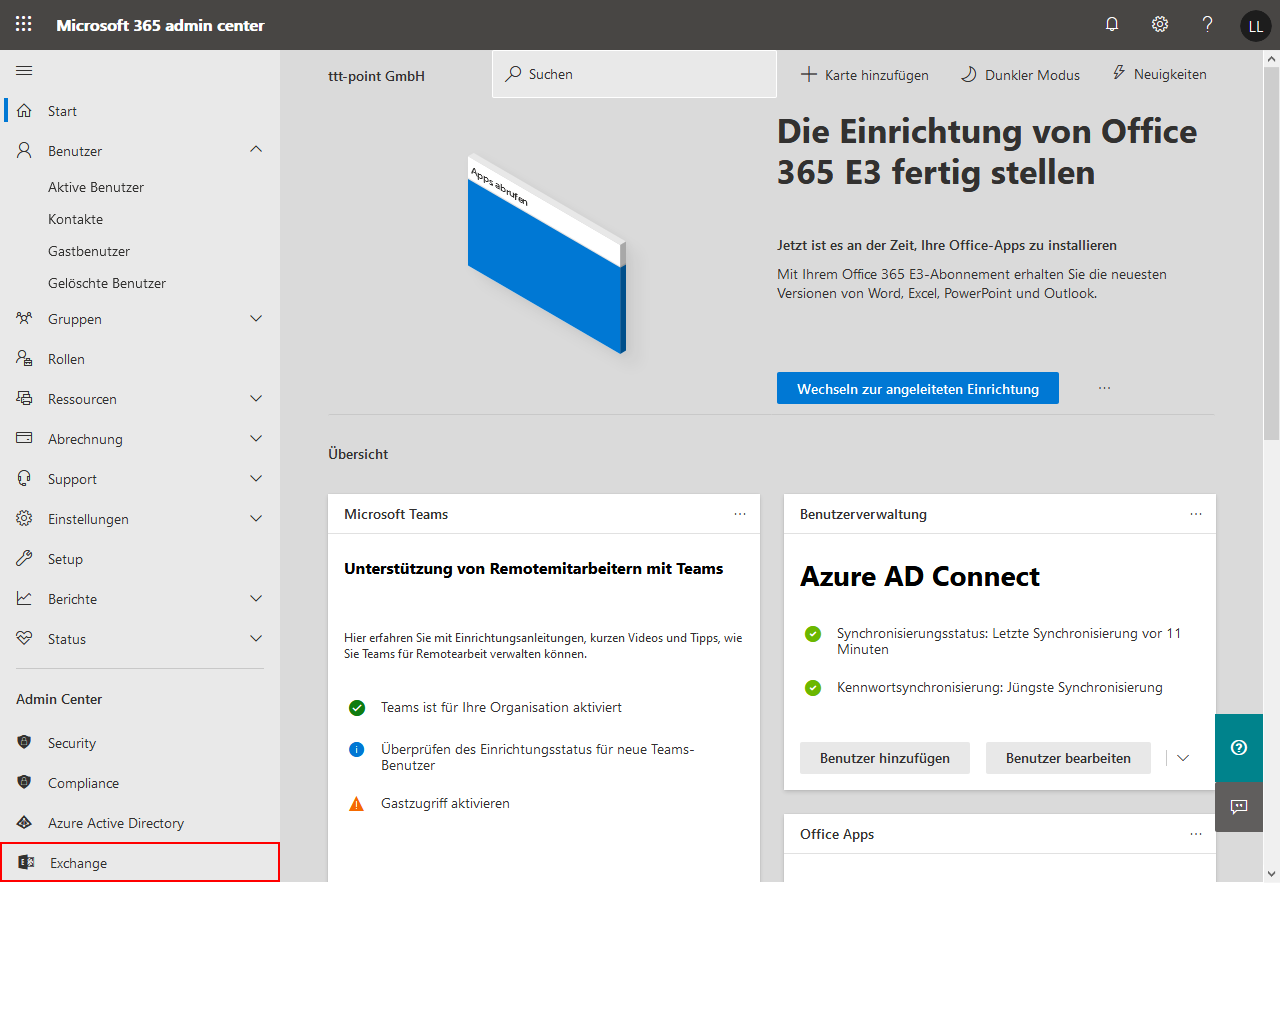
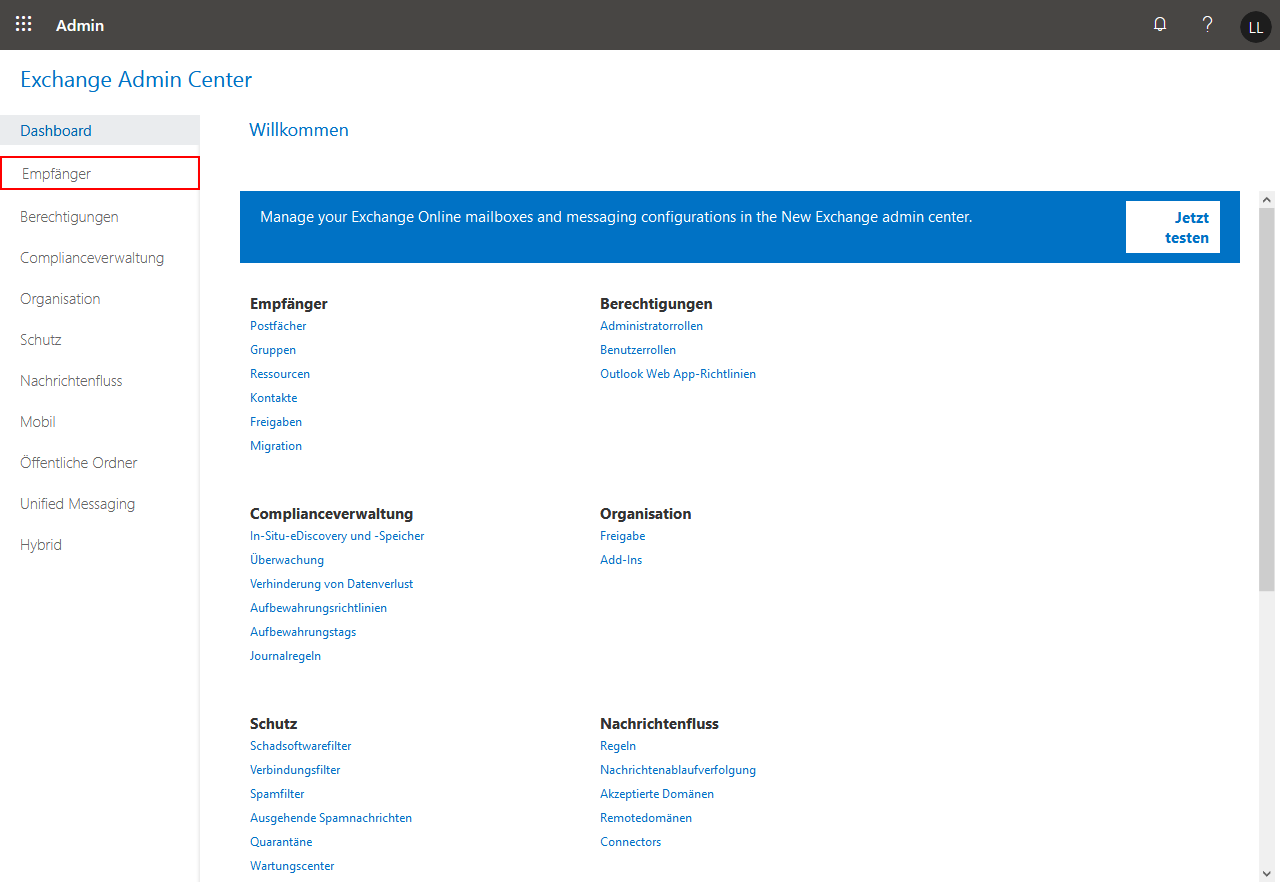
- Open the Exchange Admin Center
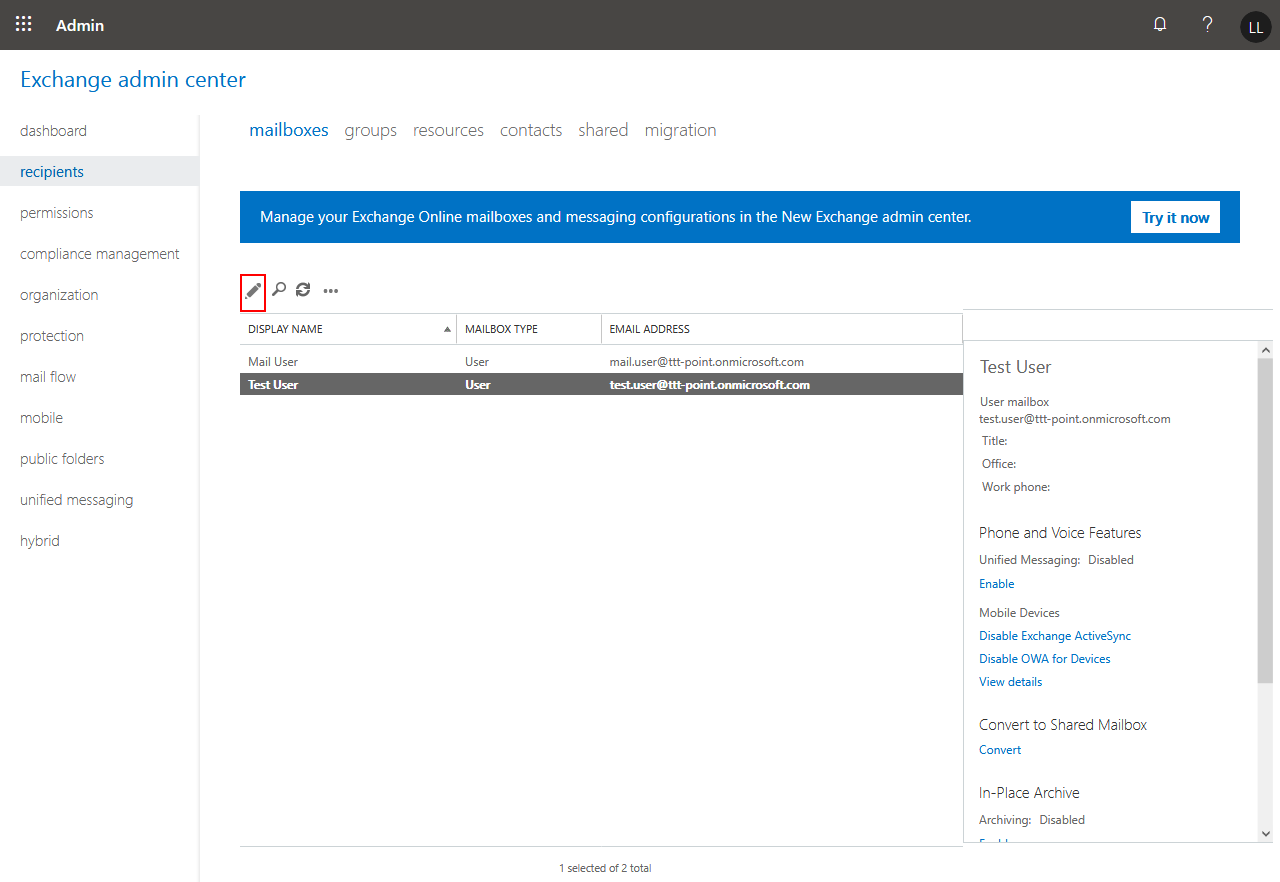
- Select and edit user ()
- Mailbox delegation section
- Full Access
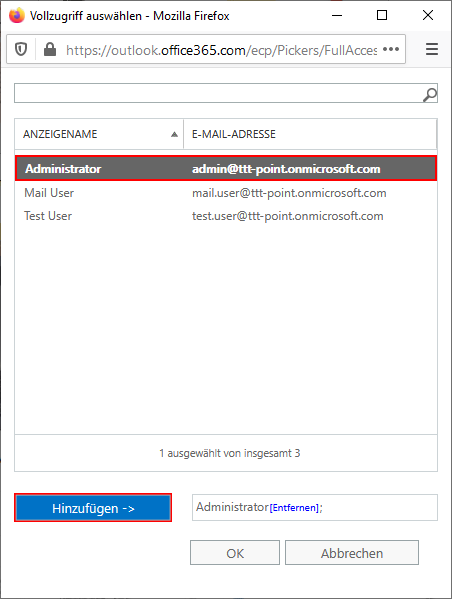
- Add entry
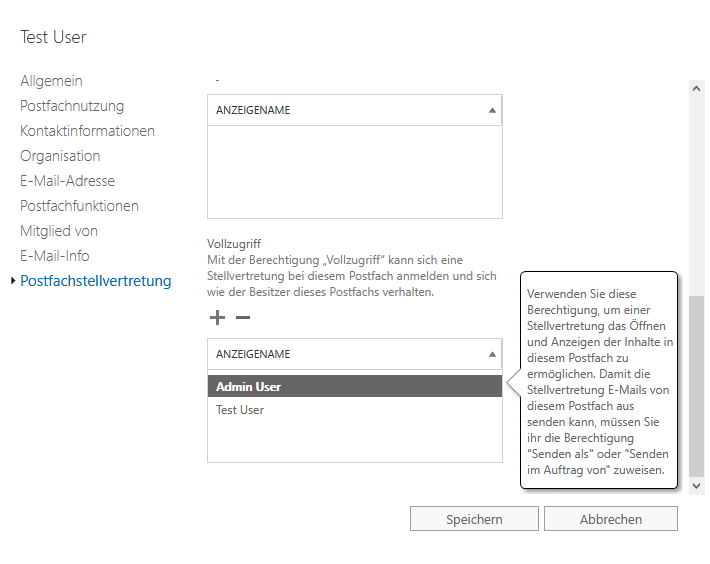
- Select user with administrator privileges to be used for the import
- Save with button

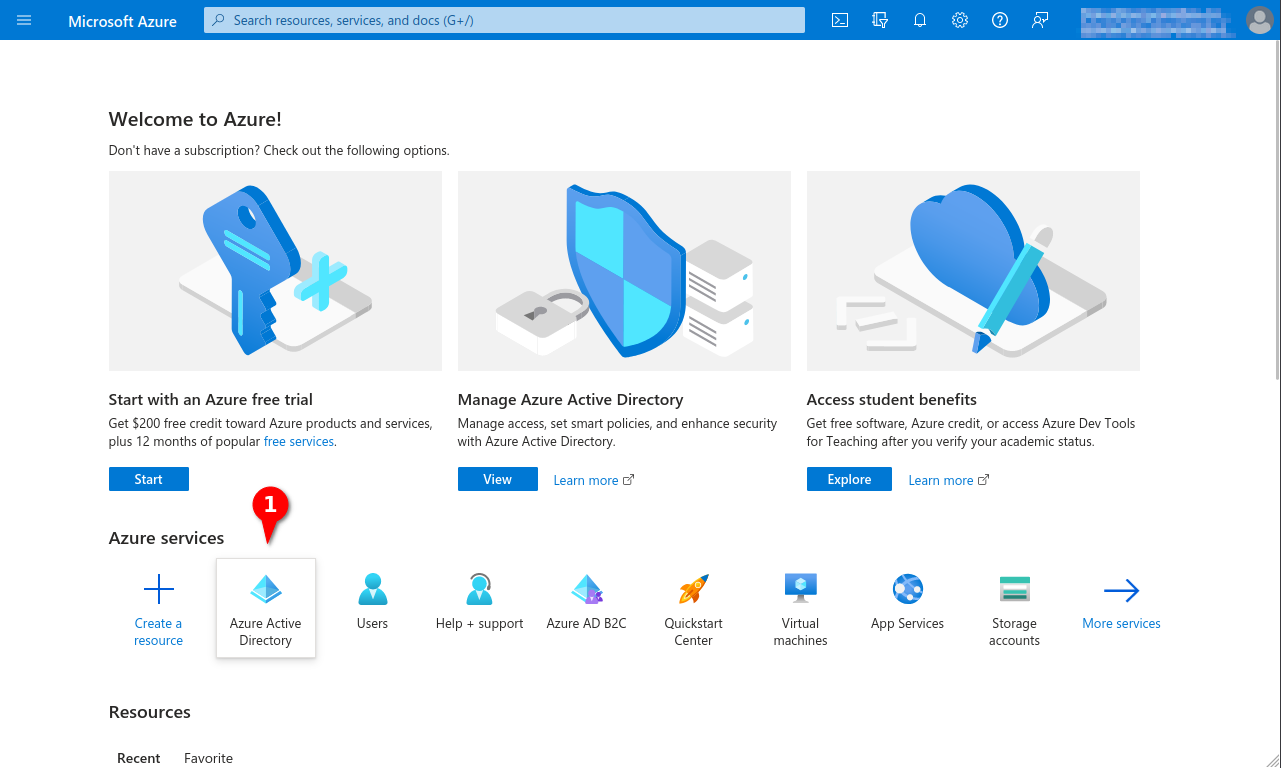
App registration in Azure AD
In order for the SEWS tool to be allowed access to Exchange online, an app permission must be created in Azure AD as well.
However, the first preparatory steps can also be performed by a normal administrator.
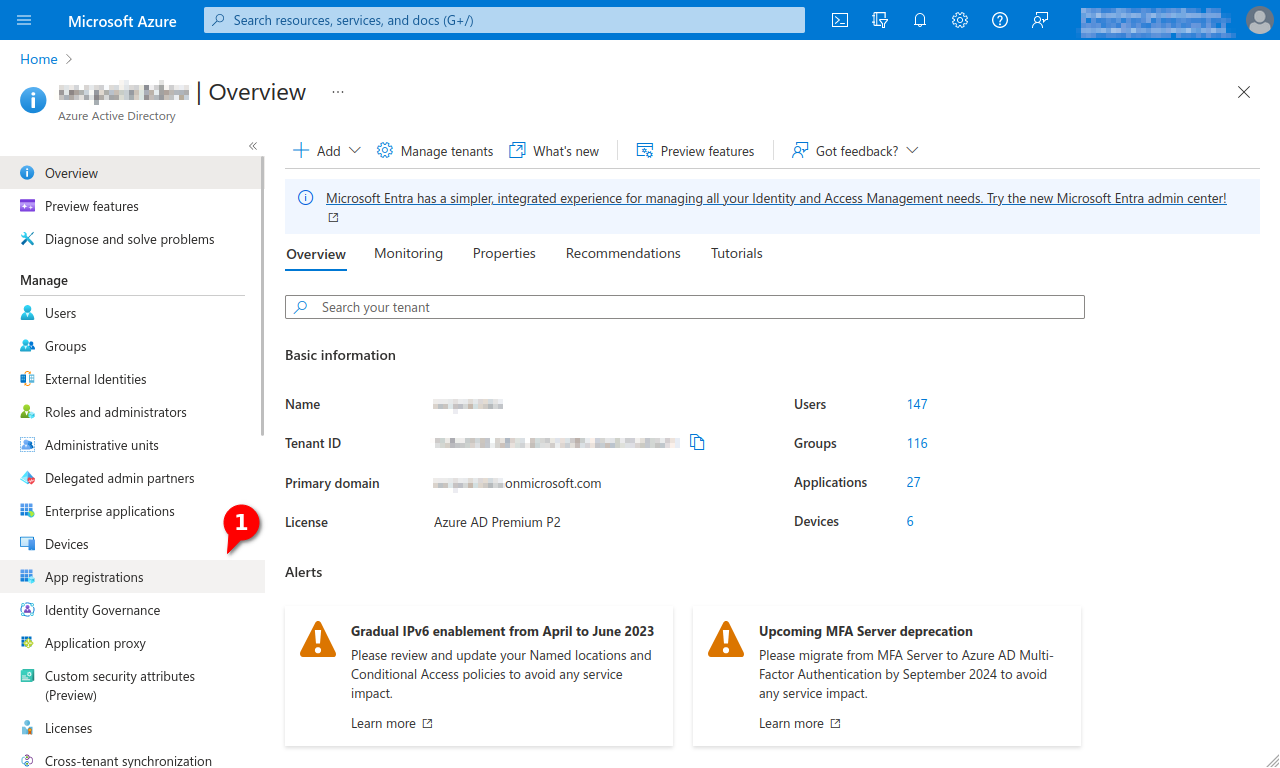
- Open Microsoft Azure Active Directory
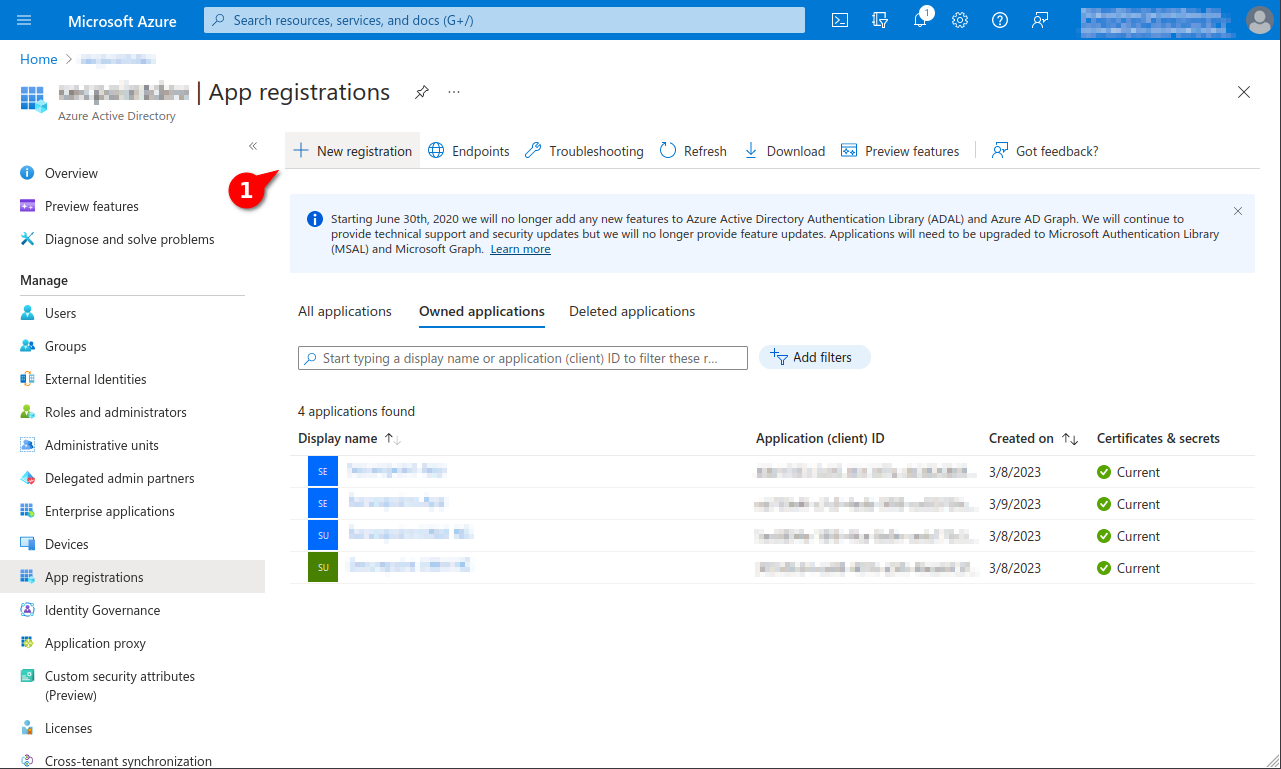
- App registrations
- Create new app registry with account types
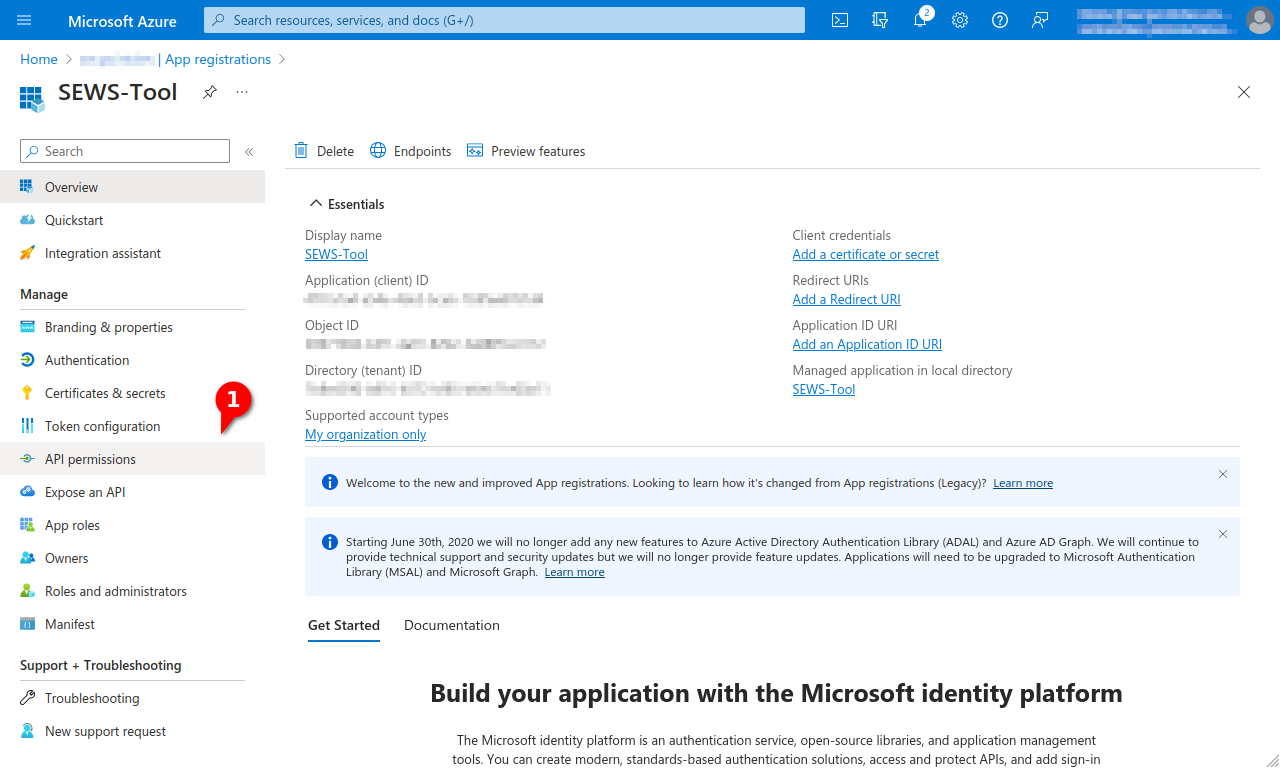
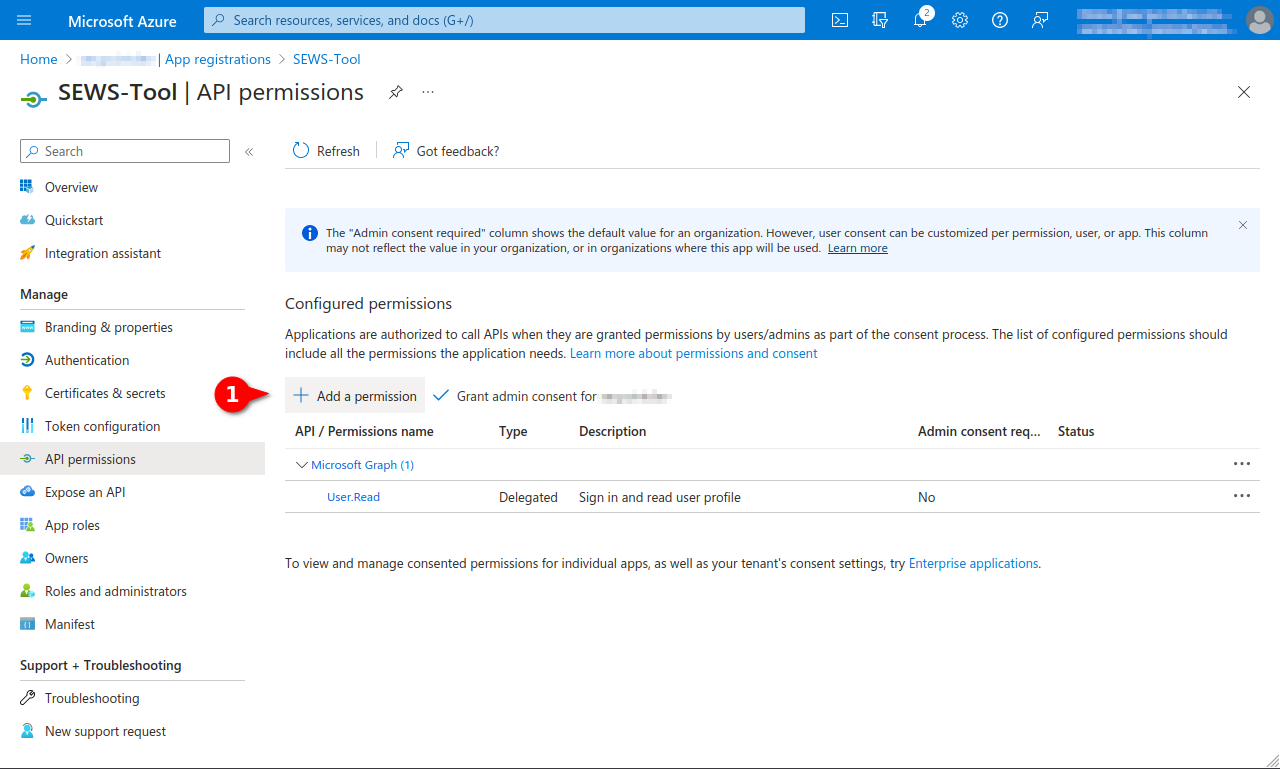
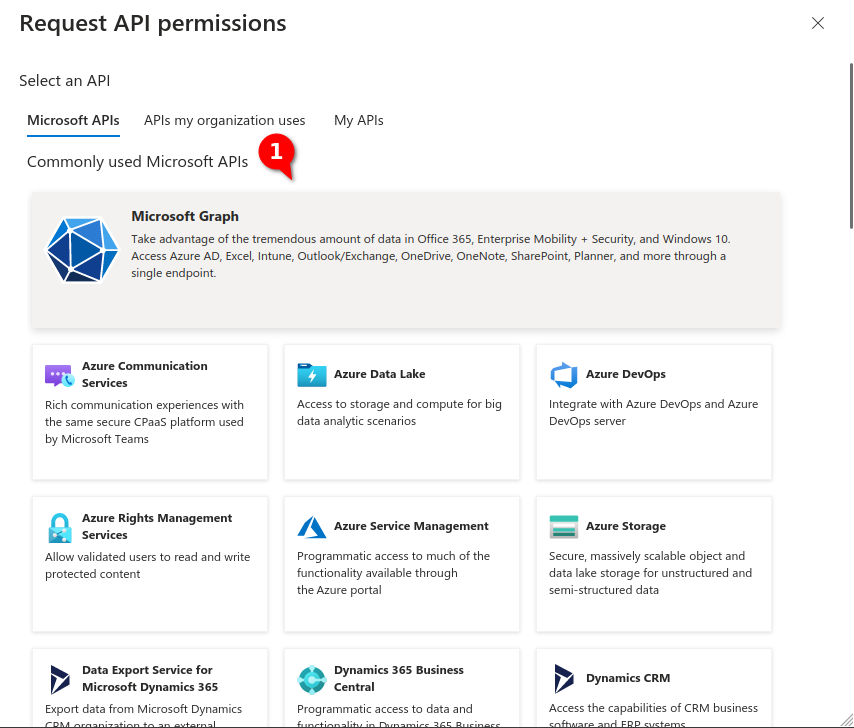
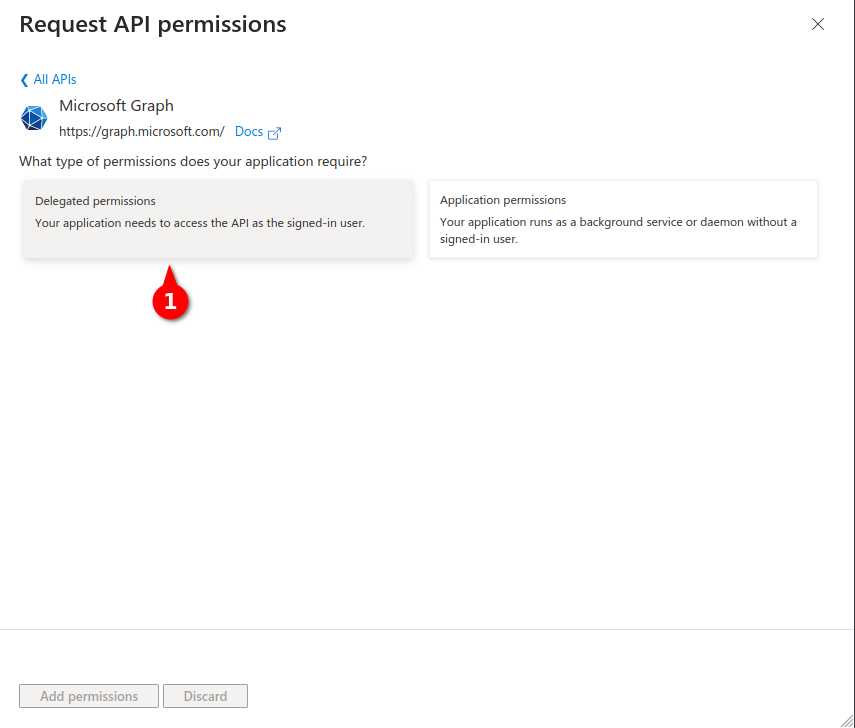
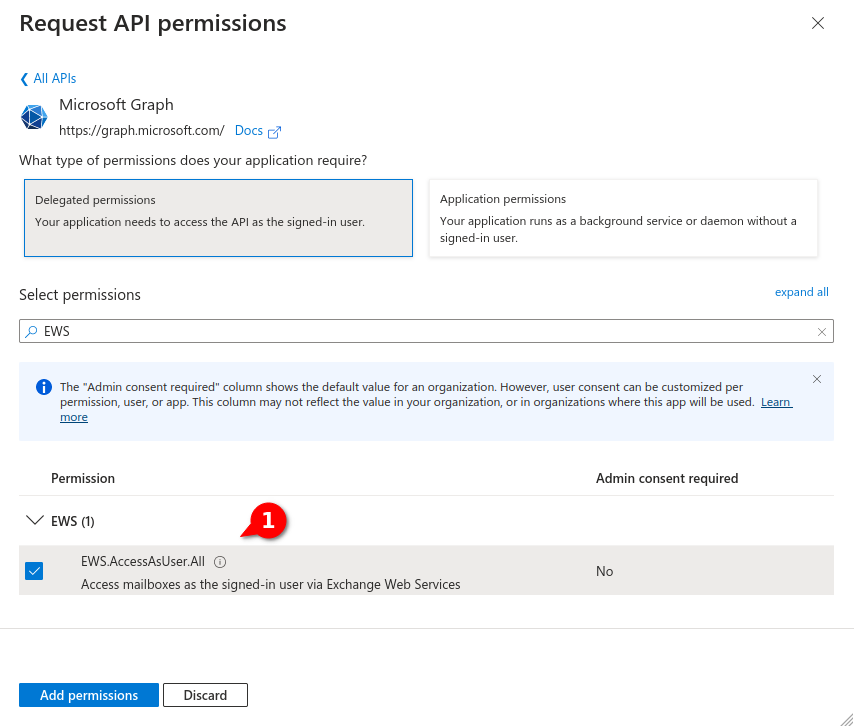
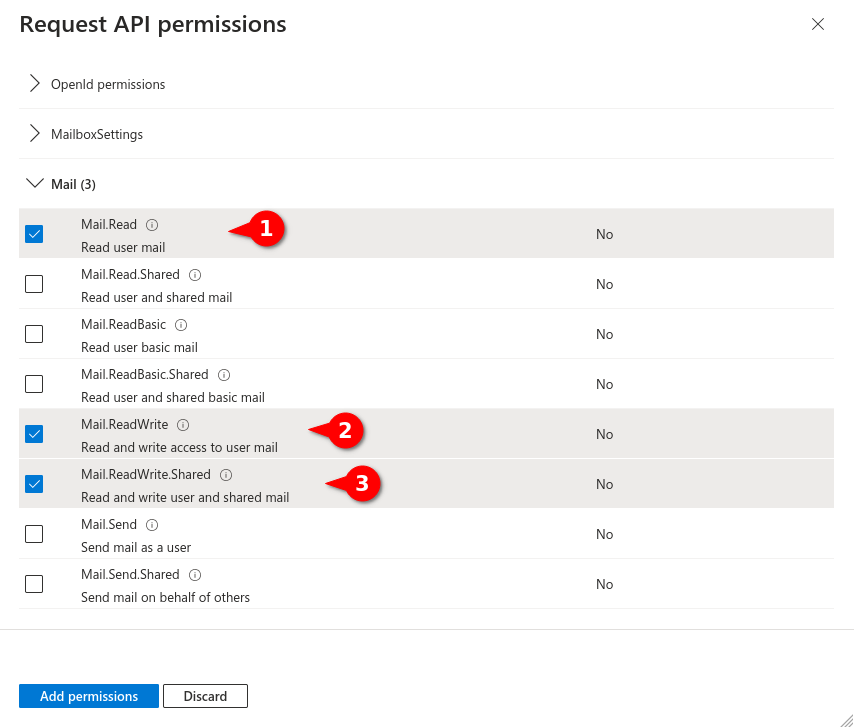
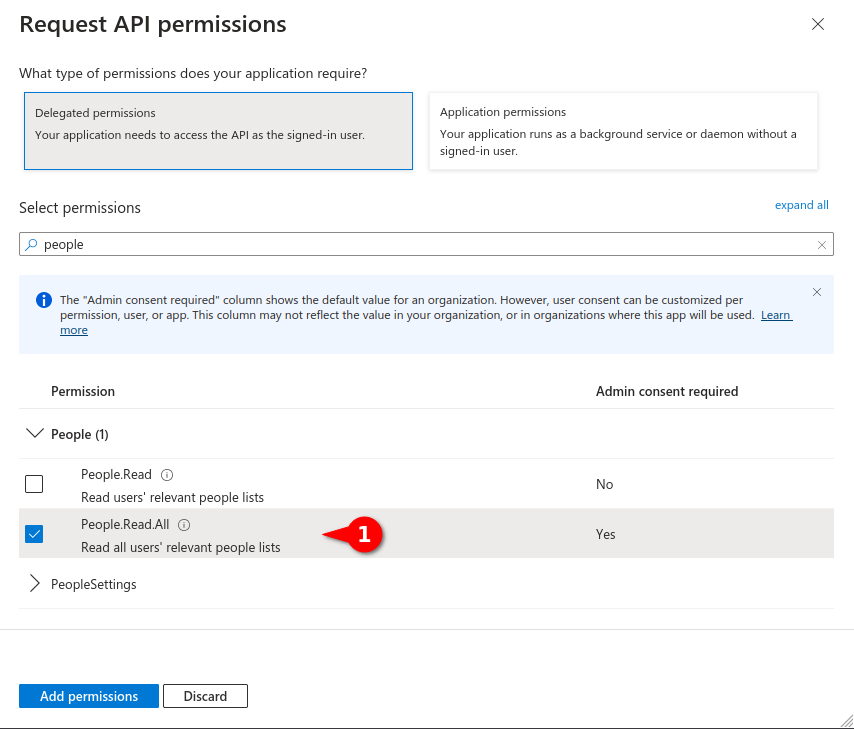
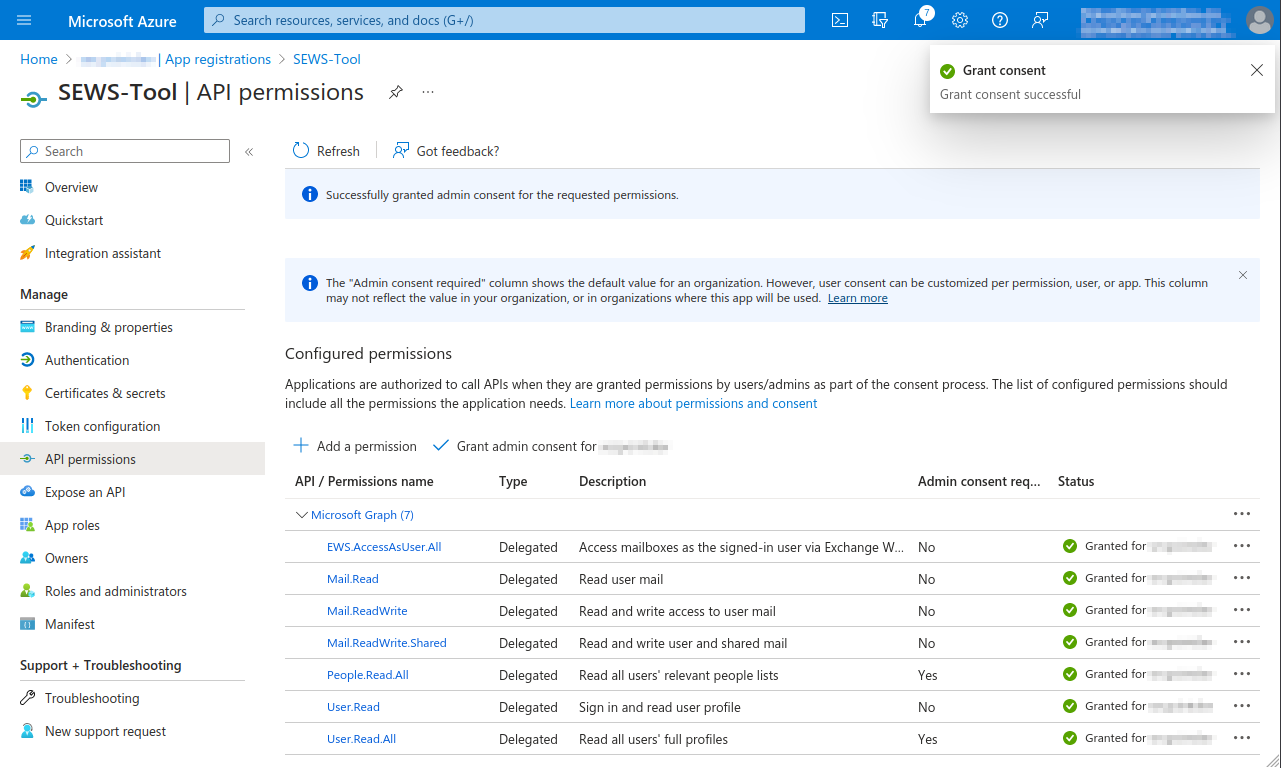
- Add Api Permissions:
- Microsoft Graph - Delegated Permissions - EWS - EWS.AccessAsUser.All
- Microsoft Graph - Delegated Permissions - People - People.ReadAll
- Microsoft Graph - Delegated Permissions - User - User.ReadWrite.All
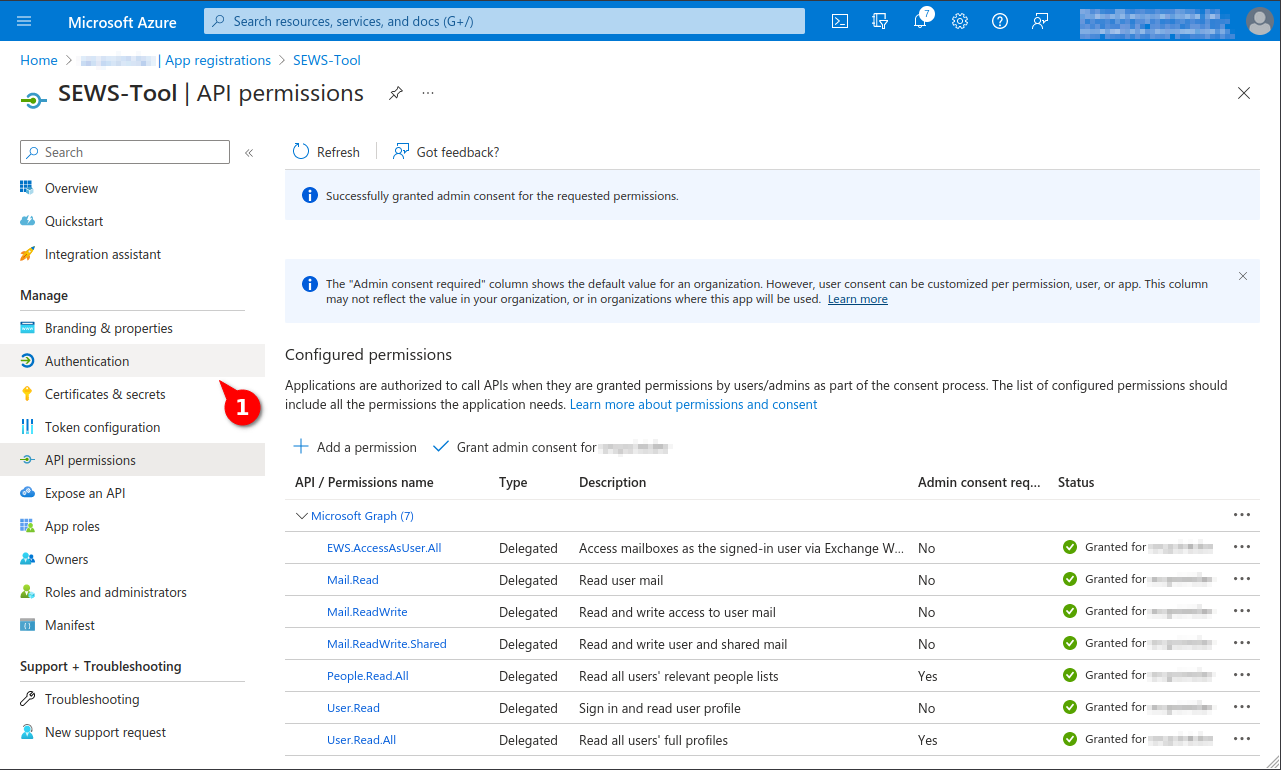
- Under authentication, set the default client type to public with Yes.

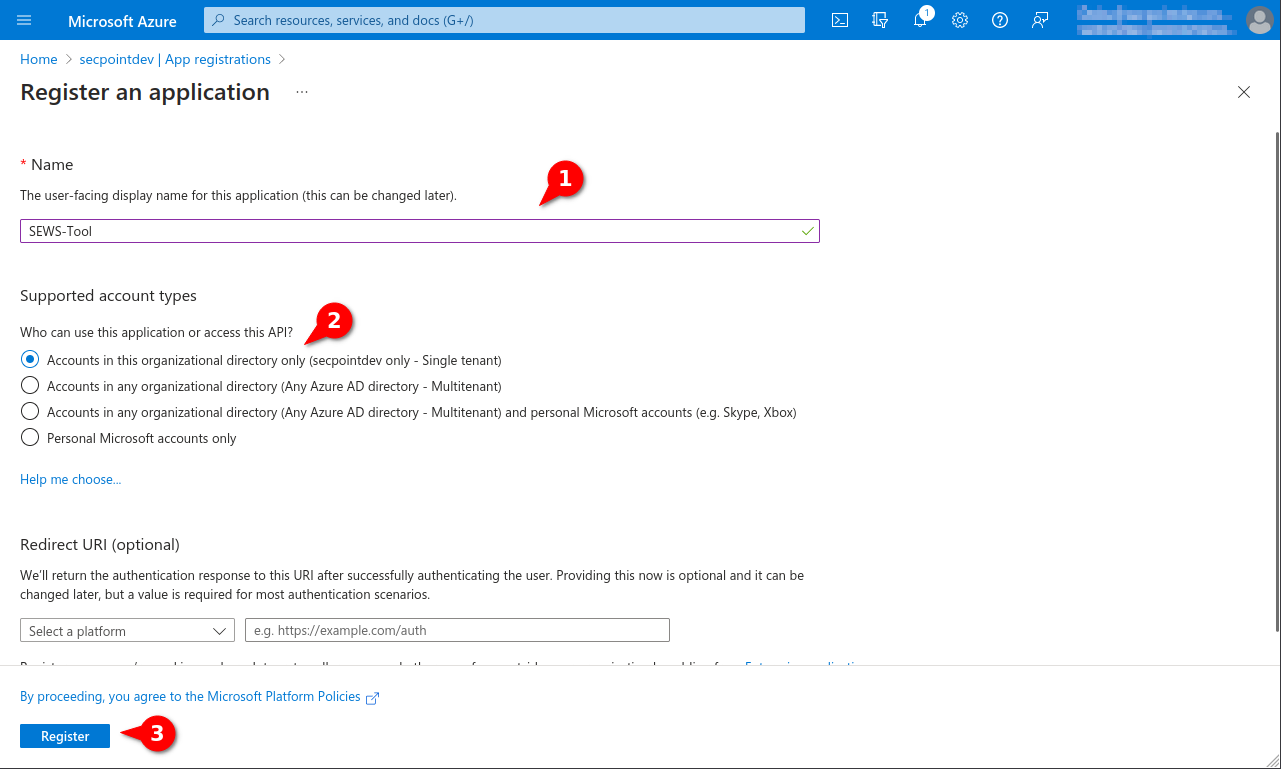
- Assign a unique name
- Selection of the required account types
- A redirection URI is not required.
- Button Register
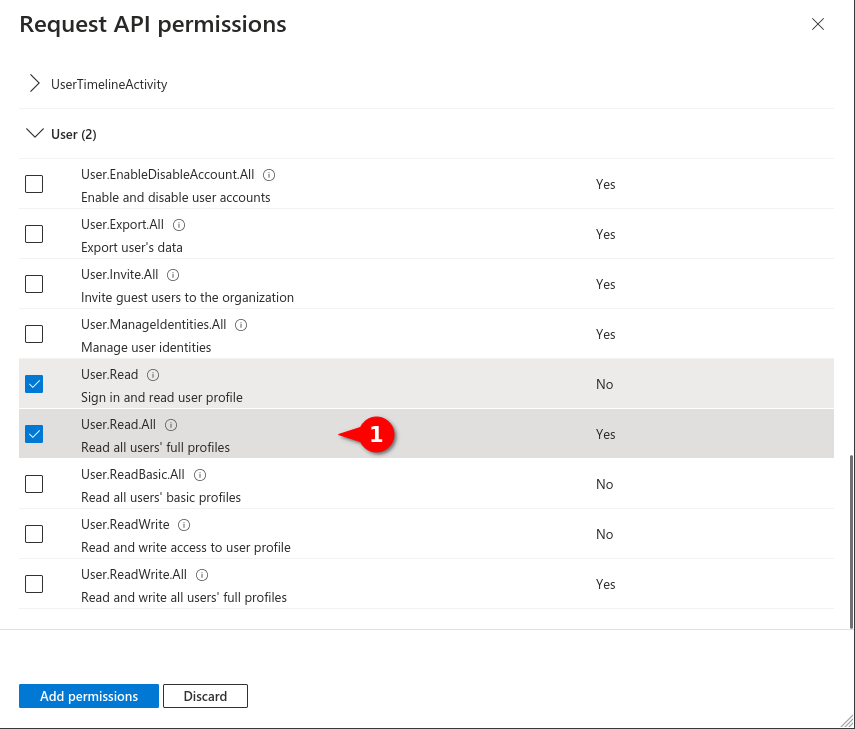
For faster retrieval, the entries in the search line can (...filter)
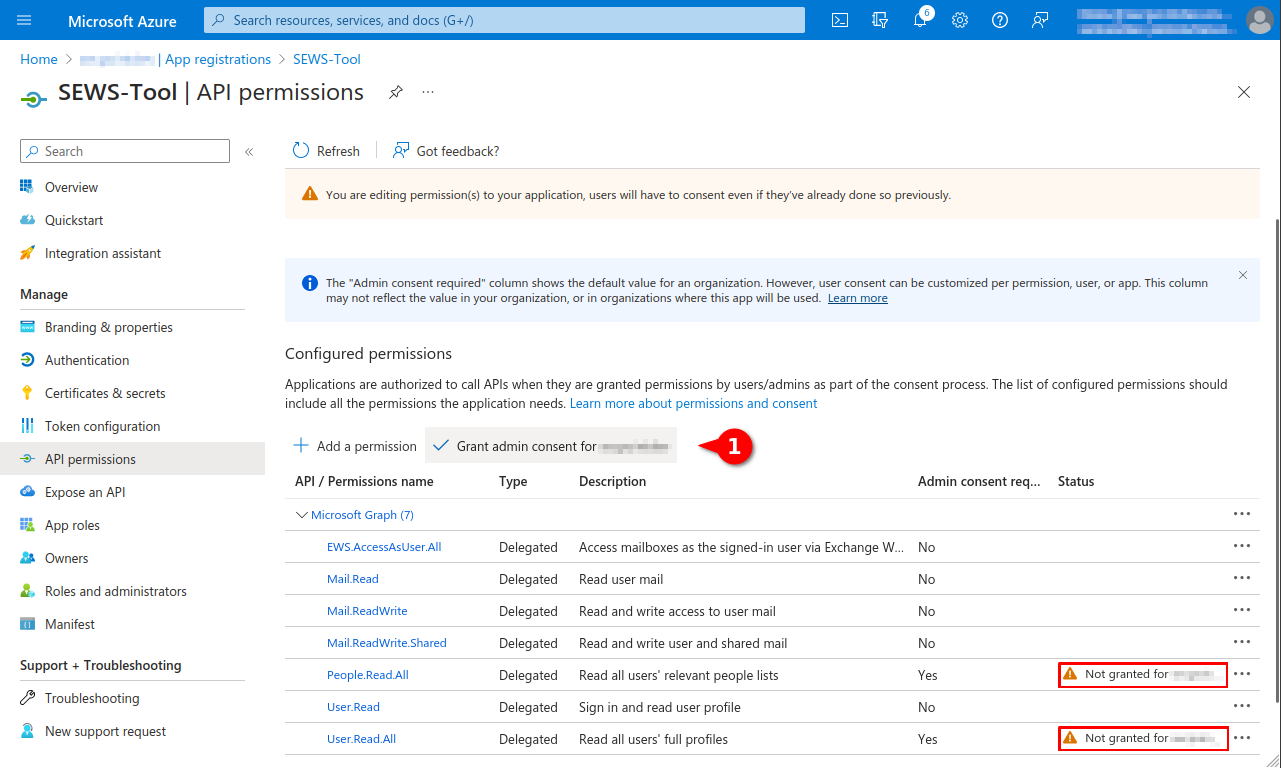
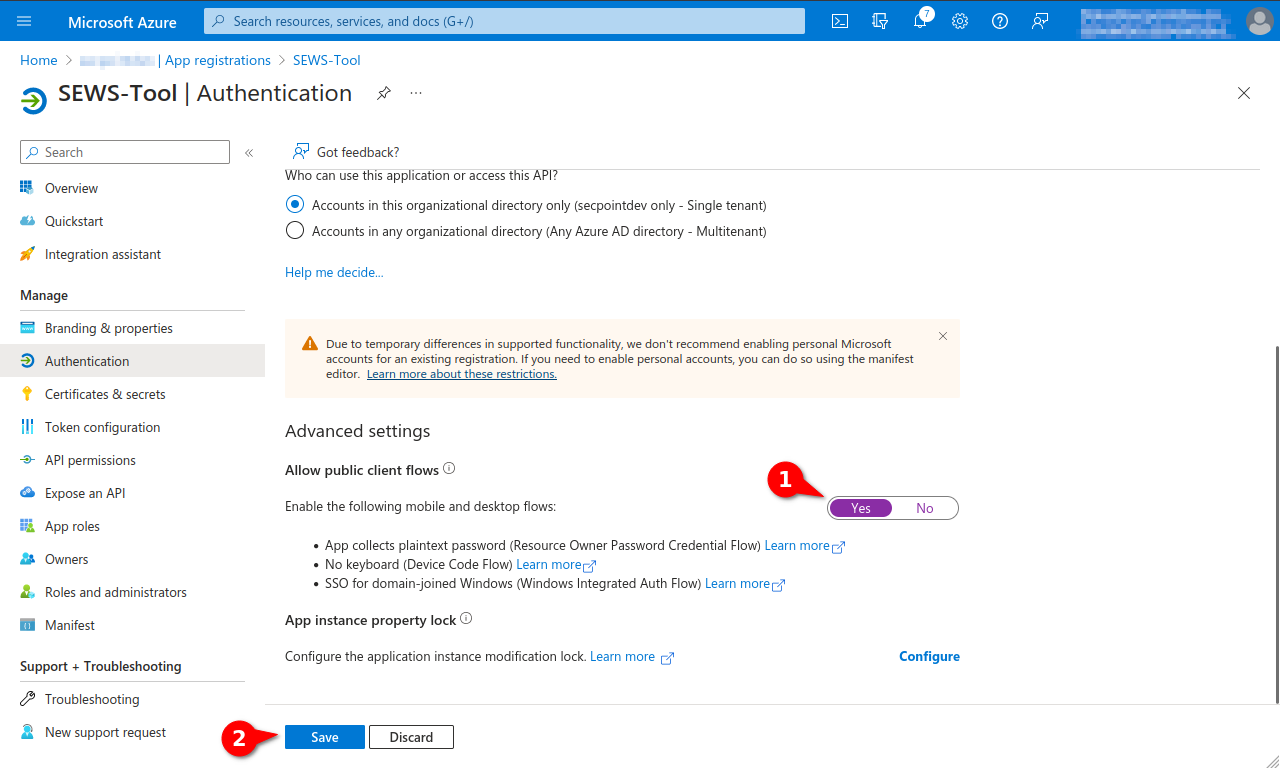
This classifies an application as a public client. Set to
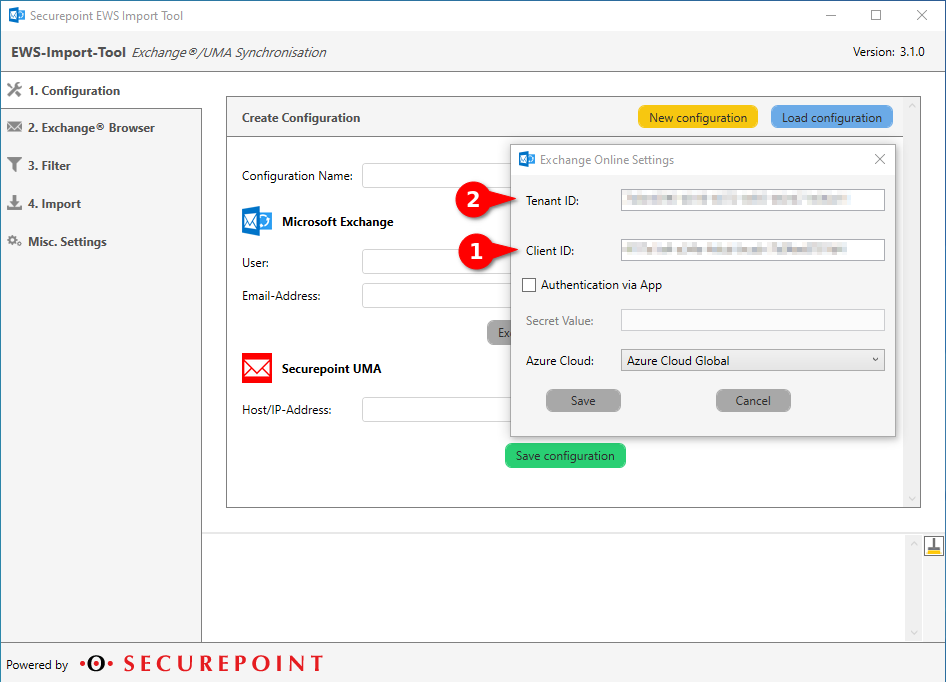
Exchange-Online settings in the SEWS tool
Additional configuration in the SEWS tool for connection to Exchange Online:
- Button
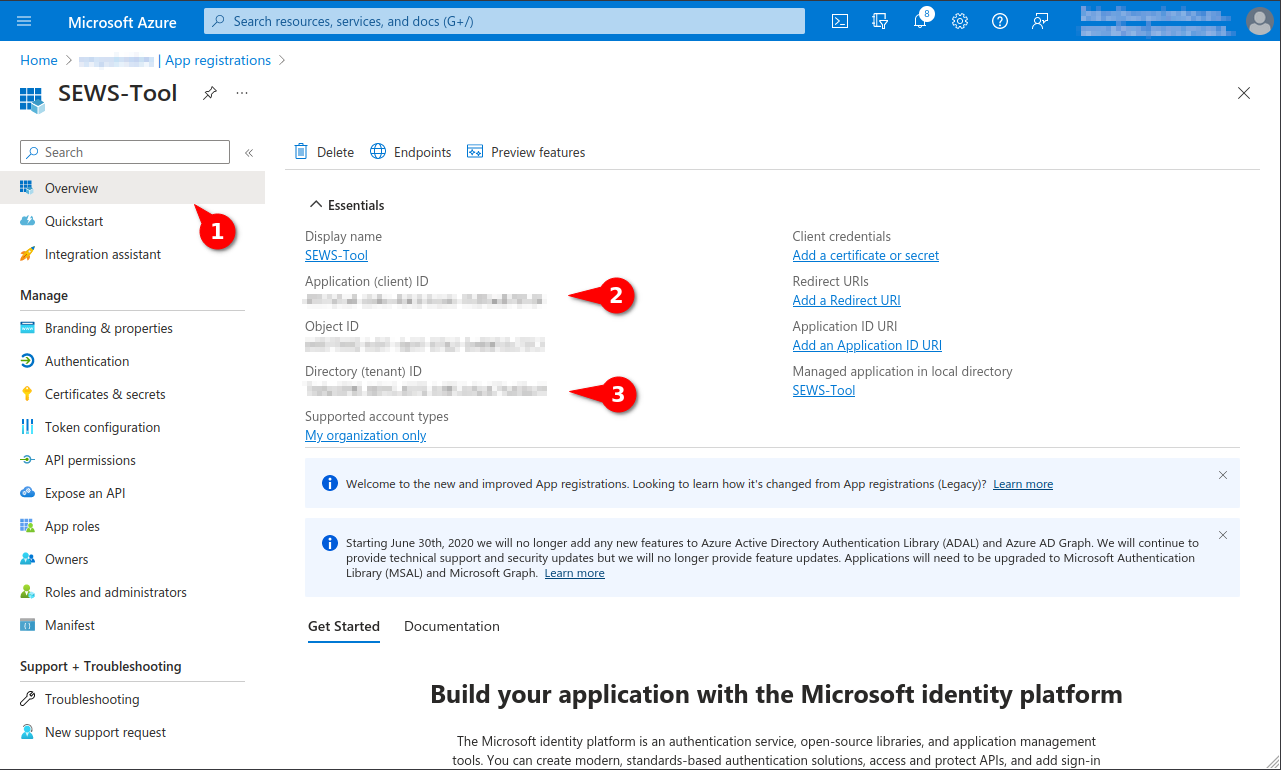
- Application ID from Azure AD: Application ID (client)
- Tenant ID from Azure AD: Directory ID (Client)

Restriction for hybrid AD environments
It is not possible to import accounts from blended environments at the same time.
Users that are created exclusively in the Azure cloud (i.e. whose directory is not synchronized) must be created manually in the current UMA.
Installation of the SEWS Import Tool
- The SEWS tool can be downloaded from the reseller portal:
- The installation is started after the download with a double click on the SEWS_Installer.exe as administrator.
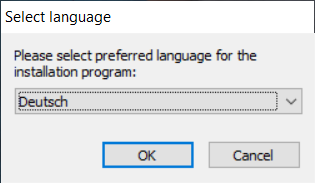
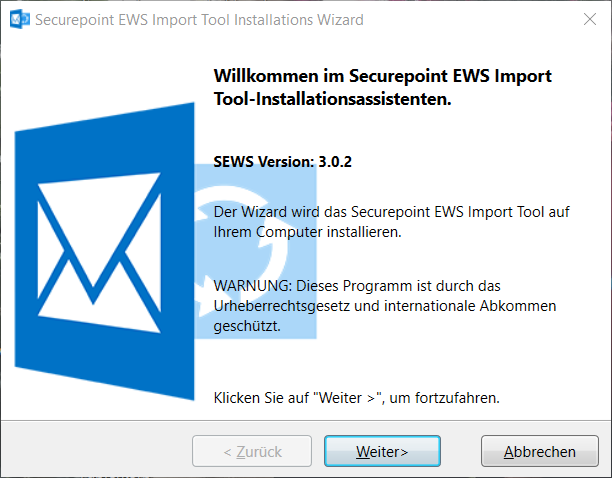
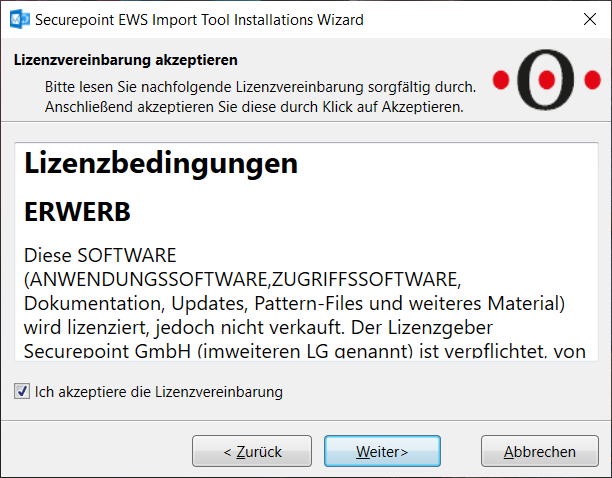
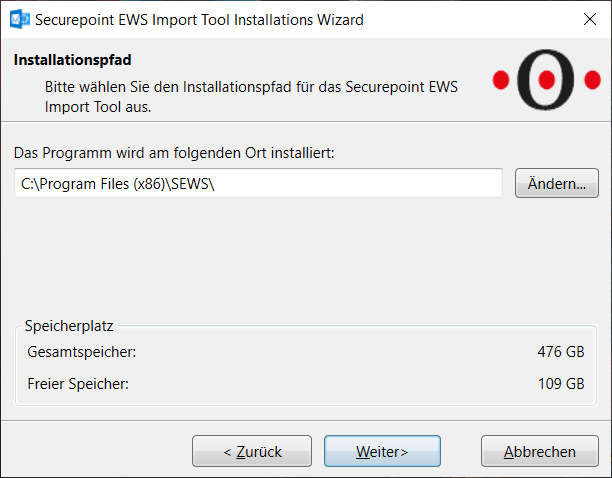
- After selecting the desired language and confirming the license agreement, an installation location must be selected.
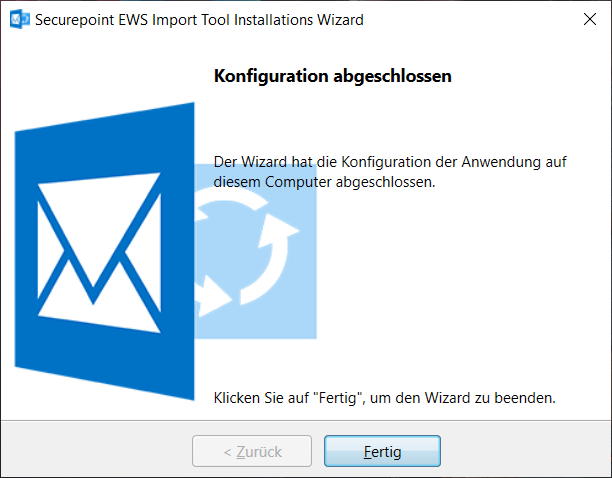
- With a click on "Finish" the installation is completed. The tool can now be started.
UMA Import via SEWS Import Tool
The SEWS Import Tool is started via the application file (.exe).
Configuration
| Caption | Value | Description | 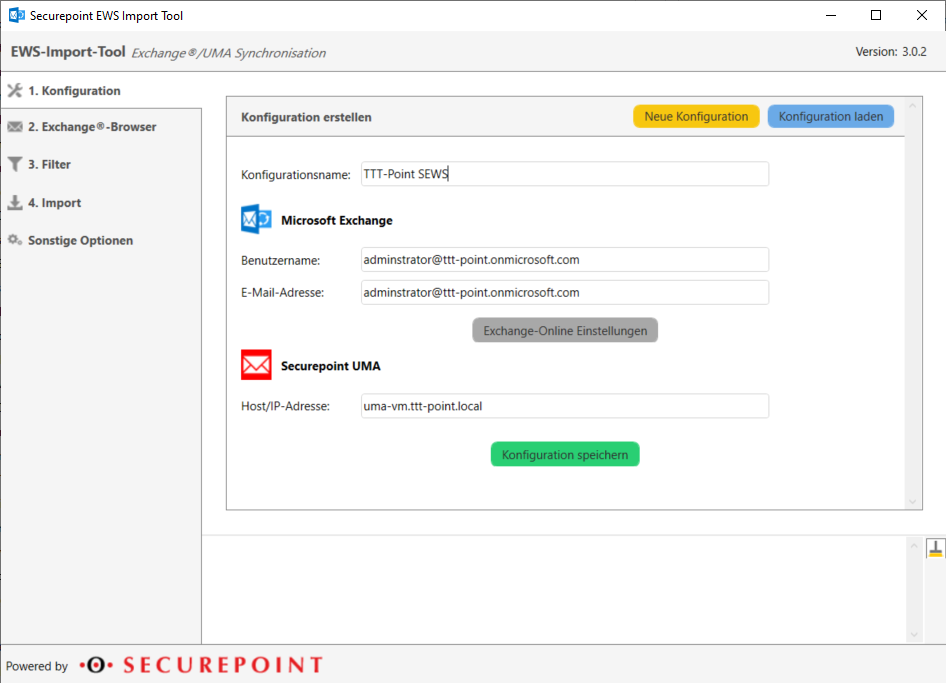 |
|---|---|---|---|
| Creating a new configuration | |||
| Various saved configurations can be loaded or copied. Also the import from a file is possible. | |||
| Configuration name | TTT-Point SEWS | Freely selectable name | |
| Microsoft Exchange | |||
| Microsoft Exchange®-Username | administrator@ttt-point.onmicrosoft.com | The user name is taken from the Configuration section | |
| Email-Address: | administrator@ttt-point.onmicrosoft.com | User email address | |
| Securepoint UMA | |||
| Host/IP address | 192.168.168.168 | Host name or IP address of the UMA | |
| A click on "Save configuration" saves it. This also appears as an info message in the lower LOG area. | |||
| Tenant-ID: | ******************** | from Azure AD: directory ID (tenant) | 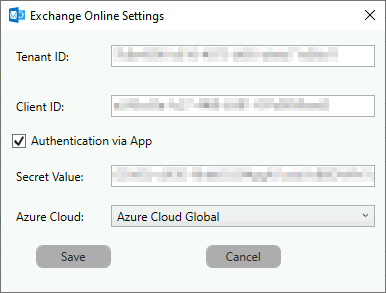 |
| Client ID: | ******************** | from Azure AD: application ID (client) | |
| Authentication via App | When enabled, Tenant ID, Client ID and Secret Value are sufficient to connect to Azure AD. | ||
| Secret Value: | ******************** | Displayed and required when authentication via app is activated. For the Secret Value, see Users Include Users from an Azure AD. | |
| Azure Cloud: | Select the right Azure Cloud | ||
| see Exchange-Online settings in the SEWS tool | |||
Exchange-Browser
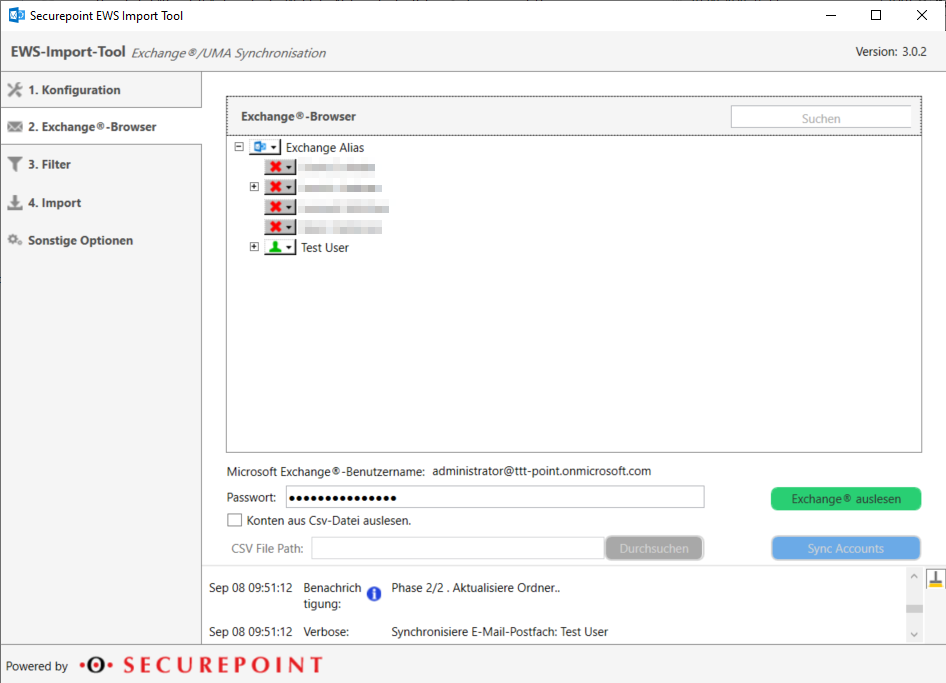
Procedure in three steps:
- Enter the password for the import user
- Click on
- In the field "Exchange Browser", under the generic term "Exchange Alias", the users appear to which the import user has corresponding permissions.
After the data has been read, a selection of the data to be imported can be made per user.
Procedure for UMAaaS:
Read accounts from CSV file
Structure of the CSV file:
DisplayName,UMA-UserName,Email-in-Azure
Example:
rabbit,wonderland,alice@anyideas.de
james,jamesk,jameskirk@anyideas.onmicrosoft.com
"Klara Fall","klara","klara.fall@anyideas.de
In the example, the account rabbit is displayed in SEWS, with the folders of alice@anyideas.de.
If you import them, they will be stored in the UMA under the local user wonderland.
Filter
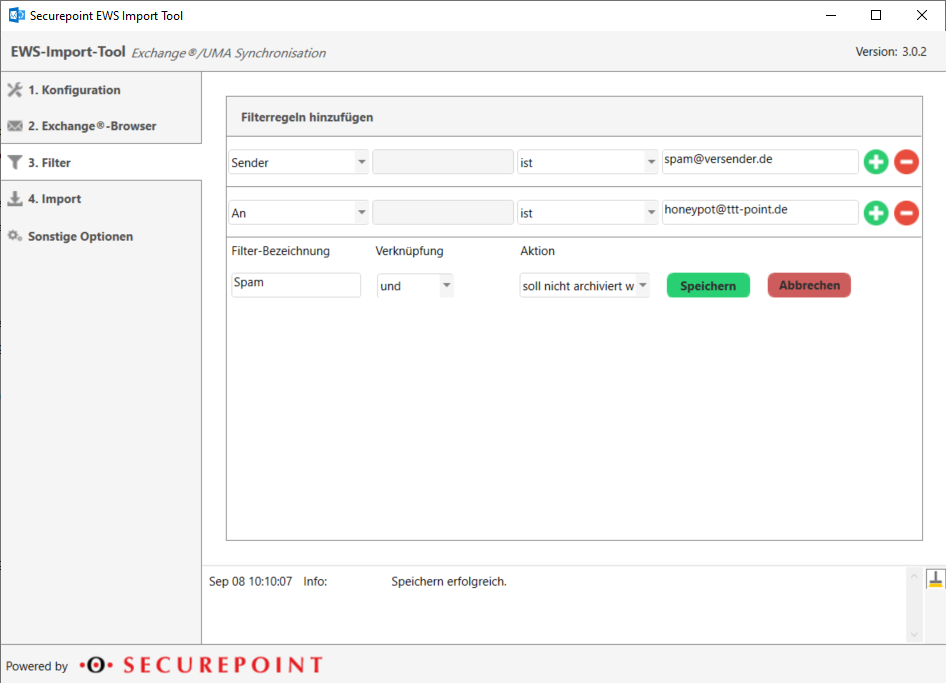
In the "Filter" area, you can create filter rules via filter rules can be created, which explicitly exclude emails from import based on subject, TO, FROM, CC or X-header entry or explicitly archive them.
Filter rules can be linked with "and/or".
In the example below, emails from a specific sender to a specific address are explicitly excluded from archiving.
If no filter rule is created, everything is archived!
Import
| Caption | Value | Description |
|---|---|---|
| Section Login credentials | ||
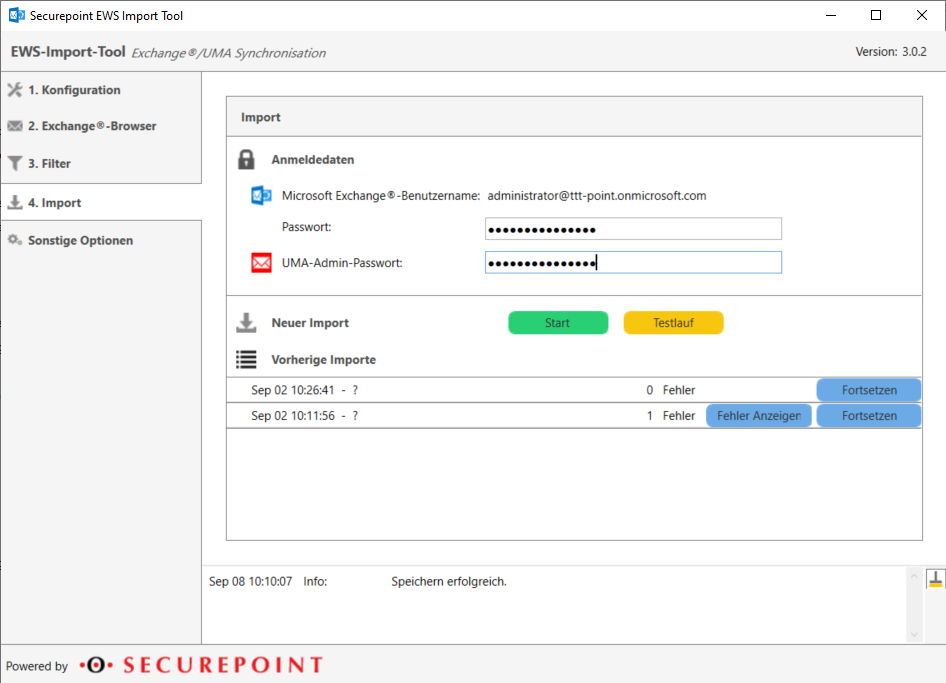
| Microsoft Exchange®-Username | import-user@ttt-point.onmicrosoft.com | The user name is taken from the Configuration section |
| Password | •••••• | Password of the Exchange Import user. Taken from the Exchange Browser section, if already used there. |
| UMA-Admin-Password | •••••• | Password of the administrator for the UMA-Admin Interface |
| Section New import | ||
| Starts the import To ensure that the mails can actually be archived, corresponding email accounts must be configured in the UMA to which the mails can be assigned. | ||
| The test run serves to check whether all data can be imported. If necessary, individual mails can be checked for errors. The mails are processed, but not imported. | ||
| Section Previous imports | ||
| An import can be interrupted (manually with or by error messages) and can be resumed with | ||
| Displays emails with account name, folder path, folder name, subject, error message, import date, sender and EmailMessageID. | ||
Other options
Mail handling and logging settings
| Caption | Default: | Description | |||||||||||||||
|---|---|---|---|---|---|---|---|---|---|---|---|---|---|---|---|---|---|
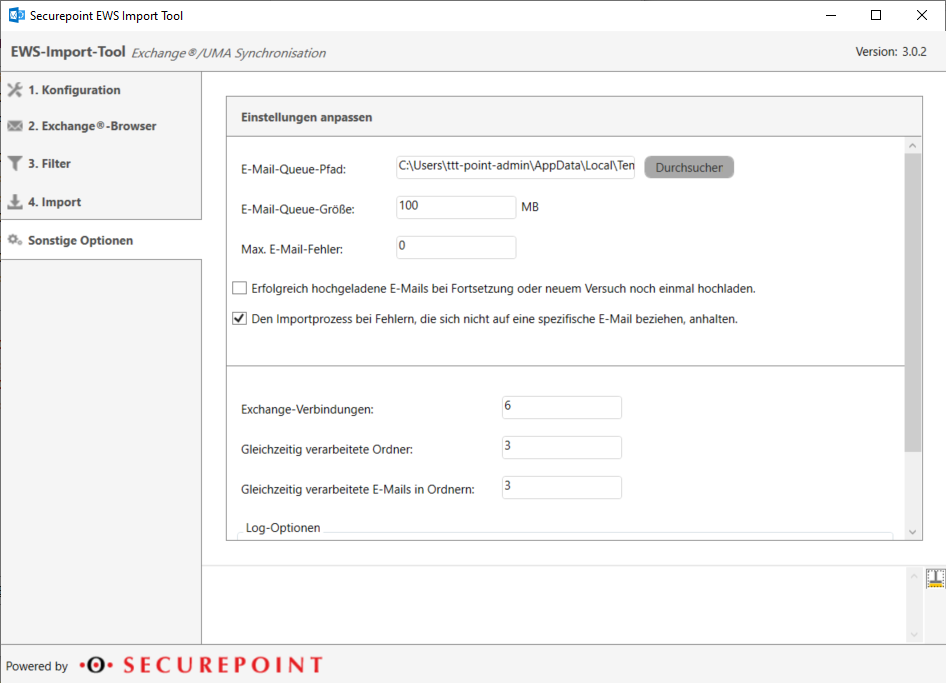
| Email Queue Path: | C:\Users\ttt-point-admin\AppData\Local\Temp\ | Path of the email queue | |||||||||||||||
| Email queue size: | 100 MB | the size of the email queue | |||||||||||||||
| Max. email error: | 0 | Maximum number of errors before an import is aborted. In practice, it has proven useful to specify a value corresponding to approx. 5-10% of the total number of mails to be imported | |||||||||||||||
| Successfully uploaded emails upload again on continuation or new attempt. | Helpful if already imported mails are no longer available due to a restore or a new setup of the UMA. | ||||||||||||||||
| Stop the import process for errors that do not relate to a specific email. | In case of errors in the communication or configuration, an import usually cannot be performed and is therefore aborted by default. Deactivation is possible for debugging. | ||||||||||||||||
|
| |||||||||||||||||
| Exchange-Connections | 6 | Number of data channels to the Exchange server. Can be adjusted depending on the performance of the system. | |||||||||||||||
| Simultaneously processed folders: | 3 | Maximum number of folders that can be edited per Exchange connection | |||||||||||||||
| Simultaneously processed emails in folders | 3 | Maximum number of emails that can be processed per folder | |||||||||||||||
| Section Log options | |||||||||||||||||
| Log level in the user interface | Trace | Log messages shown in the lower part of the application window | |||||||||||||||
| Log level in the log file | Trace | Log messages that are stored in the log file | |||||||||||||||
| |||||||||||||||||
| Show previous log during configuration load | Shows the previous log of an existing configuration in the application window when it is loaded. | ||||||||||||||||
Troubleshooting
| Error message | Error message in the log | Cause | Solution |
|---|---|---|---|
| Exchange connection error | The remote server returned an error: (500) Internal server error. The server cannot service this request right now. Try again later. |
When importing a large number of emails, it is possible that the connection is throttled. This may be due to the throttling policy of the Exchange Server. |
|
| The import aborts at a random moment. | The termination depends on the throttling policy of the Exchange Server. Problems can arise also after 1-2 hours. |
|


