- Updating the of the web session from UTM v.12.5.1
- Screenshots updated
- Web sessions are now also possible with UTMs that do not have a public IP from UTM v12.5.1
Requirements
Enabling the control via the Unified Security Console
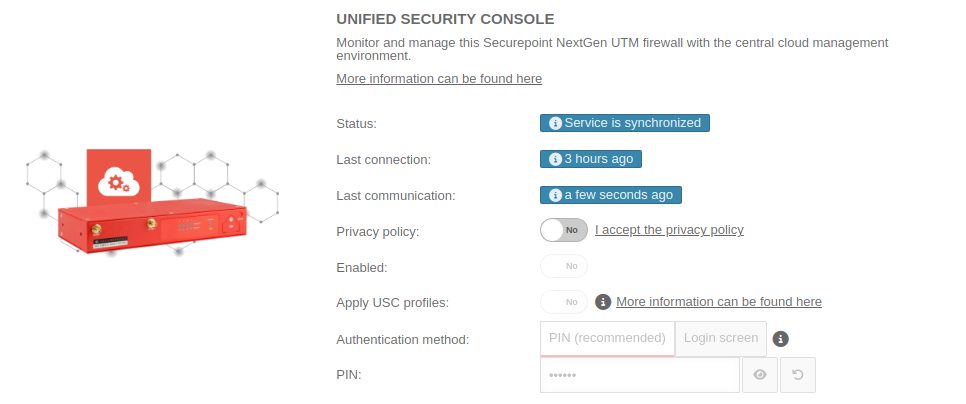
The Unified Security Console must be enabled in the UTM
Access by then Unified Security Console must first be enabled in the UTM itself in the menu .
The UTM reports to the license server after the update. Here, the availability of the service is indicated and the menu is activated.
The process can be shortened by executing the command system restrictions update on the CLI after a few minutes of runtime (the UTM must have had the opportunity to report to the license server!).
| Caption | Value | Description | 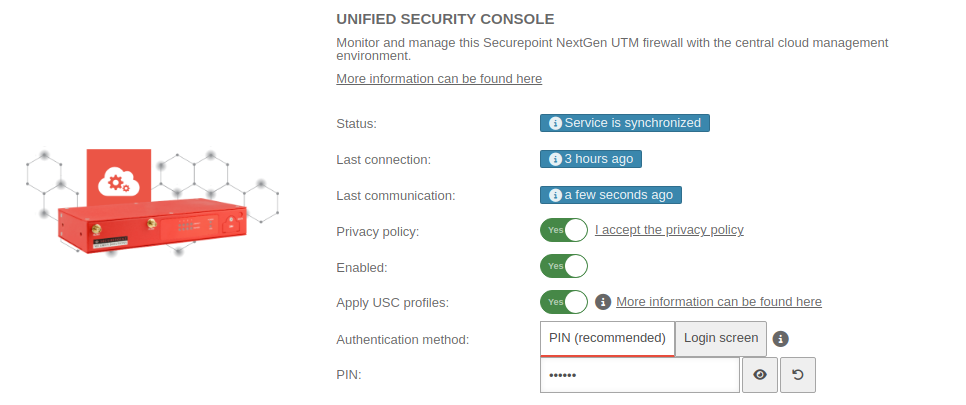 |
|---|---|---|---|
| Privacy Policy: | Yes | The privacy policy must be accepted | |
| Activated: | Yes | This activates the Unified Security Console - and thus the display, configuration and access via the Securepoint Unified Security portal. | |
| Authentication method: |
|
||
| PIN: | •••••••• | As authentication for a web session, a 6-digit PIN can be selected instead of the login mask with access data. After 5 incorrect entries in a row, access is blocked. The block is only lifted again after correct login directly at the admin interface. | |
| Displays the Websession PIN | |||
| Creates a new PIN | |||
IP address
- UTM up to v.12.2.2.8: Update required
The UTM uses an older procedure for the web session, which is only available until 30.11.2023- The UTM is directly accessible via a local network
- Access data (user name and password) are required
or - The UTM has a public IP If no public IPv4 is available because the UTM is behind a NAT router, a public IPv6 can be assigned via IPv6 prefix delegation.
- UTM up to v12.4.4.1 An update to the latest version is recommended
- The UTM is directly accessible via a local network
- Access data (user name and password) are required
or - The UTM has a public IP If no public IPv4 is available because the UTM is behind a NAT router, a public IPv6 can be assigned via IPv6 prefix delegation.
- UTM v12.5.0
- The UTM is directly accessible via a local network
- Access data (user name and password) are required
or - The UTM has a public IP If no public IPv4 is available because the UTM is behind a NAT router, a public IPv6 can be assigned via IPv6 prefix delegation.
- A PIN is additionally required Deposited on the UTM in the menu USC / box Unified Security Console
Example configuration with a Fritzbox
This section includes descriptions of third-party software and is based on the status at the time this page was created.
Changes to the user interface on the part of the manufacturer are possible at any time and must be taken into account accordingly in the implementation.
All information without warranty.
- Login to the configuration interface (in the default settings at https://192.168.178.1)
- In the network settings for IPv6, the option Enable DHCPv6 server in FRITZ!Box for home network must be selected
- Select suboption Assign DNS server, prefix (IA_PD) and IPv6 address (IA_NA)
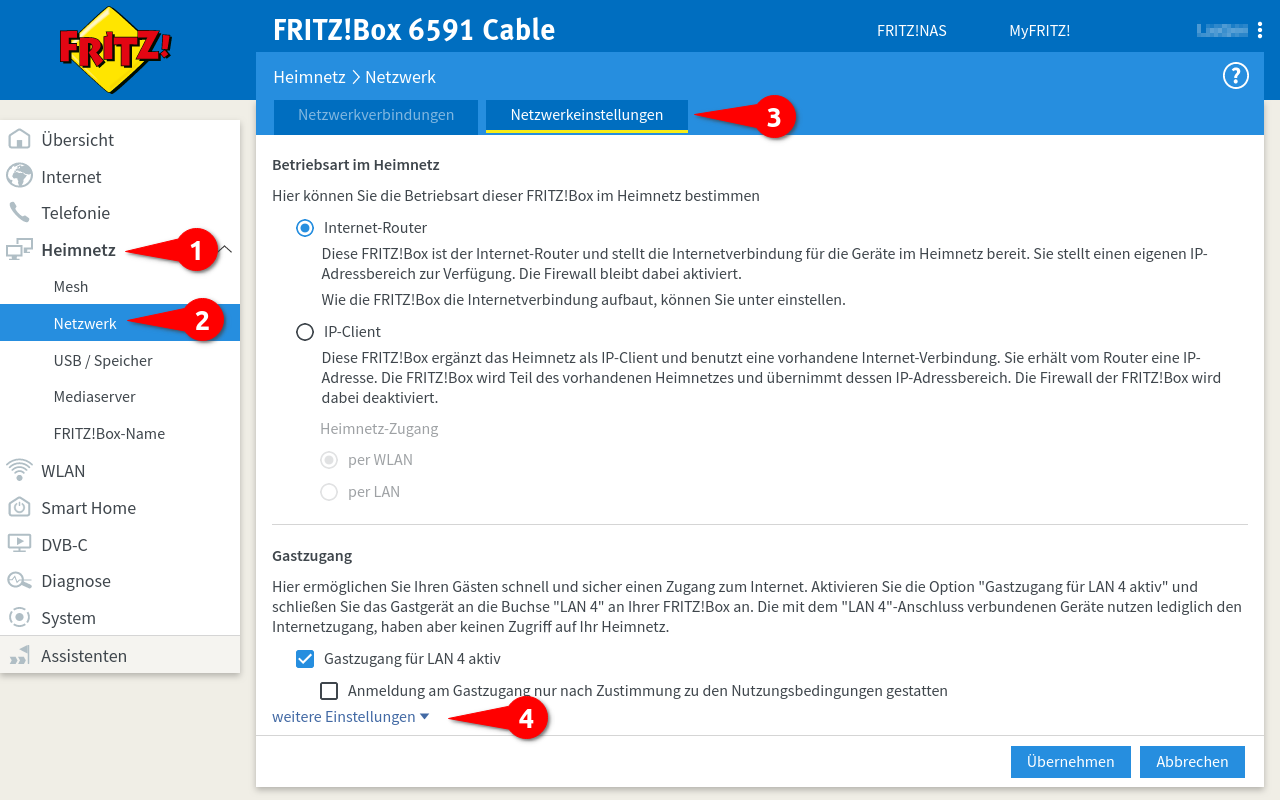
- Menu Home network ➊ / Network ➋ / Tab Network settings ➍
- at the bottom of the page dropdown menu: More Settings ➍
- Section IP addresses / Button IPv6 settings ➎ (not in picture)
or also IPv6 configuration
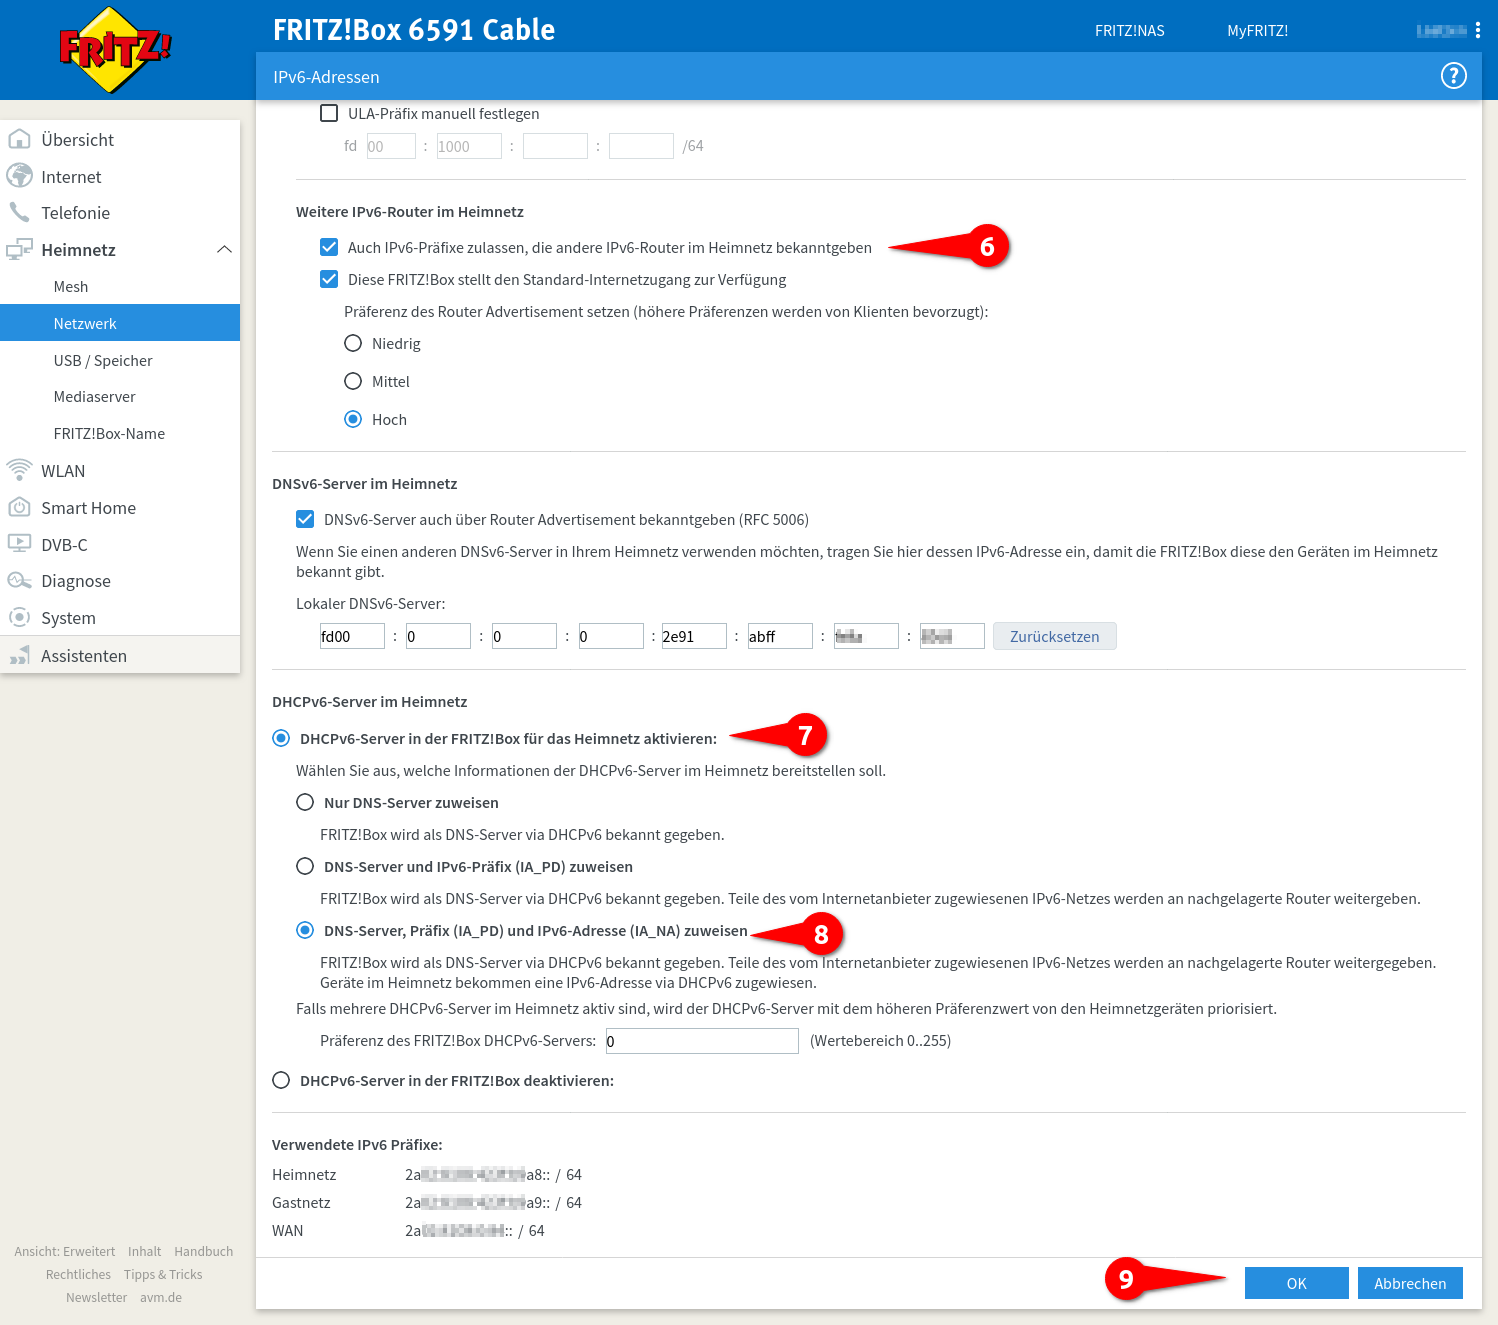
- Section Other IPv6 routers in the home network
Also allow IPv6 prefixes to be advertised by other IPv6 routers on the home network ➏ - Section DHCPv6 server in home network
Enable DHCPv6 server in FRITZ!Box for the home network: ➐- Activate Assign DNS server, prefix (IA_PD) and IPv6 address (IA_NA). ➑
- Save details with button OK ➒
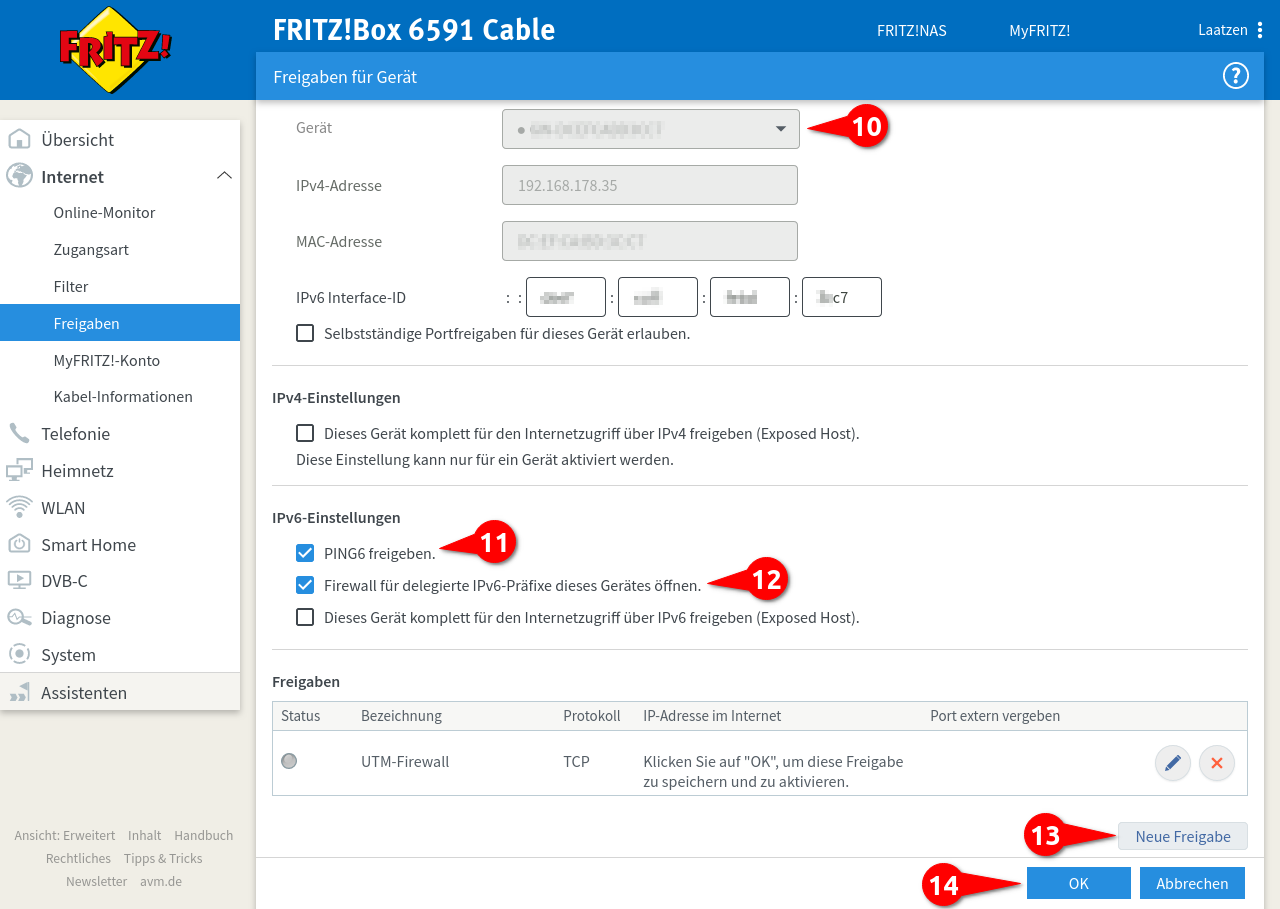
Menu
- Select device from dropdown menu ➓
Select 'Enter IP address manually' if it is not assigned via DHCP - If desired: enable ping for IPv6 ⓫
- Enable Open firewall for delegated IPv6 prefixes of this device option ⓬
- Click on the button ⓭
Another dialog opens
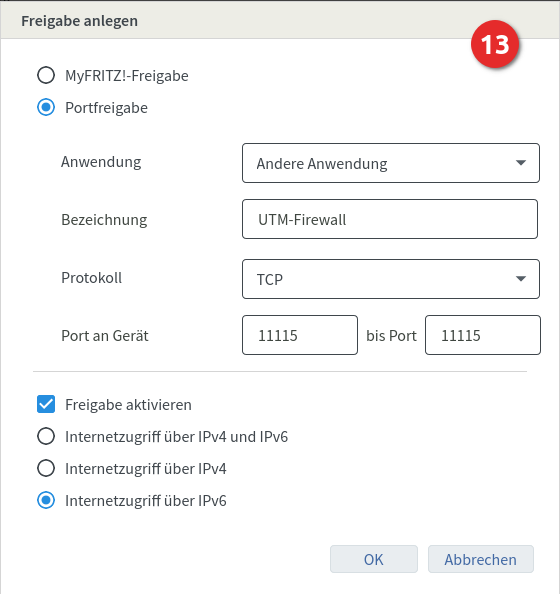
- Choose option Port sharing
- Application Other application
- Description Meaningful name
- Protocol TCP
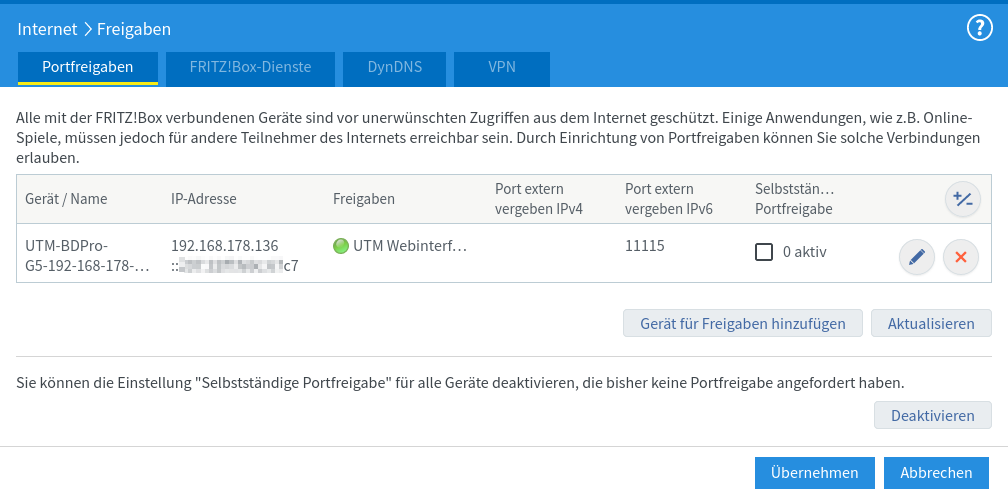
- Port to device 11115 through Port 11115
Adjust port if necessary under section web server Administration Web Interface Port: a different port has been configured. - In the Enable sharing section, select the
Internet access via IPv6 option - Finish input with
- In the overview confirm entries with OK (see Fig.4 No.⓮)
Configuration on the UTM:
Edit interfaces
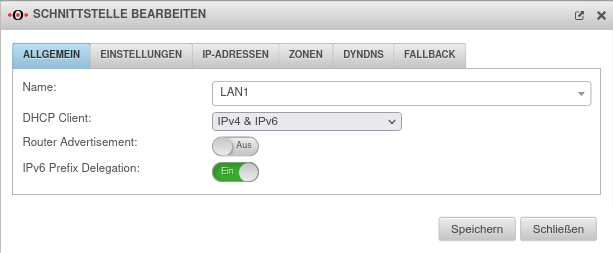
connected to the Internet via NAT router
Menu Tab Network Interfaces / Edit External Interface / Tab General
DHCP Client
Router Advertisement: Off
IPv6 Prefix Delegation On
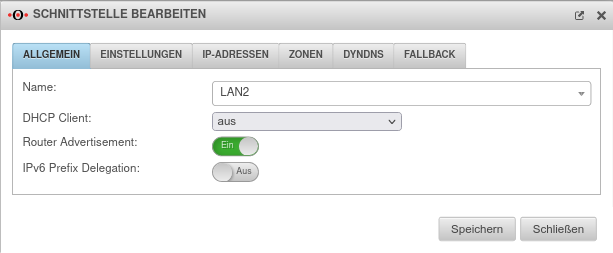
(must be configured for all internal interfaces that are to distribute a public IPv6 address to clients (and thus also receive one themselves).
Menu Tab Network Interfaces / Edit Internal Interface / Tab General
DHCP Client
Router Advertisement: On
IPv6 Prefix Delegation Off
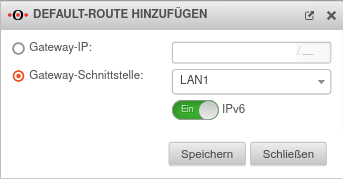
Gateway interface: LAN1
IPv6: On
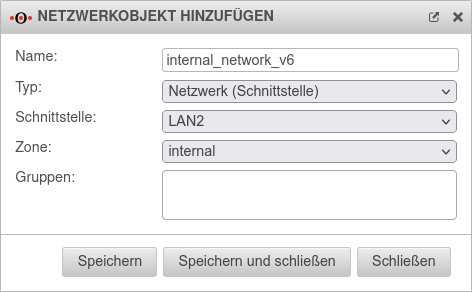
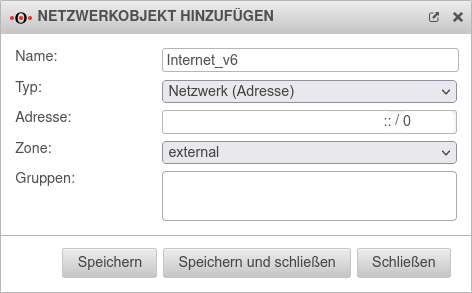
In order for the IPv6 addresses to be routed, a default route must be added under Tab Routing with Button .
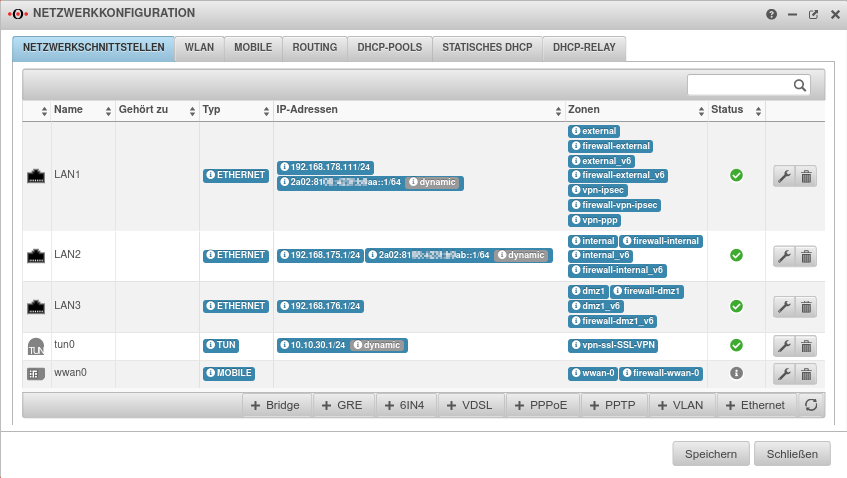
- The external interface should get a dynamic after a short moment. .../64 IPv6 address If there is a 128 address here, the settings in the Fritzbox must be verified
After a few minutes, this address is displayed in the selection box for IP addresses in the USC.
- UTM from v.12.5.1:
- The UTM is directly accessible via a local network
- Access data (user name and password) are required
or - A web session from remote networks is also possible if the UTM does not have a public IP
- The connection is established via the interface on which the default route of the UTM is set up.
- Login with PIN or access data possible Deposited on the UTM in the menu USC / box Unified Security Console
Websession
Websession
| Action: | Description | 
| |||||||||||||
|---|---|---|---|---|---|---|---|---|---|---|---|---|---|---|---|
| Start new websession | Opens the dialog to start the administrative web interface of the UTM | ||||||||||||||
Websession with UTM up to v12.5.0notempty An update to the latest version is recommended
| |||||||||||||||
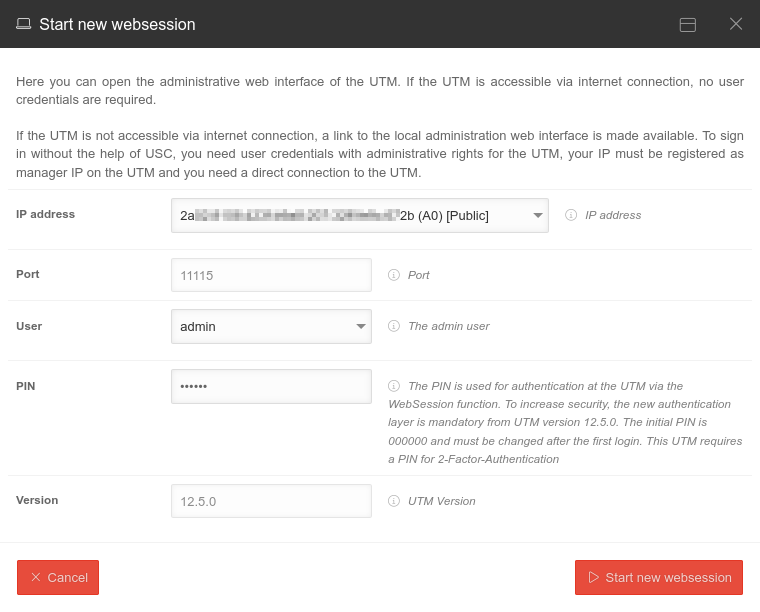
Web session with PIN notempty
Websession with PIN (UTM from v12.5.1) | |||||||||||||||
| User | admin If there is no user with the name admin, a user with admin rights can be selected here with whom the web session connection is to be started.
|
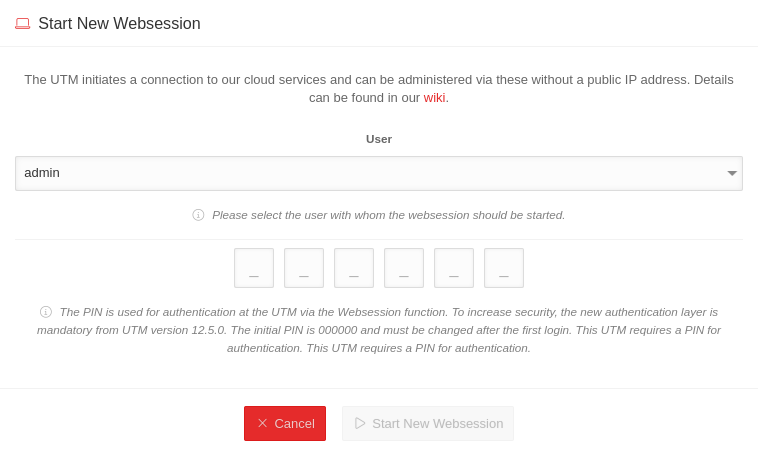 | |||||||||||||
| PIN: |
_ _ _ _ _ _ Websession PIN (Configured on the UTM in the menu in the Unified Security Console section
After entering the PIN, the web session can be started directly using ↵ Enter. | ||||||||||||||
| The entered PIN is incorrect After 5 incorrect entries in a row, access is blocked.
The block is only lifted again after correct login directly at the admin interface. | |||||||||||||||
| Start new websession | Opens the admin interface of the UTM in a new tab of the used browser | ||||||||||||||
Web session with login screen notempty
Web session with login screen (UTM from v12.5.1) | |||||||||||||||
| The connection is established via the interface on which the default route of the UTM is set up. | 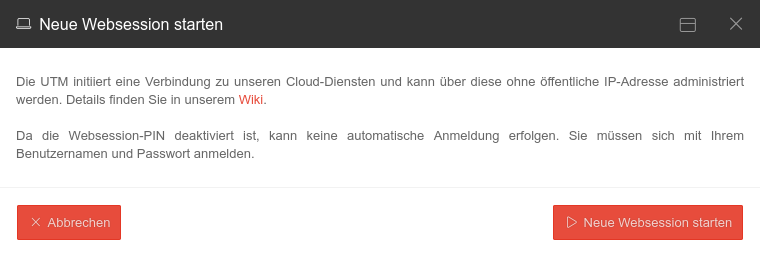 | ||||||||||||||
| As the web session PIN is deactivated, no automatic login can take place. Access data (user name and password) are required. | |||||||||||||||
| Start new websession | Opens the admin interface of the UTM in a new tab of the used browser | ||||||||||||||
