Jump to:navigation, search
Wiki


De.png
En.png
Fr.png


HTTP proxy authentication guide
Last adaptation to the version: 12.6.0
New:
  • Updated to Redesign of the webinterface
notempty
This article refers to a Resellerpreview

02.2023 11.7

Access: UTM-IP:Port or UTM-URL:Port
Port as configured at Network / Appliance Settings / Webserver
Default-Port: 11115
i.e.: https://utm.ttt-point.de:11115
Default: https://192.168.175.1:11115
Applications HTTP Proxy


User authentication on the HTTP proxy

In addition to the transparent mode of the HTTP proxy, it is also possible that users must authenticate in advance for Internet use. This authentication can be performed either using the user management of the UTM or an authentication server such as Active Directory, LDAP or Radius.

To use authentication on the HTTP proxy, it is necessary to enter the proxy in the browser and make changes to the packet filter settings.


Proxy setting in the browser
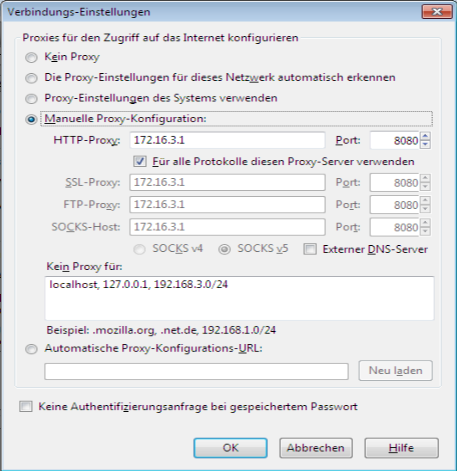
Win7 FF Proxy.png
Proxy configuration in the browser

In the connection settings of the used browser, the IP address of the corresponding interface of the UTM can be entered under Manual proxy configuration

.

In addition, the port must be entered, which is set in the UTM under Applications HTTP Proxy . When the UTM is delivered, this is port 8080.

In order for web pages accessed via HTTPS to be routed through the proxy as well, the function use this proxy server for all protocols must be enabled.


Packet filter settings

The UTM is shipped with a packet filter rule set to allow access from the internal network to the Internet with all services (any).

Since users might get the idea to change the browser's proxy settings to bypass authentication, this rule should be disabled or an appropriate service group should be created instead of any for this rule.

# Quelle Target Service NAT Action Active
Dragndrop.png Network.svg internal-network World.svg internet Other.svg any HN Accept Off
Dragndrop.png Network.svg internal-network Interface.svg internal-interface Service-group.svg proxy Accept On

More information on the packet filter rules can be found here.


Authentication via the user management of the UTM

Create proxy user group

First of all, a user group is needed.
To do this, click on Authentication Users  Area Groups Button Add Group.
Add group UTMuser@firewall.name.fqdnAuthenticationUser UTM v12.6 HTTP Proxy-Authentifizierung Gruppe hinzufuegen Proxy Group-en.png
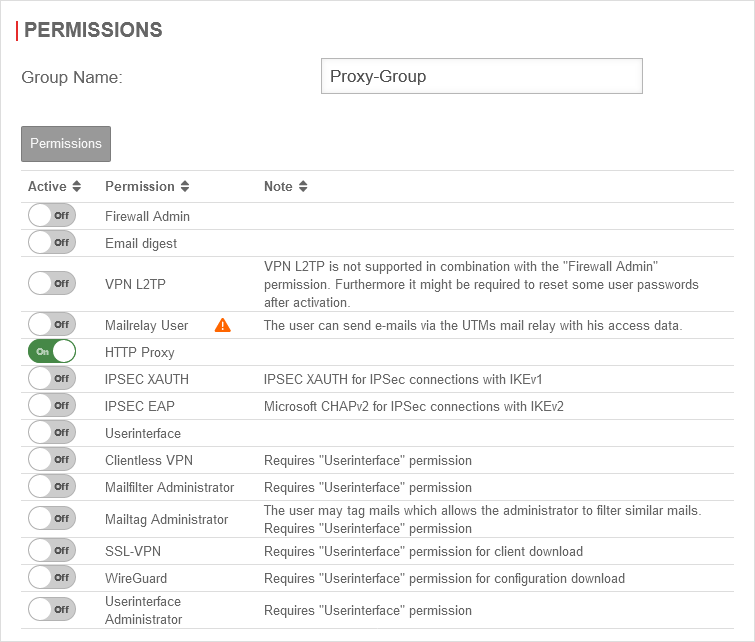
Group name: Proxy-Group Choose a unique name
  • No blank space may be used.
  • HTTP-Proxy: On Enable HTTP proxy function
    Save and close Saves the settings and closes the dialog
    If different proxy users are to be treated differently later, then additional groups can be created.

    Create user

    Next, under Authentication Users  Area Add User Button + must be clicked. Add user UTMuser@firewall.name.fqdnAuthenticationUser UTM v12.6 HTTP Proxy-Authentifizierung Benutzer hinzufuegen Allgemein-en.pngEdit group and enable HTTP proxy
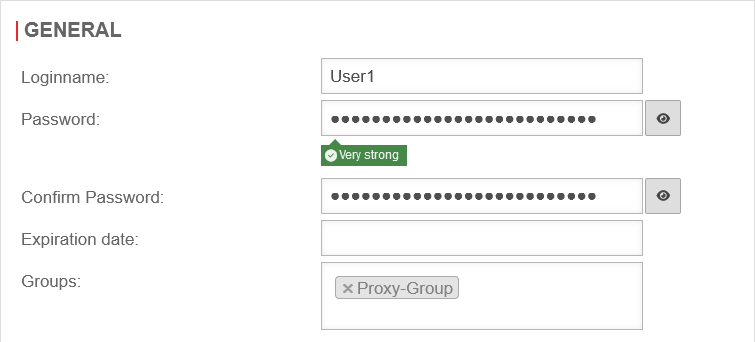
    Login name: User1 Assign login name
    Password:     Assign a secure password
    Confirm password:     Re-enter password
    Groups: »Proxy-Group Select pre-set group
    Save and close Saves the settings and closes the dialog
    This process must be repeated for each user that is to be created.
    More information about user management can be found here.

    Enable authentication in HTTP proxy

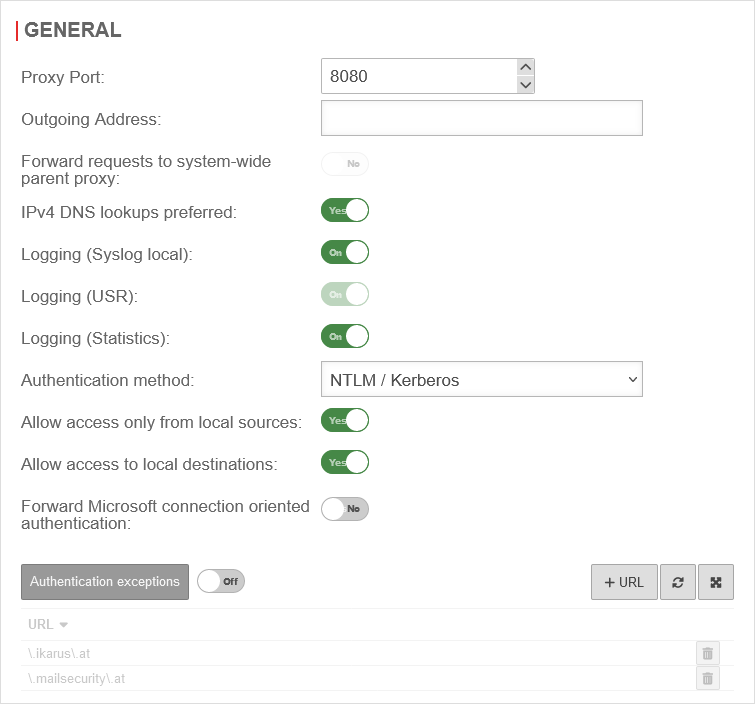
    Authentication in the HTTP proxy can be enabled under Applications HTTP Proxy  Area General. HTTP Proxy UTMuser@firewall.name.fqdnApplications UTM v12.6 HTTP Proxy-Authentifizierung HTTP-Proxy Allgemein-en.pngAuthentication method "Basic"
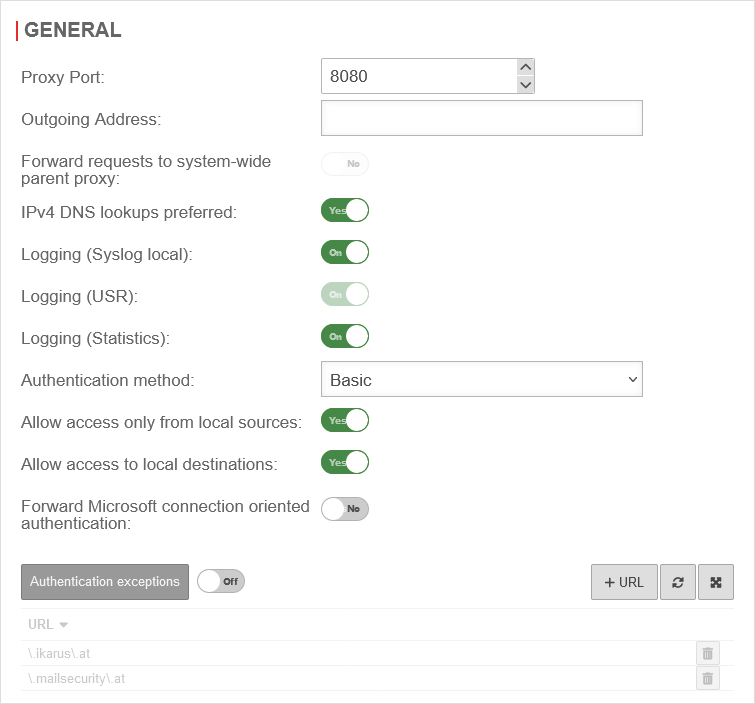
    Authentication method: Basic Select method in drop-down menu
    Save Saves the settings
    If now a browser (prepared as above) is started, an authentication prompt appears before the first web page that is called is displayed. Win7 FF Userauth.png
    Authentication prompt

    Authentication with Active Directory

    First of all, it must be ensured that the UTM also finds the domain.
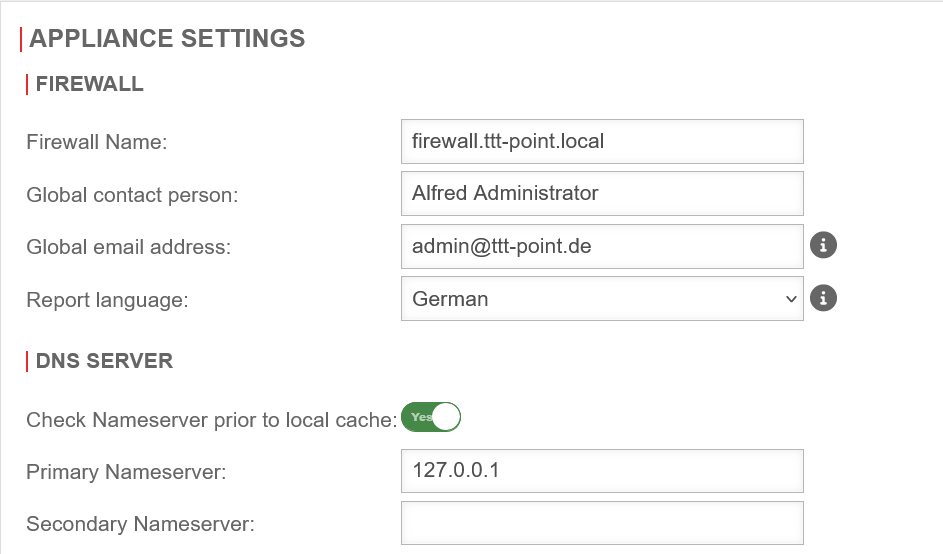
    Under Network Appliance Settings the localhost IP address can be entered in the section DNS Server.
    Appliance Settings UTMuser@firewall.name.fqdn UTM v12.6 HTTP Proxy-Authentifizierung Primaerer Nameserver-en.pngEnter localhost IP address
    Primary name server: 127.0.0.1 Enter localhost IP address
    Save Saves the settings
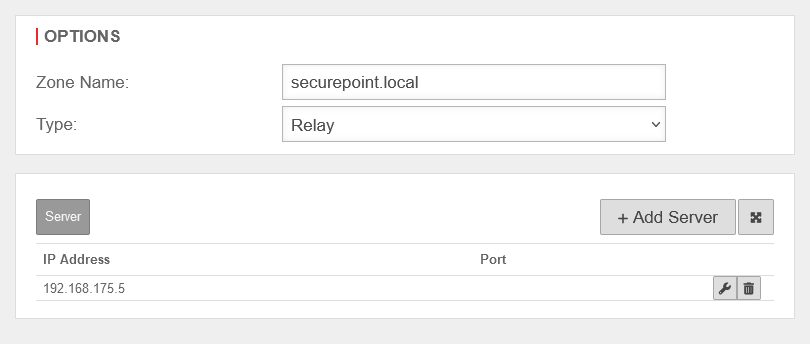
    Then → Applications →NameserverTab Zones Button Add Relay Zone must be called to create a new relay zone with the local domain and the IP address of the domain controller. Add Relay Zone UTMuser@firewall.name.fqdnAdd Relay ZoneNameserver UTM v12.6 HTTP Proxy-Authentifizierung Relay-Zone hinzufuegen securepoint local-en.pngAdd Relay Zone
    Zone name: securepoint.local Select zone name
    Type: Realy Select "Relay" type
    + Add server Enter IP address and select port.
    Then Save and close
    Save and close Saves the settings and closes the dialog

    Connecting UTM to Active Directory

    To be able to connect the UTM to the Active Directory, the Authentication AD/LDAP Authentication button must be clicked under Wizard. Afterwards the four steps of the assistant must run through.
    Step 1: Directory type
    Directory type: AD - Active Directory Select the Active Directory AD/LDAP Authentication Wizard UTMuser@firewall.name.fqdnAuthenticationAD/LDAP Authentication UTM v12.6 HTTP Proxy-Authentifizierung AD LDAP Assistent Schritt 1-en.pngAD/LDAP Authentication Wizard Step 1
    Next Continue to step 2
    Step 2: Settings
    UTM v12.6 HTTP Proxy-Authentifizierung AD LDAP Assistent Schritt 2-en.png
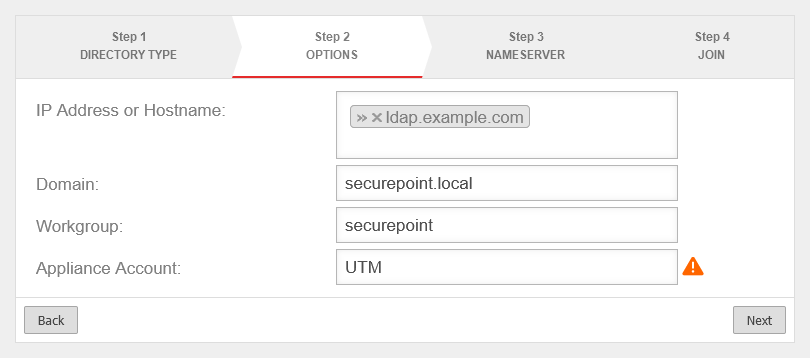
    AD/LDAP Authentication Wizard Step 2
    IP or Hostname: »Idap.example.com Choose name
    Domain: securepoint.local Register domain
    Workgroup: securepoint Preset
    Appliance Account: UTM Preset
    Next Continue to step 3
    Step 3: Nameserver
    UTM v12.6 HTTP Proxy-Authentifizierung AD LDAP Assistent Schritt 3-en.png
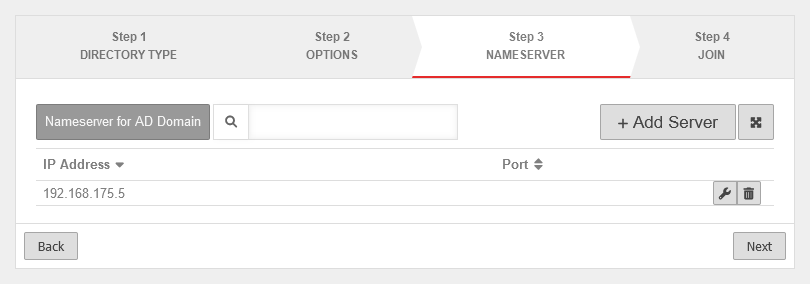
    AD/LDAP Authentication Wizard Step 3
    If this step has already been done, then the IP address is already preset.
    If not, the IP address can be entered via + Add Server.
    Next Continue to step 4
    Step 4: Join
    UTM v12.6 HTTP Proxy-Authentifizierung AD LDAP Assistent Schritt 4-en.png
    AD/LDAP Authentication Wizard Step 4
    Administrator name: Administrator Choose name
    Password:     Assign a secure password
    Done Completes the process
    If everything worked correctly, the Connection status: now shows a green circle. AD/LDAP Authentication UTMuser@firewall.name.fqdnAuthentication Wizard UTM v12.6 HTTP Proxy-Authentifizierung AD LDAP Assistent fertig-en.pngAD/LDAP Authentication Completed

    Create proxy user group for Active Directory

    First of all, a user group is needed.
    To do this, click on Authentication Users  Area Groups Button Add Group.
    Add group UTMuser@firewall.name.fqdnAuthenticationUser UTM v12.6 HTTP Proxy-Authentifizierung Gruppe hinzufuegen Proxy Group-en.png}}
    Group name: Proxy-Group Choose a unique name
  • No blank space may be used.
  • HTTP-Proxy: On Enable HTTP proxy function
    Save and close Saves the settings and closes the dialog
    If different proxy users are to be treated differently later, then additional groups can be created.

    Enable authentication in HTTP proxy for Active Directory

    In order to enable authentication on the proxy, the authentication method must be set to NTLM/Kerberos under → Applications →HTTP ProxyTab General. HTTP Proxy UTMuser@firewall.name.fqdnApplications HTTP-Proxy Log UTM v12.6 HTTP Proxy-Authentifizierung HTTP-Proxy NTLM-en.pngAuthentication method NTLM/Kerberos
    Authentication method: NTLM/Kerberos Select method in drop-down menu
    Save Saves the settings
    The NTLM authentication method has the advantage that the proxy no longer asks for the username and password when the web browser is opened. In this case, authentication is already performed when the operating system is started with the login to the domain.