Setup and configuration of a Virtual UTM in VMware ESXi
Last adaption: 07.2023
New:
- ESXi-Screenshot aktualisiert
Requirements
- ESXi 6.7 or higher
- License for the UTM
- Installation image from the Resellerportal
- For dimensioning specifications see the following Wiki article
ESXi
Installation image
- Memory storage
- Open file storage browser
- Upload installation image
Network
Virtual Switches
For communication, at least two virtual switches are required. Two virtual standard switches are created under "Network" -> "Virtual switches". These are named according to their function (e.g. v_Switch_external, v_Switch_internal). Then an uplink to the physical NetworkInterfaceCard for the external switch is added.
Port groups
Port groups are required so that the switches can be created in the UTM. Again, two port groups are created for the internal and external network and linked to the respective virtual switch.
Virtual machine
- Virtual machine -> Create/register VM
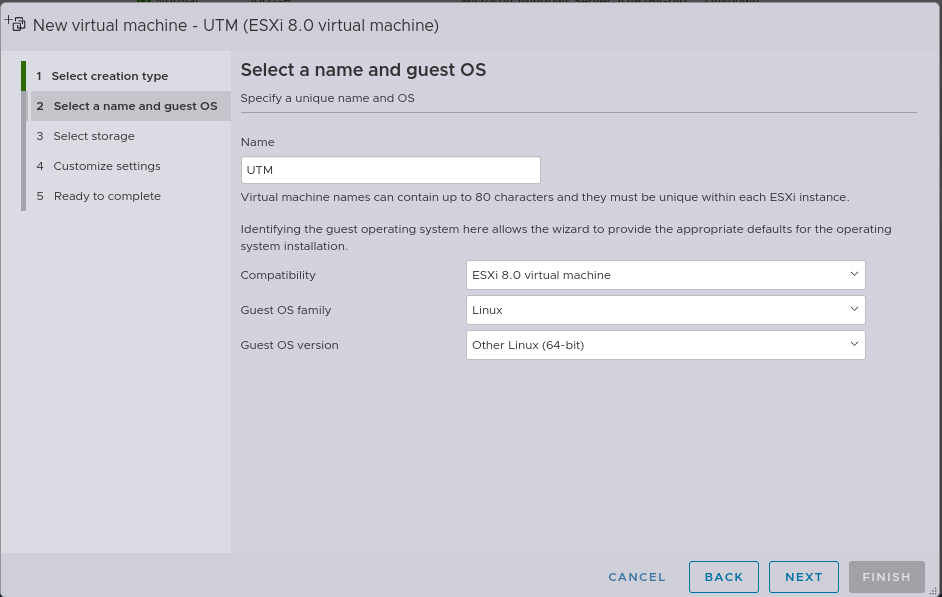
Setup Wizard
Step 1Step 1
| |||
| |||
| The following settings have proven to be effective: notempty updated
| |||
| Caption | Value | Description |  |
|---|---|---|---|
| Compatibility: | Virtual ESXi 8.0 machine | Set compatibility as high as possible (min. 6.7). | |
| Guest operating system family: | Linux | Select the family of the guest operating system. Depending on the selection, the version of the guest operating system must be selected accordingly. | |
| Version of the guest operating system: | Other Linux system (64 bit) | Based on the guest operating system family selection, select the appropriate version. | |
Step 2Step 2
| |||
| |||
Step 3Step 3
| |||
| |||
Configuration of the UTM
Configuration and first login are described in another wiki article.