- Correction for the certificate that is stored on the client
Introduction
This HowTo describes how to create an IPSec Roadwarrior connection using IKEv2 EAP-MSCHAPv2 to a Windows client.
Customization of the server certificate
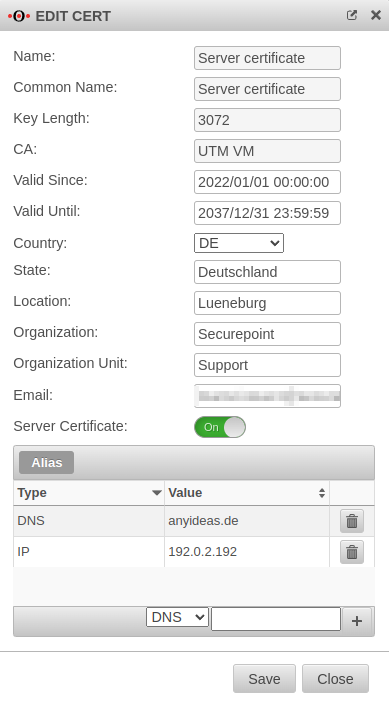
The server certificate on the UTM must be adjusted so that the Windows client trusts the IPSec connection.
For this purpose, a Subject Alternative Name is defined:
- If the connection is established via a static IP address, this address is entered
- If the connection is established via a domain name, this name is entered
- Both entries can also be combined
In the Edit button opens the edit dialog of the server certificate.
If there is no server certificate yet, the , or buttons will create one.
Under Alias either the IP address is entered with IP, or the domain name with DNS and added with the button.
The button is used to save the entries.
IPSec with EAP-MSCHAPv2
An IPSec Roadwarrior connection with EAP-MSCHAPv2 to the Windows client is required. The corresponding Wiki article IPSec with EAP-MSCHAPv2 contains the instructions for this.
Adjustment of the IPSec connection
For the IPSec connection used, IKEv2 phases 1 and 2 must be adjusted, as Windows does not support the default values.
Under Tab Connections, the buttons for the corresponding IKEv2 phases are clicked for the IPSec roadwarrior connection.
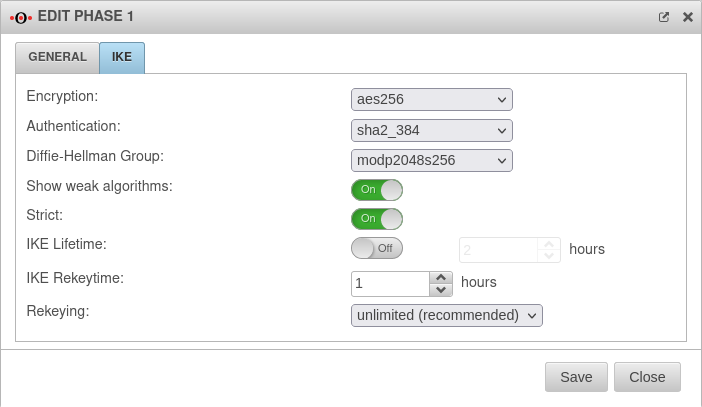
IKEv2 Phase 1
The button switches the window to the IKE tab and makes the following recommended settings
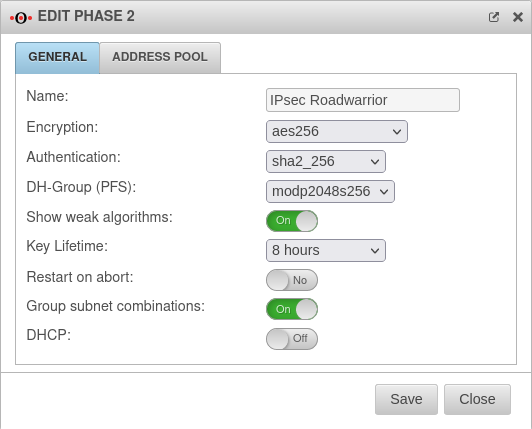
IKEv2 Phase 2
The button switches the window to the General tab and makes the following recommended settings
Setting up the connection on the Windows client
Import CA from server certificate
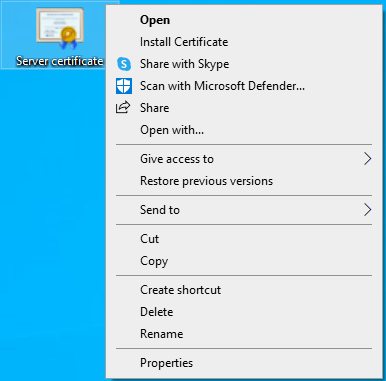
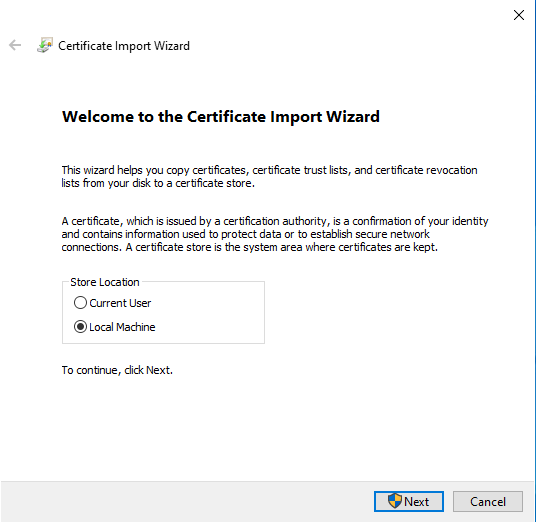
The public key of the CA, which belongs to the server certificate revised above, is stored as a certificate on the Windows client. Only then does the client trust the UTM.
- The CA must be exported as PEM and opened in an editor.
- The section between -----BEGIN PRIVATE KEY----- and -----END PRIVATE KEY----- is deleted.
- The CA must be saved as a .crt file.

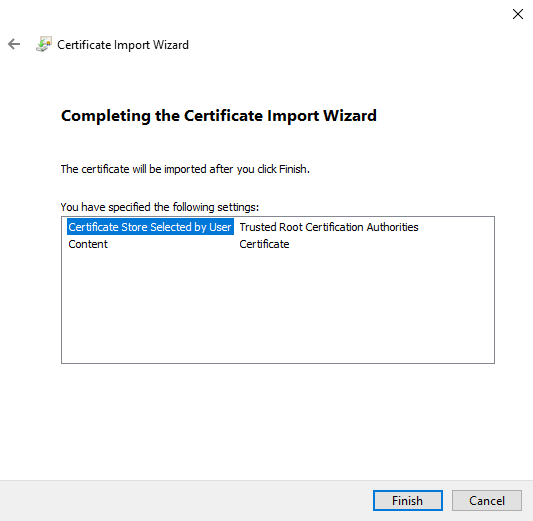
- Select Store all certificates in the following memory
- Select Certificate store: Trusted root certification authorities
Connection setup
The IPSec connection can be added to the Windows client in different ways.
Here the method via Powershell is described.
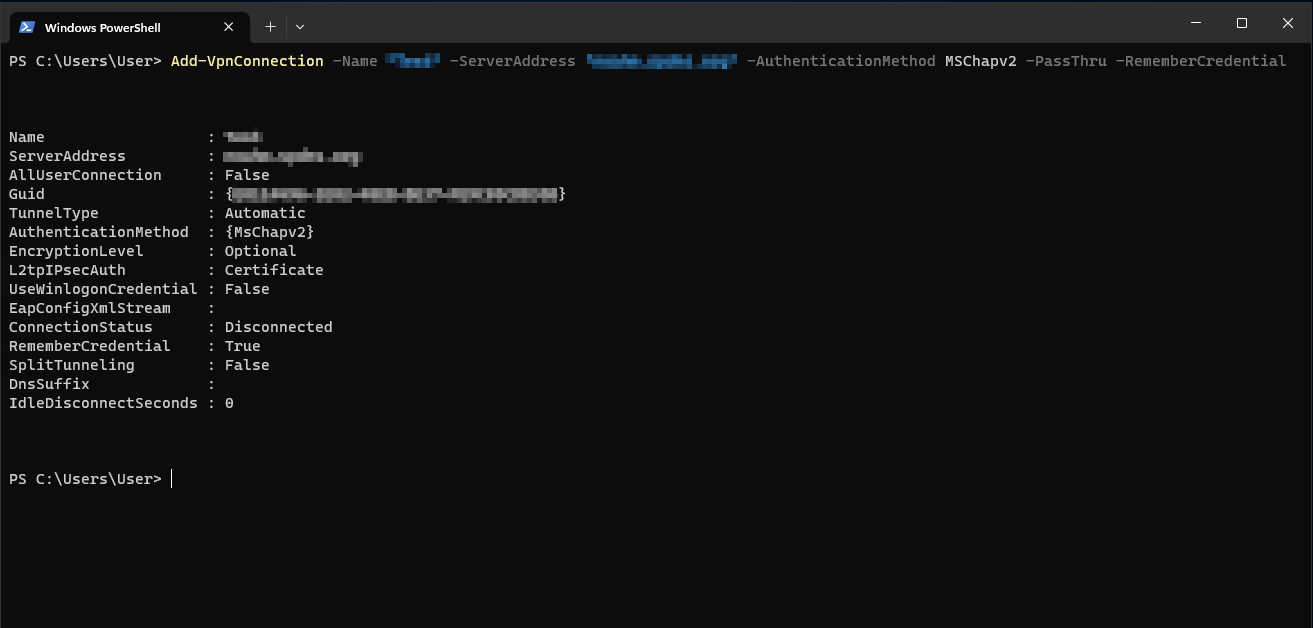
Add-VpnConnection -Name "IPSec RW Windows" -ServerAddress "utm.spdns.eu" -AuthenticationMethod MSChapv2 -PassThru -RememberCredential
The following adjustment must be done in the process:
- Add-VpnConnection -Name "IPSec RW Windows": The name of the created IPSec connection
- -ServerAddress "utm.spdns.eu": Hostname of the UTM
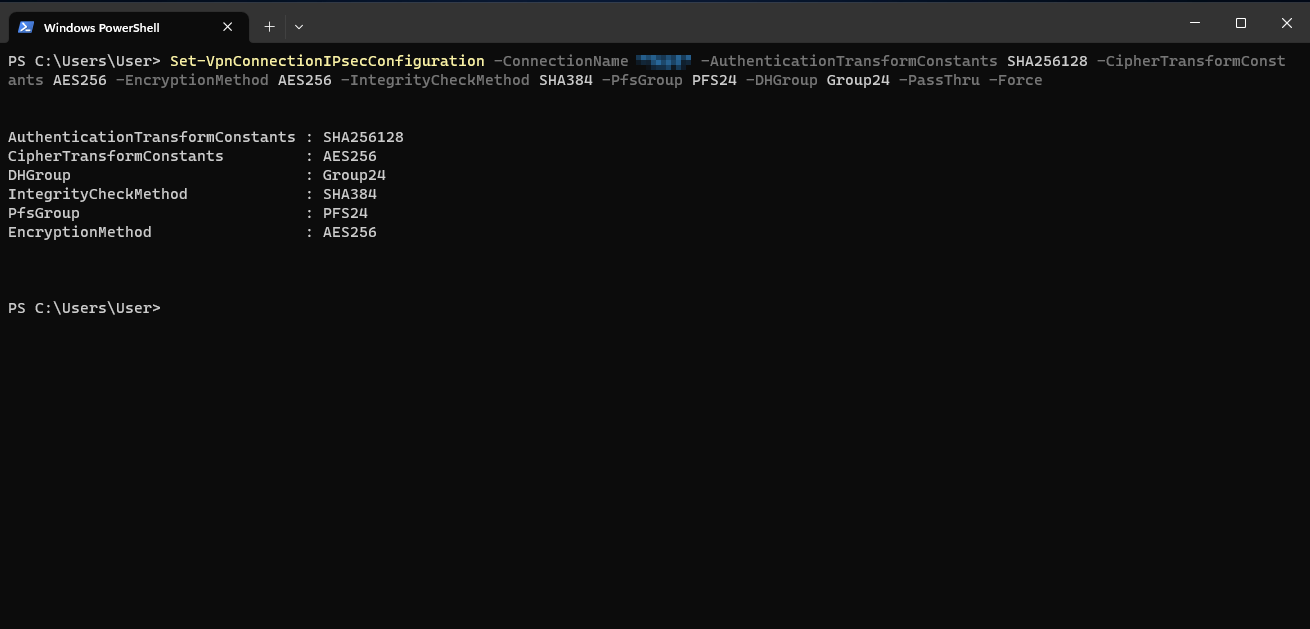
Set-VpnConnectionIPsecConfiguration -ConnectionName "IPSec RW Windows" -AuthenticationTransformConstants SHA256128 -CipherTransformConstants AES256 -EncryptionMethod AES256 -IntegrityCheckMethod SHA384 -PfsGroup PFS24 -DHGroup Group24 -PassThru -Force
The following adjustment must be done in the process:
- -ConnectionName "IPSec RW Windows": The name of the created IPSec connection
With the option -RememberCredential (in the first command) the Windows client remembers the login data. Alternatively, the -UseWinlogonCredential option can be entered. Then the Windows login data of the current user is passed to the UTM.
