Setting up the Exposed Host on a Fritz!Box
New article with version: 12.5.2 10.2023
notempty
This article refers to a Resellerpreview
Introduction
Introduction
This article includes descriptions of third-party software and is based on the status at the time this page was created.
Changes to the user interface on the part of the manufacturer are possible at any time and must be taken into account accordingly in the implementation.
All information without warranty.
notempty
This can be useful for an IPSec connection between a UTM and a Fritz!Box, or for IPSec connections of multiple UTMs with a Fritz!Box.
Configure Exposed Host
Configure Exposed Host
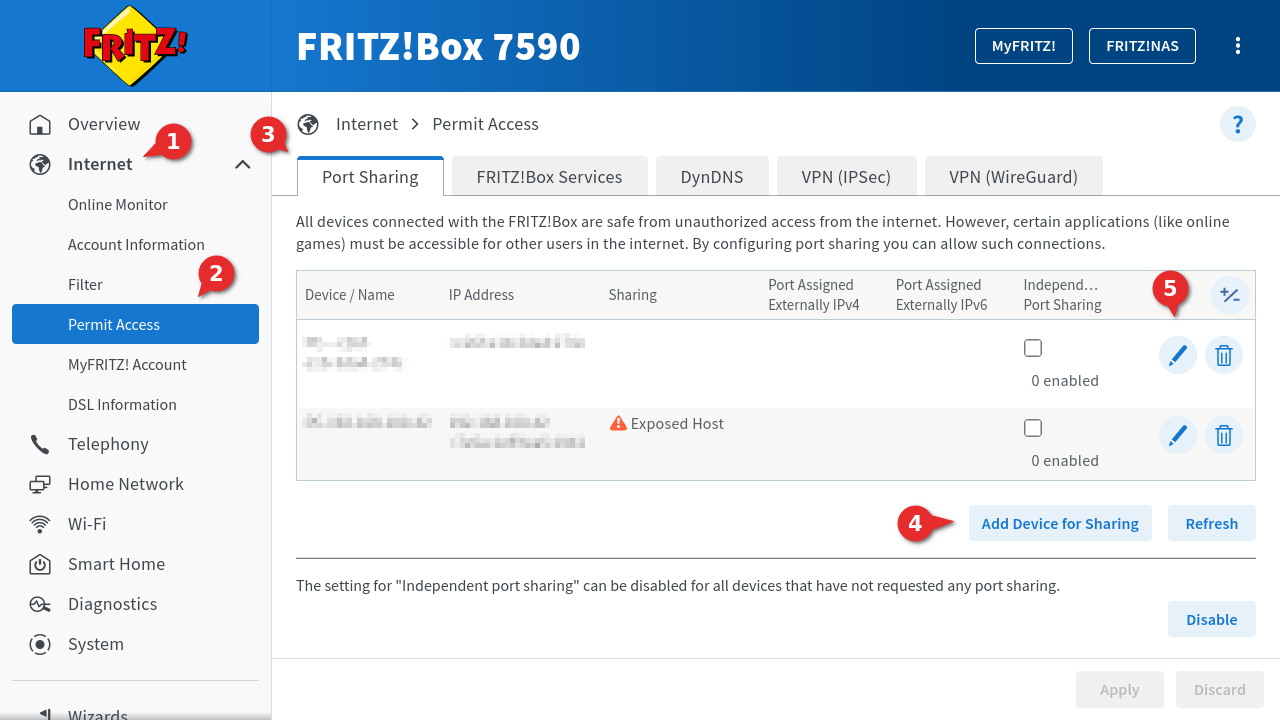
Step 1 - Add deviceStep 1 - Add device
| |||
|
 | ||
Step 2 - Configure deviceStep 2 - Configure device
| |||
| Caption | Value | Description | 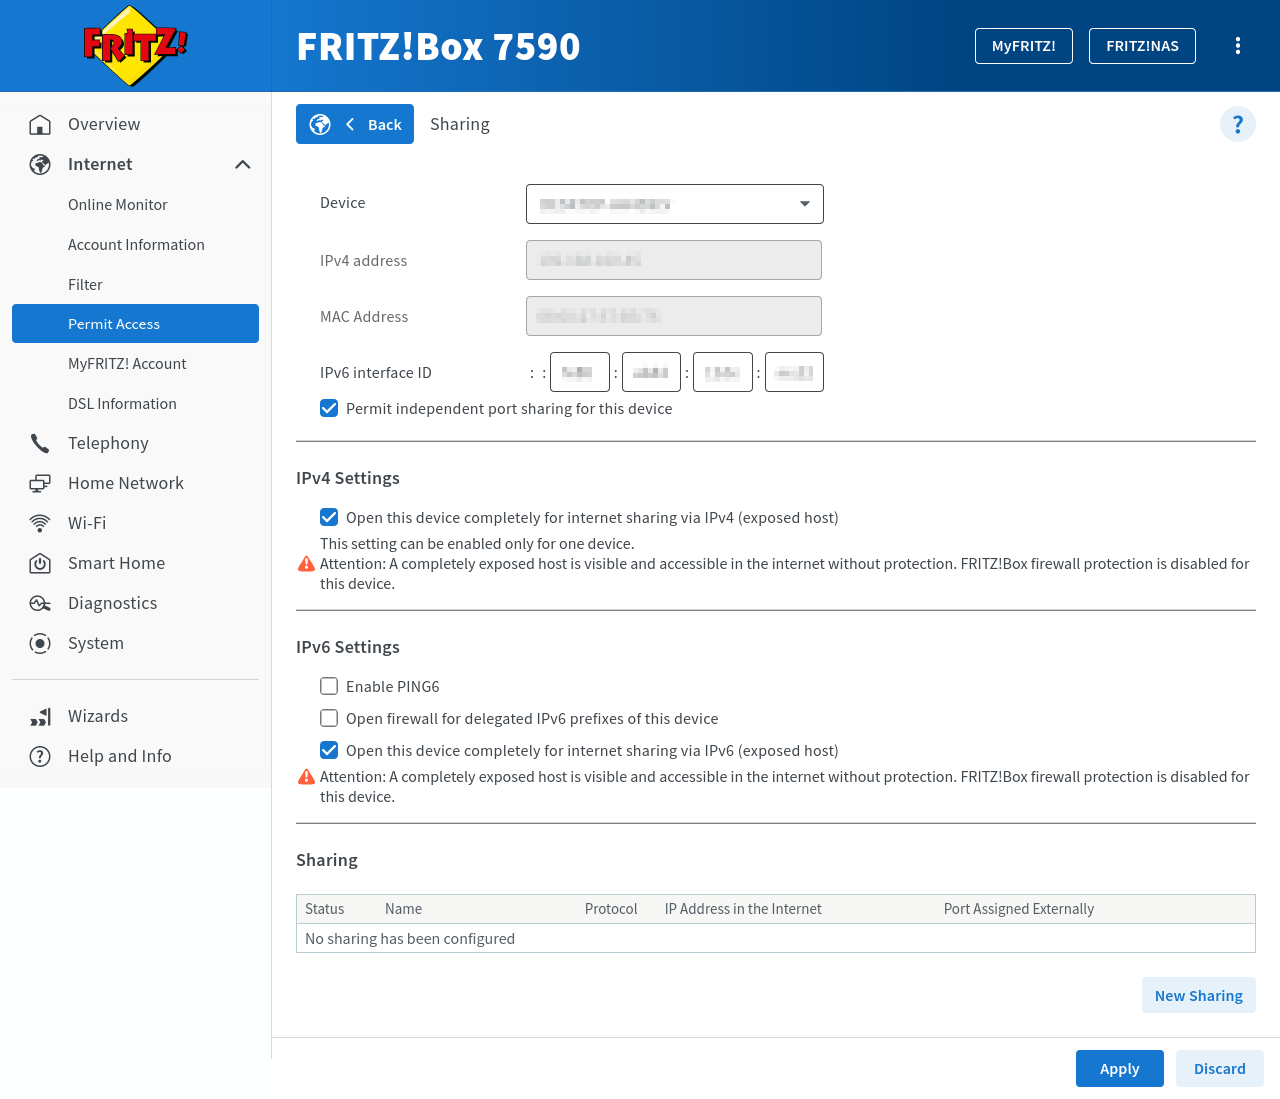 |
|---|---|---|---|
| Device | Select the appropriate UTM | ||
| IPv4 address | Set automatically after device selection | ||
| MAC address | Set automatically after device selection | ||
| IPv6 Interface-ID | :: : : : | Set automatically after device selection | |
| The following options can only be set after device selection. | |||
| Allow independent port sharing for this device | Enable to allow independent port sharing for the UTM | ||
| IPv4 settings | |||
| Fully enable this device for Internet access via IPv4 (Exposed Host) | Enable, so that a corresponding configured port sharing is possible | ||
| IPv6 settings | |||
| Enable PING6 | If required, PING6 can be enabled by activation | ||
| Open firewall for delegated IPv6 prefixes of this device | If required, activation can open the firewall for delegated IPv6 prefixes for this device | ||
| Fully enable this device for Internet access via IPv6 (Exposed Host) | Enable for IPv6 to allow appropriately configured port sharingnotempty Corresponding Firewall Rules are required for this.
| ||
Step 3 - Permit AccessStep 3 - Permit Access
| |||
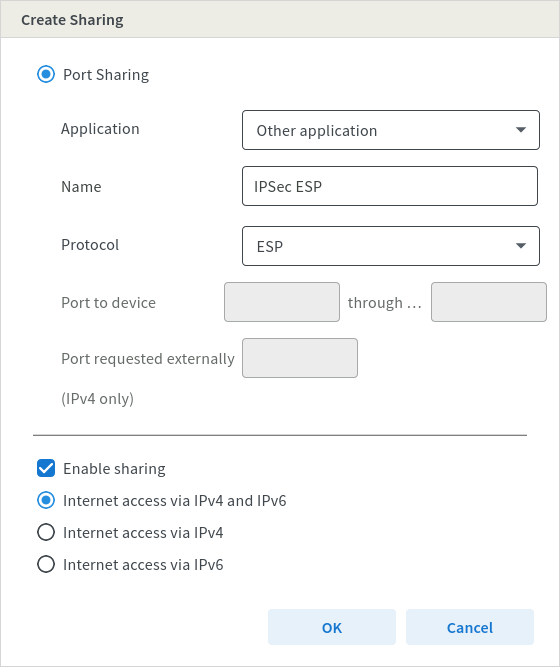
| In the Permit Access section, the button in the window that opens is used to make one port share each for ESP and UDP 500/4500. | |||
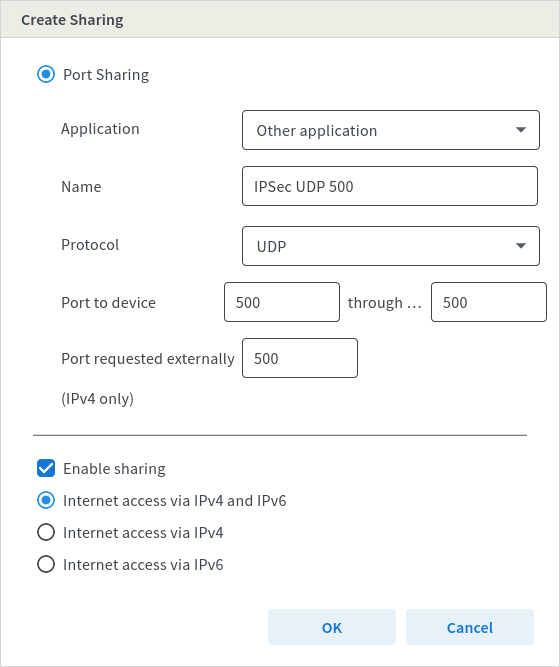 Fig.2 Application
Name IPSec UDP 500
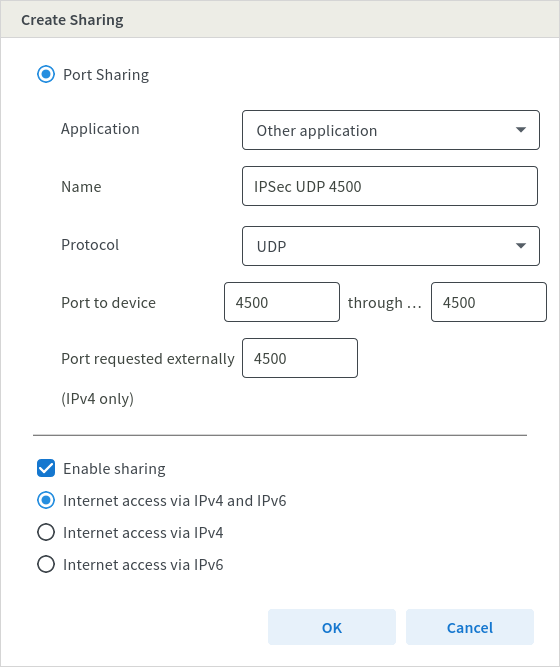 Fig.3 Application
Name IPSec UDP 4500
| |||
| Subsequently, the configuration is applied via the button. | |||
