Jump to:navigation, search
Wiki


notempty
Dieser Artikel bezieht sich auf eine nicht mehr aktuelle Version!

notempty
Der Artikel für die neueste Version steht hier

notempty
Zu diesem Artikel gibt es bereits eine neuere Version, die sich allerdings auf eine Reseller-Preview bezieht


De.png
En.png
Fr.png


Konfiguration of the Captive-Portals
Last adaptation to the version: 12.1.9
New:
  • No changes to the Server Settings are required any more
  • ACME wildcard certificates can be used for the landing page

Preliminary remark

The captive portal redirects an HTTP client in a network to a special web page (so-called landing page) before it can connect normally to the Internet. Thus, acceptance of the condition of use must take place and additional authentication can be configured.


  • As of version 12, the UTM can manage ACME certificates. (Let's Encrypt)
    It is recommended to use either an ACME certificate or a purchased certificate from an official CA (or an already existing wildcard certificate) for the captive portal to prevent later irritations due to warning messages of the browser.

  • Planning

    The following aspects should be considered before configuration:

    • For which networks should the captive portal be configured?
      Will all potential users be reached exclusively?
    • How and by whom will the terms of use be written?
    • Should authentication take place?
    • Which internal web servers are not allowed to be reached from the network behind the captive portal?


    Jus a few preparations must be made to use the captive portal:

    1. A certificate must be available for the landing page
    2. Implicit and port filter rules must allow access

    Changing the firewall name is no longer necessary since v12.
    The host name of the portal page is configured under → Applications →Captive PortalTab General.


    Provide certificate

    Create an ACME certificate

    To use ACME certificates (Let's Encrypt) the following steps are required:

    • Activate ACME service
    • Generate ACME Challenge Token on spDyn
    • Create certificate
    • Add SAN with spDyn hostname and token
    • Create certificate
  • Wildcard certificates are required for use with the Captive Portal!


  • notempty
    This article refers to a version that is no longer current!

    notempty
    The article for the latest version is here

    notempty
    There is already a newer version of this article, but it refers to a Reseller-Preview


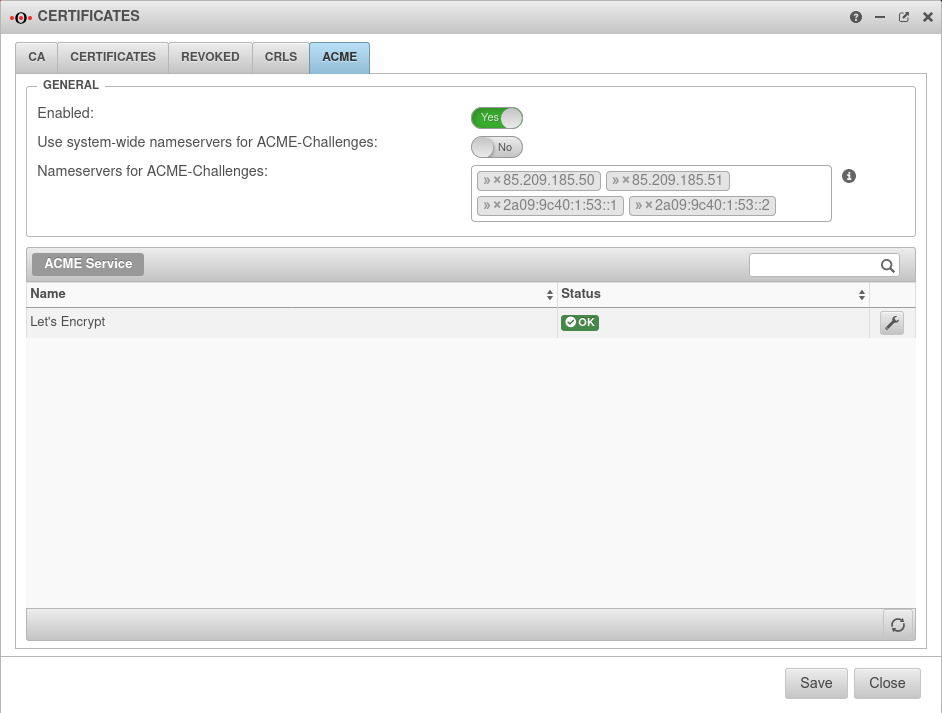
    → Authentication →CertificatesTab ACME


    Caption Value Description UTM v12.4 Zertifikate ACME Nameserver-en.png
    ╭╴General ╶╮
    Activated: Yes Enables the use of ACME certificates.
    For more information see below Activate ACME service.
    Use system-wide nameservers for ACME challenges: Yes If the addresses for the servers for the extension of the ACME challenges cannot be resolved via the system-wide nameserver (e.g. due to configured relay or foreward zones), alternative nameservers can be entered by deactivating No.
    Nameserver for ACME challenges:
    Can be used for ACME challenges when system-wide nameserver is disabled
    »85.209.185.50»85.209.185.51»2a09:9c40:1:53::1»2a09:9c40:1:53::2 Here you can enter the nameservers for the ACME-Challenges.


    Activate ACME service

    Activate ACME service

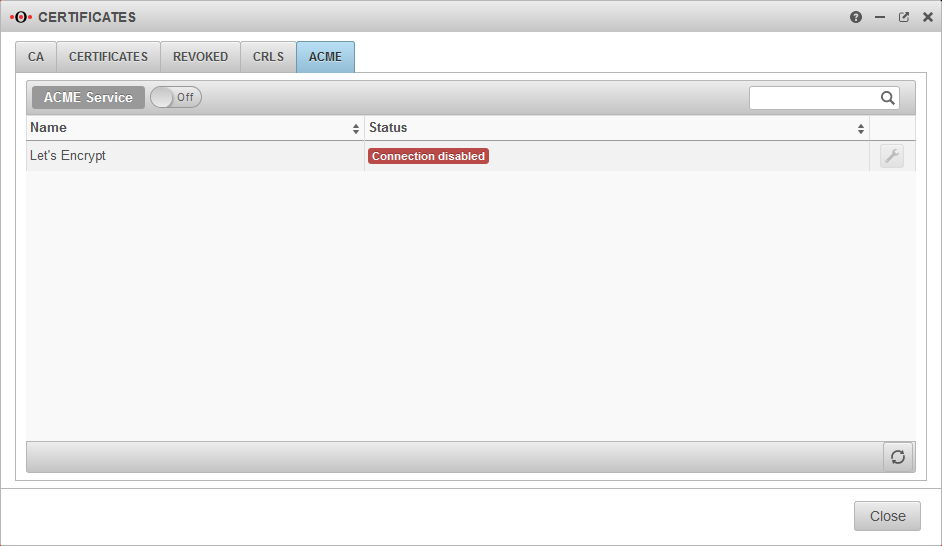
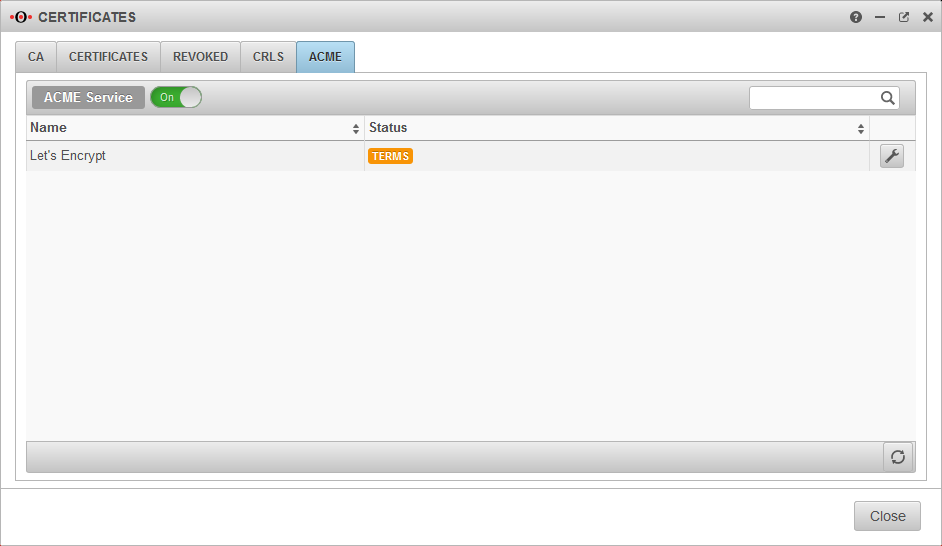
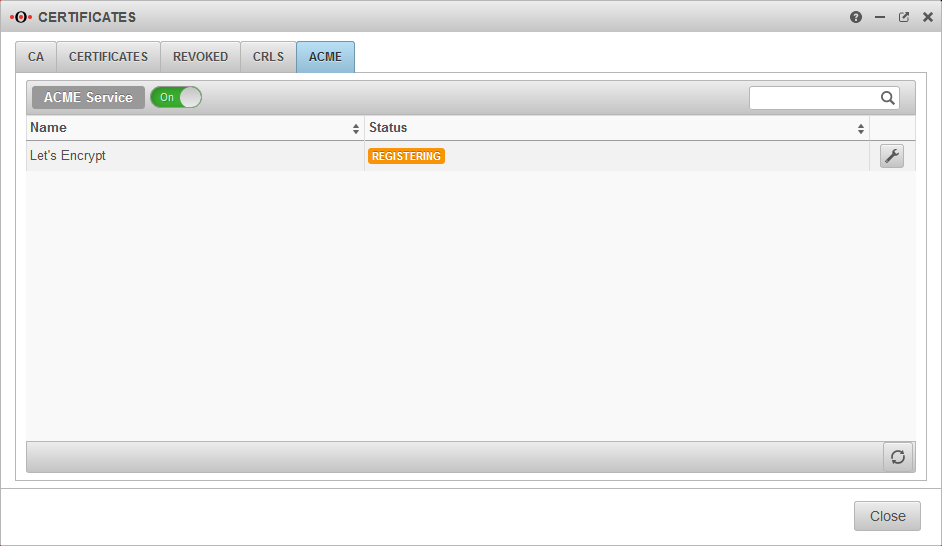
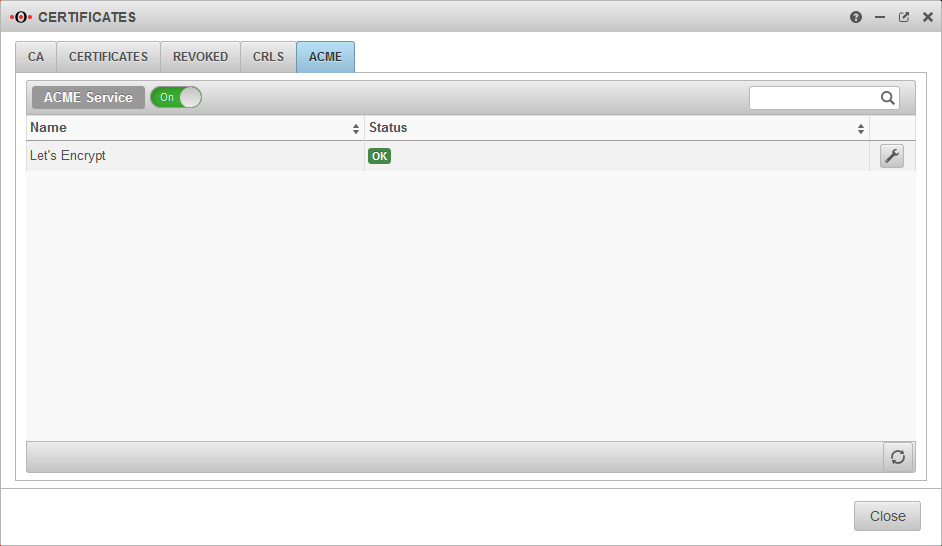
    In order to use ACME certificates, the service must first be activated in the ACME tab.

    • Once the service has been activated, the link to the terms of use is loaded and the settings can be accessed
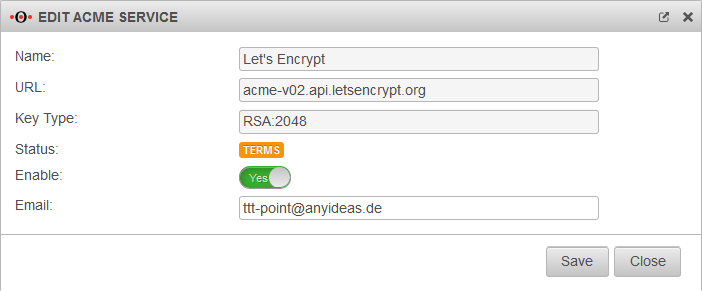
    • With the button Activate Yes and the storage of an Email address for notifications by the ACME service provider (here: Let's Encrypt), the information can be Saved
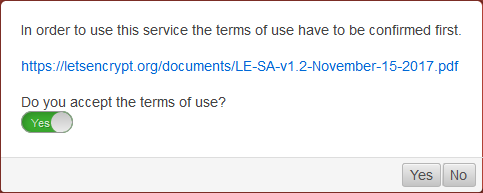
    • A dialog will appear with a link to the Terms of Use, which must be accepted Yes.


    Generate token

    Generate token

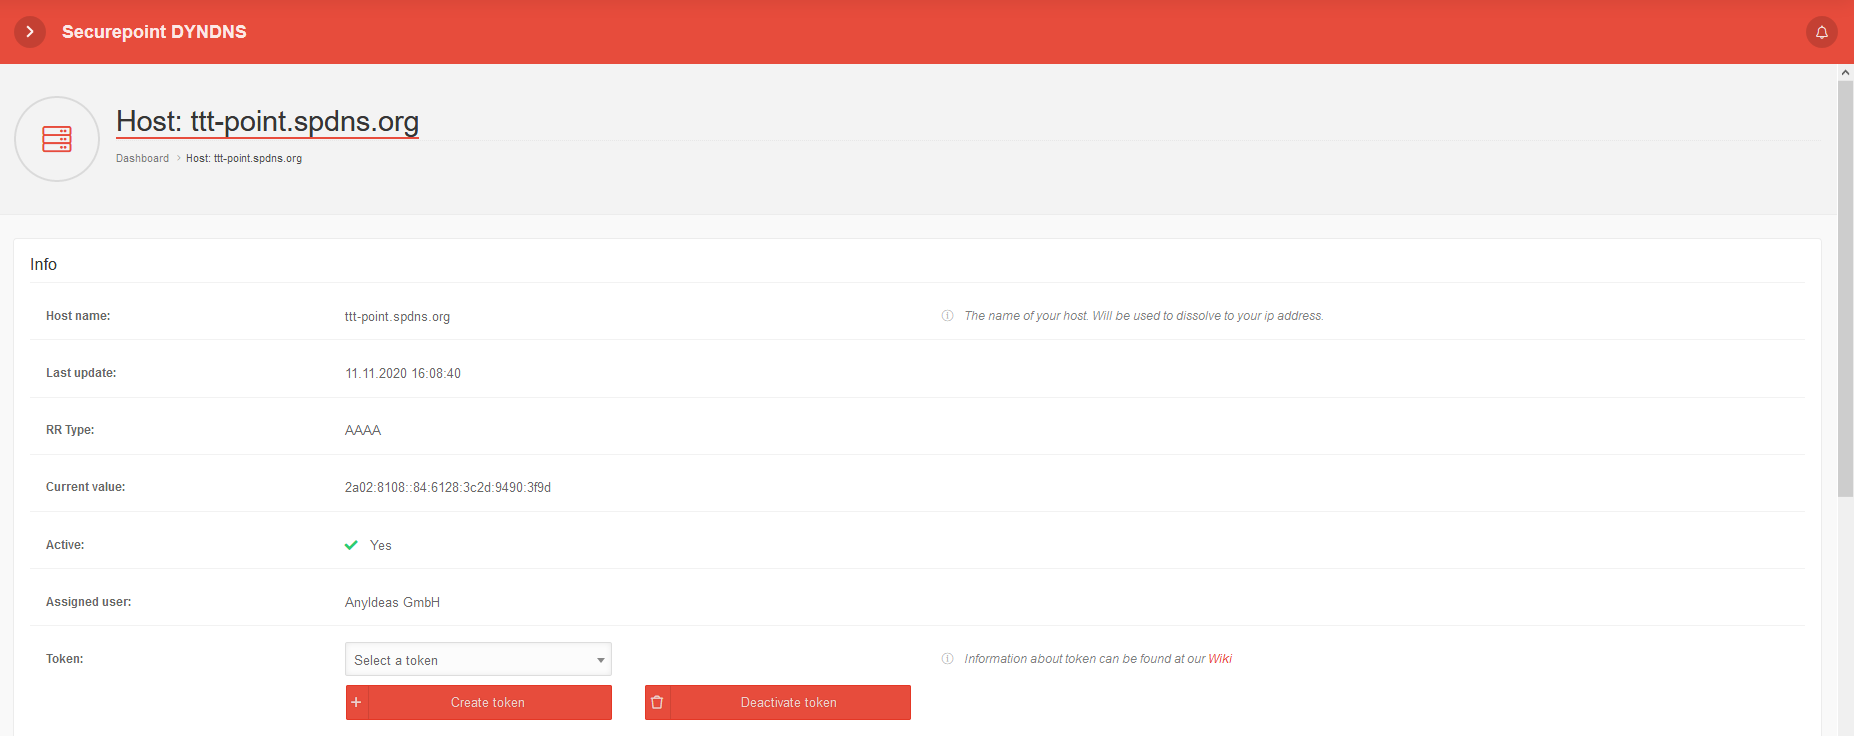
    spDYN To generate the certificates, the ACME token must first be generated in the spDYN portal.
    Within the spDYN portal, the corresponding host must be opened.

    • Call up spDyn Host
    • Select the ACME Challenge Token from the Token drop-down menu.
    • Generate token
      notempty
      The token is displayed once during generation and cannot be displayed again.

      The token should be noted and stored safely.

    Renewal of ACME certificates

    Renewal of ACME certificates
    notempty
    New as of 12.4
    The renewal of the ACME/Let's Encrypt certificates takes place via the nameservers used, which are configured under ╭╴General╶╮ (see above)


    ACME Certificates

    ACME Certificates
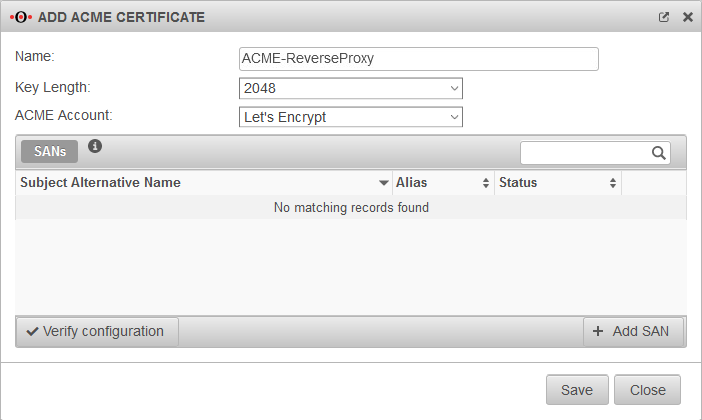
    After completing the previous steps, the actual certificate can now be generated. A click on Add ACME certificate in the Certificates tab opens the corresponding dialog.
    Caption Value Description UTM v12.1 Zertifikate ACME hinzufügen-en.png
    Add ACME certificate

    Add ACME certificate

    UTM Dialog → Authentifizierung →CertificatesTab Certificates Button Add ACME certificate
    Name ttt-Point Name to identify the certificate
    Key length: 2048 Key length of the certificate. Possible values: 1024 / 2048 (default) / 4096
    ACME Account Let's Encrypt ACME account which should be used
    Subject Alternative Name configure with Add SAN

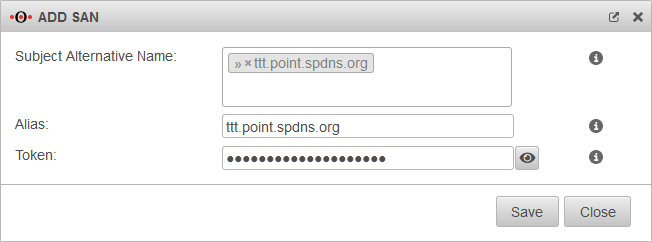
    Add Subject Alternative Name

    Subject Alternative Name »ttt-point.spdns.org The Subject Alternative Name ('SAN) is stored in the certificate and corresponds to the called URL UTM v12.1 Zertifikate ACME SAN-en.png
    Add Subject Alternative Name
    »*.ttt-point.spdns.org
  • Wildcard SANs can also be used.
  • Wildcard certificates are strongly recommended for use with a captive portal
    If a forward zone is required for the captive portal in the nameserver and an A record is then entered for it, this is no longer resolved in the public DNS.
    Verification and renewal of an ACME certificate with this name will then fail.
      
  • Alias ttt-point.spdns.org If the SAN is a spDYN hostname it is automatically taken on as alias.
    (Also for wildcard domains without * )
    Token ••••••••••••• The token from the spDYN portal (see above) proves to the ACME service that you are allowed to dispose of the hostname.
    displays the token.
    When inserting the token from the clipboard it can happen that there are blanks before or after the actual token. These must be removed
    Save

    Check configuration

    Check configuration
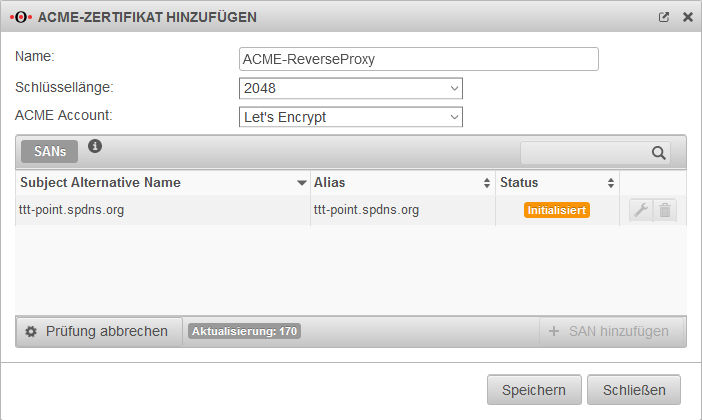
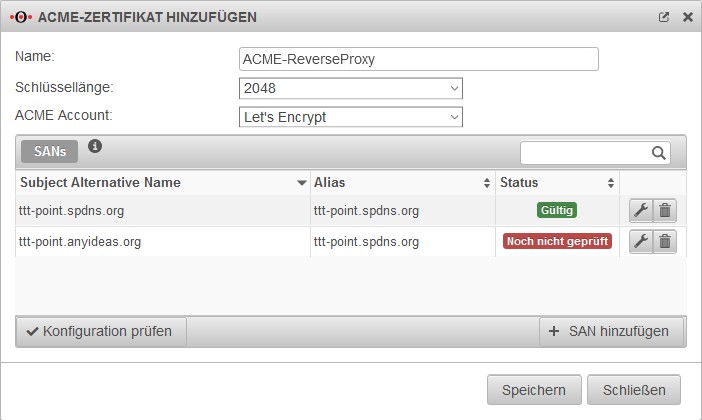
    Status Not yet checked Before the actual generation of the certificate, the configuration must first be checked. This is done by clicking on the Check configuration button. UTM v12.1 Zertifikate ACME initialisiert.png
    initialize
    Initializes
    The check can take several minutes. During this process, the dialog is updated regularly.
    Valid If the check is successful, the status Valid is displayed.
    DNS error Possible causes:
    • wrong token
    • DNS resolution disturbed
    • zone forwarding configured in DNS
    • local DNS zone configured in DNS
    • If there is a zone in the nameserver of the UTM for a domain that also uses the ACME certificate, the DNS resolution fails. Solution: Create a CNAME record for this domain.
      • Search for the zone under Menu/Applications/Nameserver/Zones
      • click on Edit
      • Click on +Add Entry in the window
      • enter a suitable name under Name:'
      • select CNAME under Type:
      • enter the domain under Value:
        
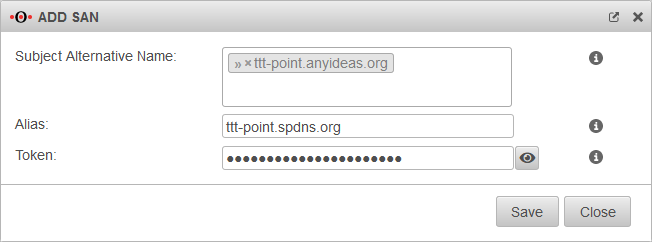
    Configure Subject Alternative Name for an external DNS zone with Add SAN

    Add SAN for external DNS zone

    Subject Alternative Name ttt-point.anyideas.org The Subject Alternative Name (SAN) from the external DNS zone. UTM v12.1 Zertifikate ACME SAN extern-en.png
    Alias ttt-point.spdns.org The alias must also be the spDYN name for the external DNS.
    DNS-Provider Basically, an additional CNAME record with the prefix _acme-challenge and the subsequent host name must be created at the DNS provider hosting the external zone (here: ttt-point.anyideas.org). _acme-challenge.ttt-point.spdns.org. (With "." at the end!)
    An example excerpt from a Zonefile for the configuration of the two hostnames mx.ttt-point.de and exchange.ttt-point.de looks like this:
    _acme-challenge.mx.ttt-point.anyideas.org. IN CNAME _acme-challenge.ttt-point.spdns.org.
    _acme-challenge.exchange.ttt-point.anyideas.org. IN CNAME _acme-challenge.ttt-point.spdns.org.

  • The hostname must be resolvable in the public DNS.
    Certificate creation for .local, .lan, etc. zones is not possible.
  • The UTM must be able to resolve the host name correctly via external nameservers.
    notempty
    If the internal and the external/public domain are identical, the zone must also be delegated to the internal DNS.
  • Check configuration Additional SANs can be added and checked as long as the Save button has not been pressed. UTM v12.1 Zertifikate ACME SAN überprüft.png
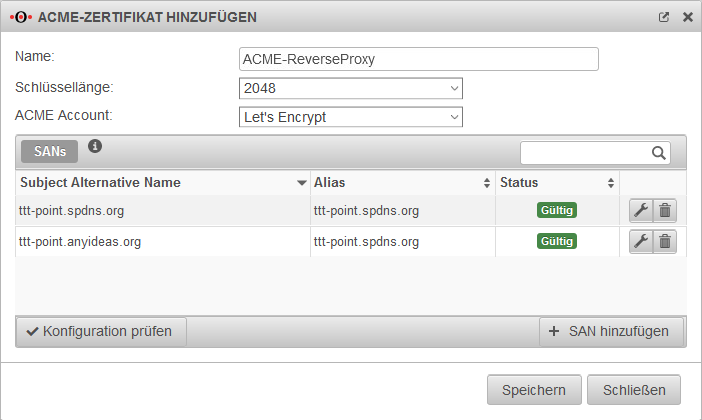
    Status Valid Once all the required SANs have been successfully checked, the certificate can be saved. UTM v12.1 Zertifikate ACME SAN gültig.png
    Save notempty
    Once the certificate has been saved, no more changes can be made. Only the alias and the token can be changed for existing SANs.
  • If additional or different SANs are required, a new certificate must be created and the existing one has to be revoked.
  • Creation of the ACME certificate

    Creation of the ACME certificate
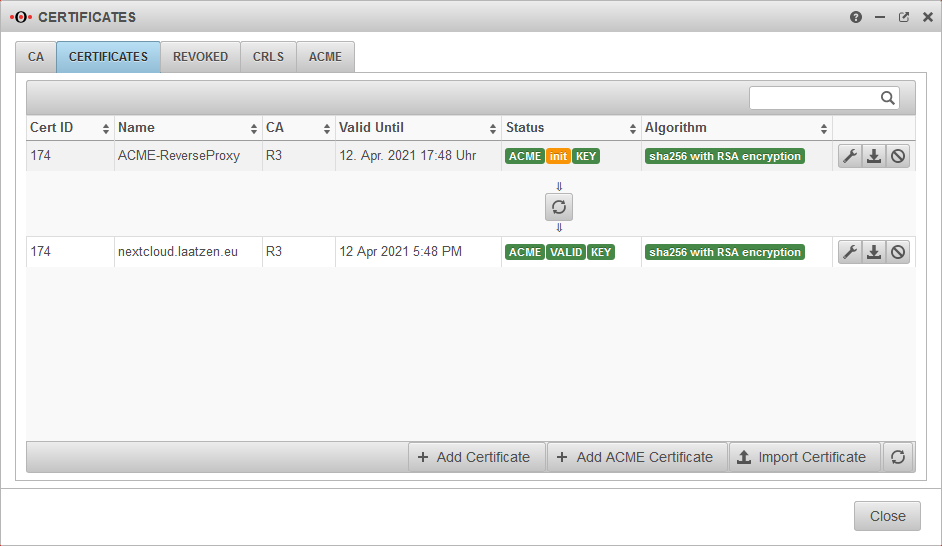
    Save If the previous steps have been completed successfully, the actual process for validating and generating the certificate is triggered by clicking Save.


    This process may take some time. To update the status, the dialog must be reloaded manually.

    UTM v12.1 Zertifikate ACME-init-valid-en.png

    Error handling

    Error handling
    The following status values can occur
    Status Description Note
    Valid The ACME certificate is valid
    Not yet verified The ACME certificate still needs to be verified
    Internal error An internal error has occurred Possible causes:
    • Broken hardware
    • Software error
    • Configuration error
    Connection error No connection possible / present Check the connection settings
    Invalid The ACME certificate is invalid and cannot be used
    DNS error A DNS error has occurred Possible causes:
    • wrong token
    • DNS resolution disrupted
    • zone forwarding configured in DNS
    • local DNS zone configured in DNS
    • If there is a zone in the nameserver of the UTM for a domain that also uses the ACME certificate, the DNS resolution fails. Solution: Create a CNAME record for this domain.
      • Search for the zone under Menu/Applications/Nameserver/Zones
      • click on Edit
      • Click on +Add Entry in the window
      • enter a suitable name under Name:'
      • select CNAME under Type:
      • enter the domain under Value:
        
    Banned The ACME certificate has been revoked Either it has been manually revoked, or it has lost its validity. For example, the ACME certificate expired and was not renewed.
    Initializing The verification of the ACME certificate is initiated This can take several minutes. The status is updated regularly.
    Deferred The verification of the ACME certificate is postponed Refreshing the status will take some time, since the limit of requests was already reached
    Initialized The ACME certificate is being verified The verification of the ACME certificate is initiated

    Purchased certificate

    Alternatively, a purchased certificate can also be imported

    Local certificate

    The UTM can also provide its own certificate

    UTM/APP/Captive Portal-lokal v12.1.9

  • Since this certificate is created by its own CA, it cannot be checked for authenticity by a browser.
    The user receives a warning message in which the trustworthiness must be confirmed once.


  • notempty
    This article refers to a version that is no longer current!

    notempty
    The article for the latest version is here

    notempty
    There is already a newer version of this article, but it refers to a Reseller-Preview


    Captive Portal User

    Captive Portal User
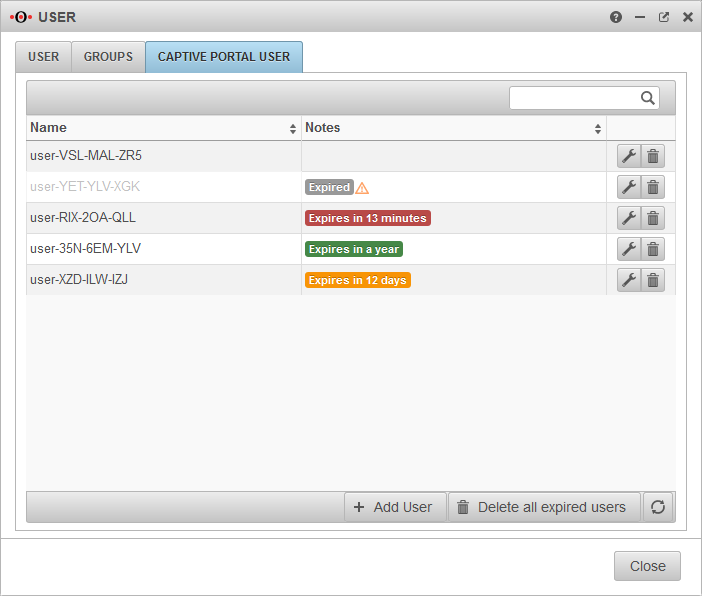
    UTM v12.1 Benutzer CP Benutzer-en.png

    Captive Portal users must authenticate themselves and agree to the terms of use when they connect to an appropriately configured network. Only then is the network access released - according to the port filter rules.


    UTM v12.2 UI Benutzerverwaltung-en.png
  • Firewall users who are members of a group with the permission Userinterface Adminstrator On (→ Authentication →UserTab Groups Button can access the Captive Portal user management via the User-Interface (in the default port 443)

  • Add user

    Add user

    Captive Portal users can be managed by:

    • Administrators
    • Users who are members of a group with the permission Userinterface Administrator .
      They reach the user administration via the user interface.
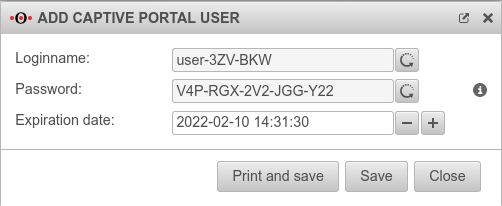
    Caption Value Description UTM v12.2.2 Benutzer CP Benutzer hinzufügen-en.png
    Login name: user-DIW-ATS-K5C Randomly generated login name.
    Once generated, login names cannot be changed after saving.
    Password: FWF-II7-4NB-GXQ-URC Randomly generated password
    The login name and password can be regenerated with the button. Once saved, passwords cannot be displayed again.
    Expiry date: yyyy-mm-dd hh:mm:ss Limits the validity of the credentials
    / New as of v12.2.2 These buttons can be used to shorten (-) or extend (+) the expiry date by 24 hours from the current time
    Print and save Saves and closes the dialogue, creates an html page with the username and password and opens the print dialogue
    Save Saves the information and closes the dialogue.
  • The password can then no longer be displayed. However, a new password can be created at any time .
  • Close Closes the dialogue without saving changes.


    weggefallen mit v12.1:


    Entfall mit 12.1:


    neu ab v12:


    Implied rules

    Firewall - Implied rules

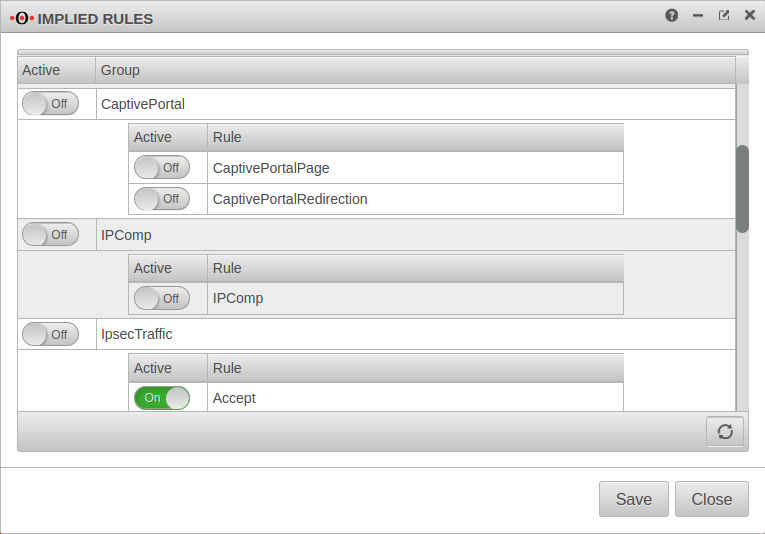
    Menu → Firewall →Implied rules Group Ein Captive Portal
    At the item Captive Portal in the menu Implied Rules you have to make sure that both rules are activated.
    The switch CaptivePortalPage opens an incoming port on the corresponding interface of the firewall, which is intended for the Captive Portal to be able to display the landing page.
    The switch CaptivePortalRedirection is, as the name suggests, responsible for the corresponding redirection of the traffic to the port mentioned above.


    Portfilter

    Firewall - Portfilter IP

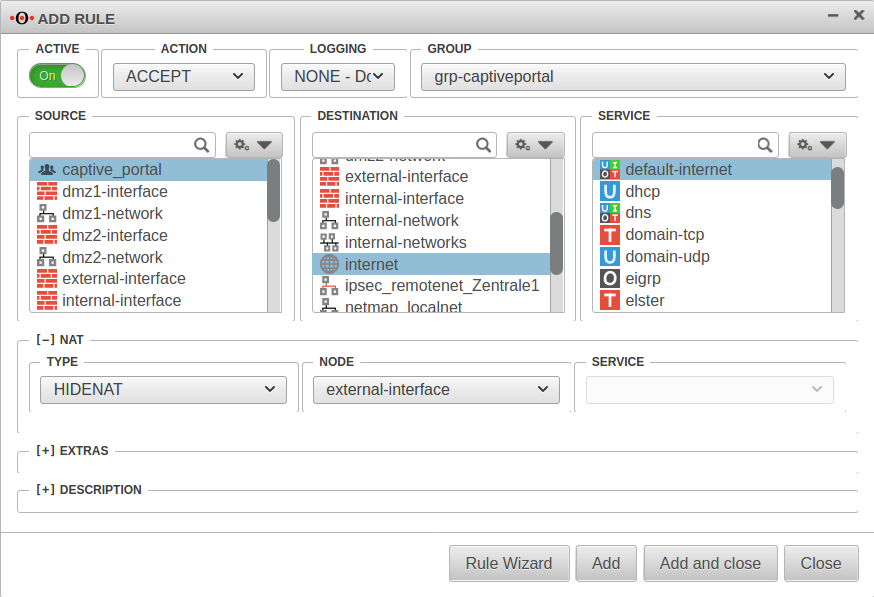
    A rule is required in the port filter to allow Captive Portal users to access the Internet.
    Alternatively, an autogenerated any rule can also be created in the Captive Portal settings using the button in the General tab.

    Rule 1
    Source:
    Ipsetgroup.svg captive_portal
    Destination:
    World.svg internet
    Service
    Service-group.svg default-internet
    [–] NAT
    Type:
    HideNAT
    Network object
    external-interface

    Add and close

    Update Rules


    Settings in the Captive Portal

    Menu → Applications →Captive Portal

    General

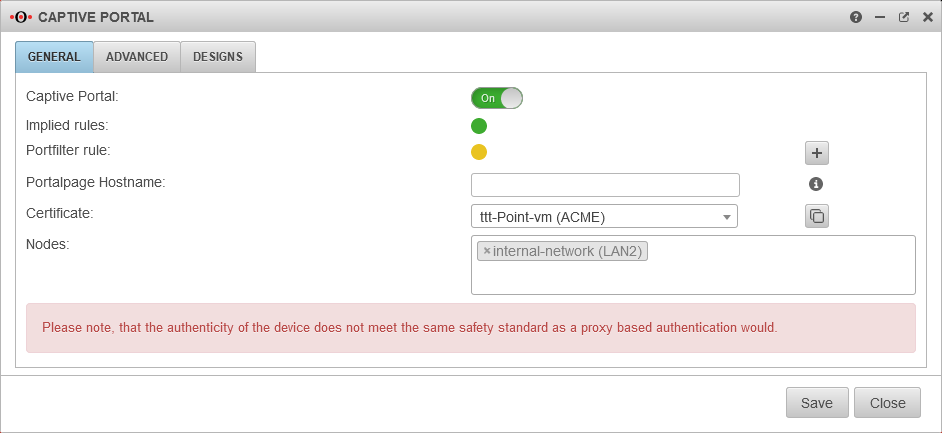
    Caption Value Description UTM v12.1 Captive Portal Allgemein-en.png
    Tab general
    Captive Portal: On This switch enables or disables the captive portal
    Implied rules:

    Shows green when the Implied rules of the captive portal are activated.
    If yellow, these rules are not used.
    Port filter rule: Shows green if port filter rules exist for the captive portal.

    With the + button an autogenerated any rule can be created.
    Better, but more elaborate, are rules that only release a selected network
      .
    Portalpage Hostname: portal.anyideas.de In the case of a certificate for a FQDN, this should correspond to the Common Name of the certificate.
    In the case of a wildcard certificate, the host name must correspond to the response to a DNS query of the client.
    Certificate ttt-Point (ACME) Please select the certificate mentioned above.
    Nodes: × wlan-0-network (wlan0)  In this field please select the network objects that represent the networks that should be redirected to the landing page.

    Advanced

    Advanced
    Authentication On If desired, an authentication can be enforced here. UTM v12.1 Captive Portal Erweitert-en.png
    Advanced tab
    Portalpage Port: 8085Link= A port must be defined for the captive portal, but this can be changed.
    Maximum connection time (seconds): 1800Link= The time frame in which a registration in the captive portal is valid.
    If the default time has expired, web access to the Internet is blocked and a reconfirmation of the terms of use (and, if desired, authentication) is required.

    Designs

    Designs
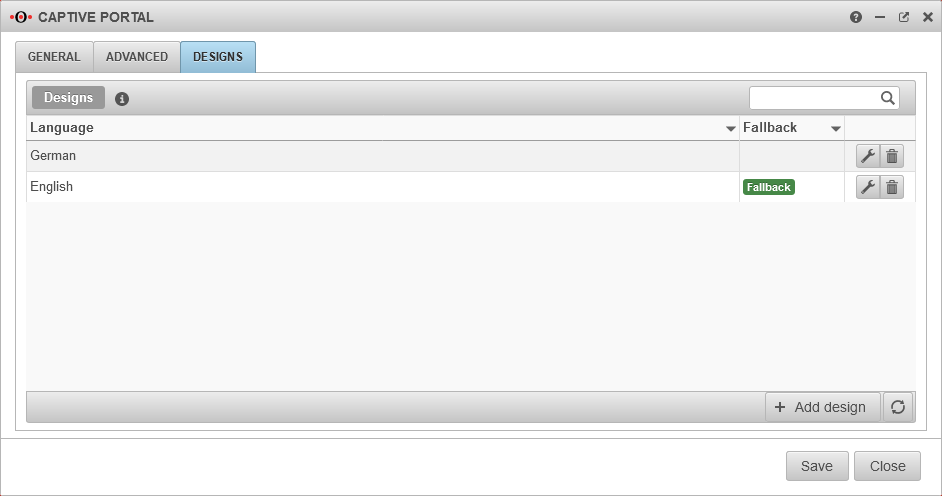
    • The captive portal can and must be customised.
    • In any case, the terms of use must be specified.
    • A design can be created for each language.
    • It is sufficient to enter the details that have been changed for the fallback design.
    • The fallback design must contain all the following information

      Call with the edit button or Add design
    UTM v12.1 Captive Portal Designs-en.png
    Tab designs

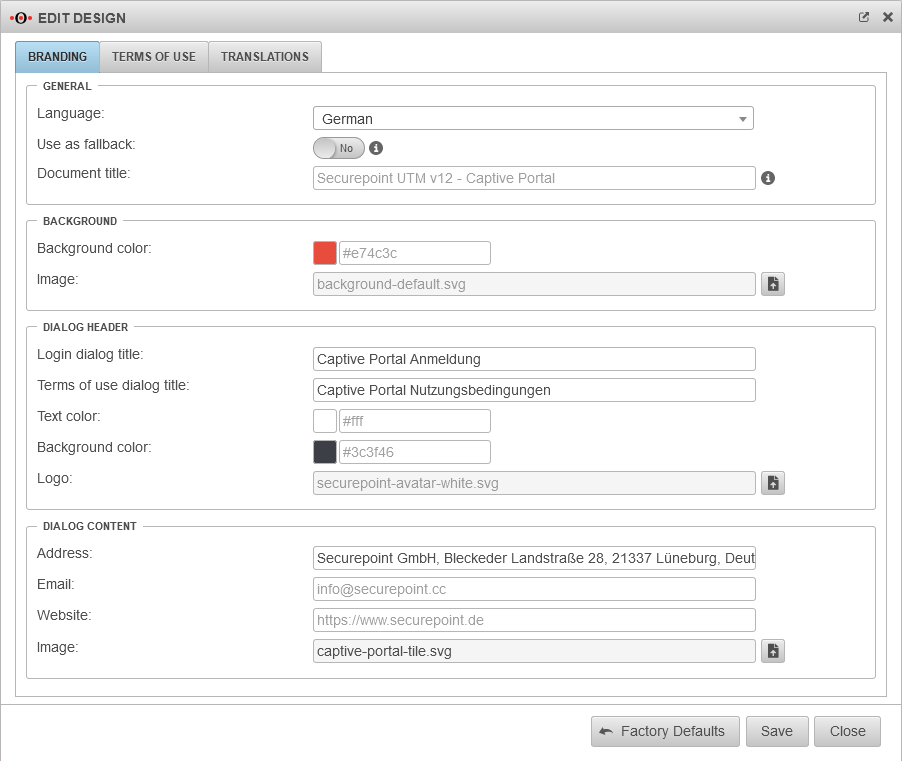
    Branding

    Call with the edit button or Add design UTM v12.1 Captive Portal Branding-en.png
    Tab Branding

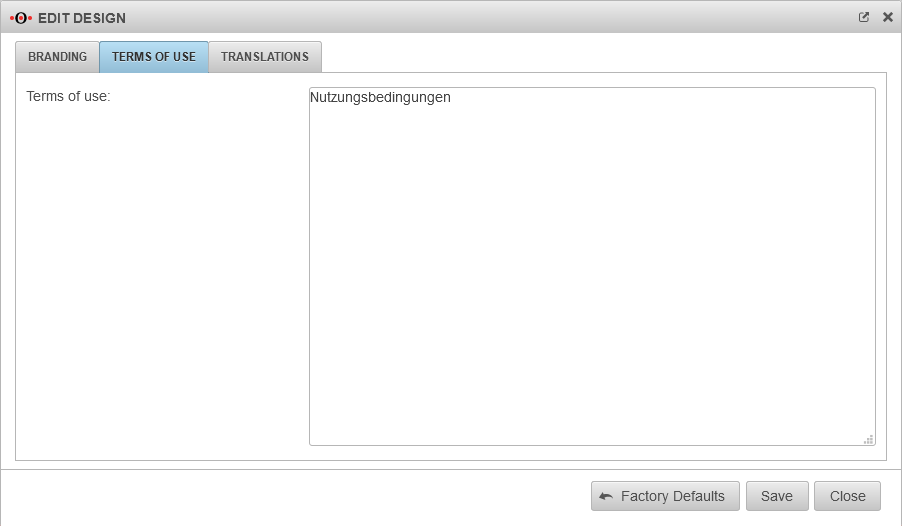
    Terms of use

    Terms of use: Nutzungsbedingungen/Terms of Use Here own terms of use have to be listed.
    For liability reasons we can not provide them. For the same reasons we recommend to consult a lawyer.
    UTM v12.1 Captive Portal Nutzungsbedingungen-en.png
    Tab Terms of use

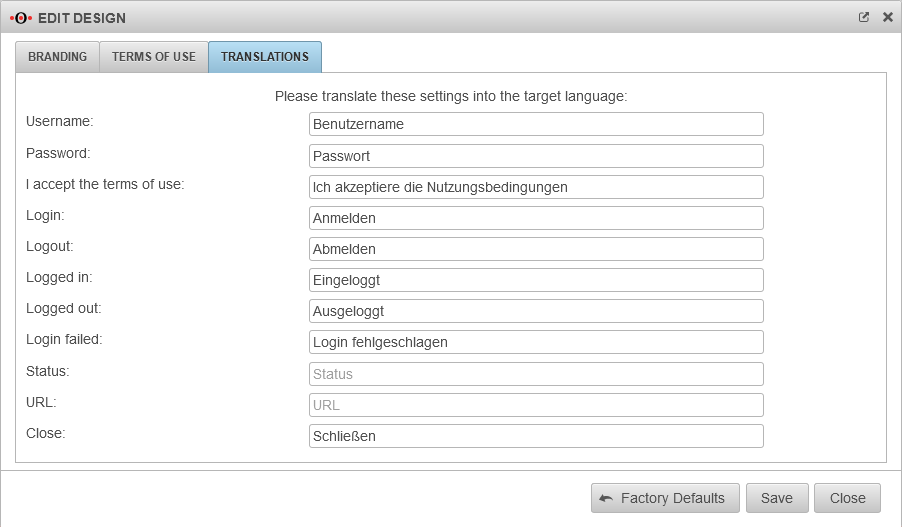
    Translations

    Translations for the labels. If a translation is missing, the value of the default language is used. UTM v12.1 Captive Portal Uebersetzungen-en.png
    Tab Translations


    Nameserver

    Menu → Applications →Nameserver Tab Zones
    If the firewall name cannot be changed to a FQDN, for example because the UTM is used as outgoing mail relay, the name server of the firewall must also be used: In this example, it is assumed that the firewall for the network of the captive portal is the responsible DHCP server and is set up as primary DNS server.

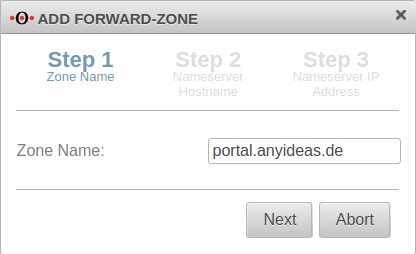
    Add Forward Zone

    Button Add Forward Zone

    The zone name to be assigned corresponds to the landing page of the captive portal.
    In the example portal.anyideas.de.
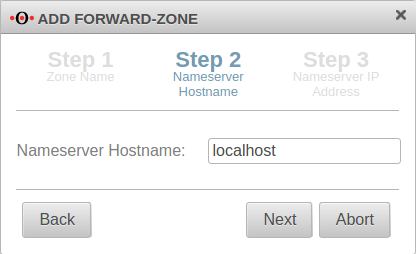
    localhost is used as the host name of the name server.
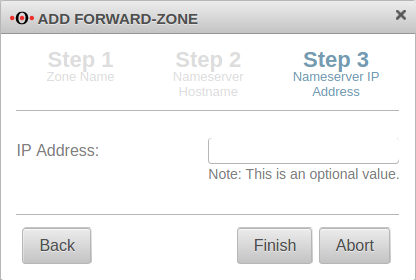
    The IP address field can be left empty.

    UTM v11.8.7 Anwendungen Nameserver Forwardzone1-en.png

    Step 1
    Zone Name portal.anyideas.de
    UTM v11.8.7 Anwendungen Nameserver Forwardzone2-en.png

    Step 2
    Nameserver Hostname loacalhost
    UTM v11.8.7 Anwendungen Nameserver Forwardzone3-en.png
    Step 3
    IP Address can be left empty


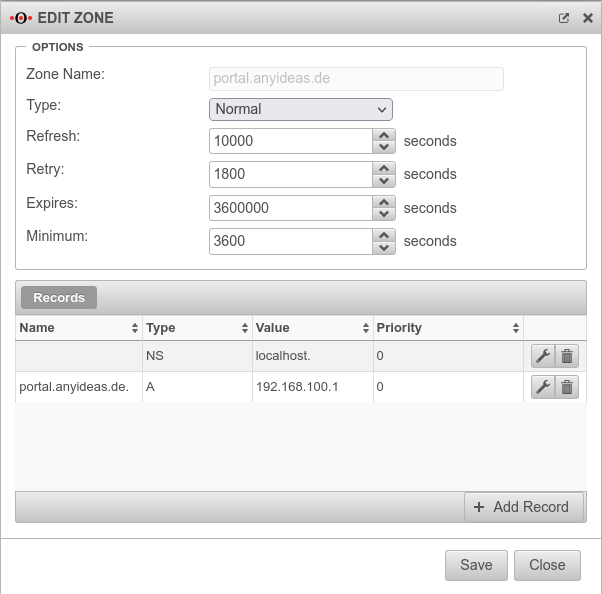
    Edit Forward Zone

    Nameserver - A-Record with IP address

    The following entry is added to the zone just created → Button Add entry  :

    Caption Value Description
    Name: portal.anyideas.de. FQDN of the firewall
  • Mit . Punkt am Ende
  • Type: A A-Record
    Value 192.168.100.1 IP of the interface via which the captive portal is to be reached (here wlan0 )


    Transparent mode

    HTTP Proxy - Transparent Proxy

    Menu → Applications →HTTP-Proxy Tab Transparent mode
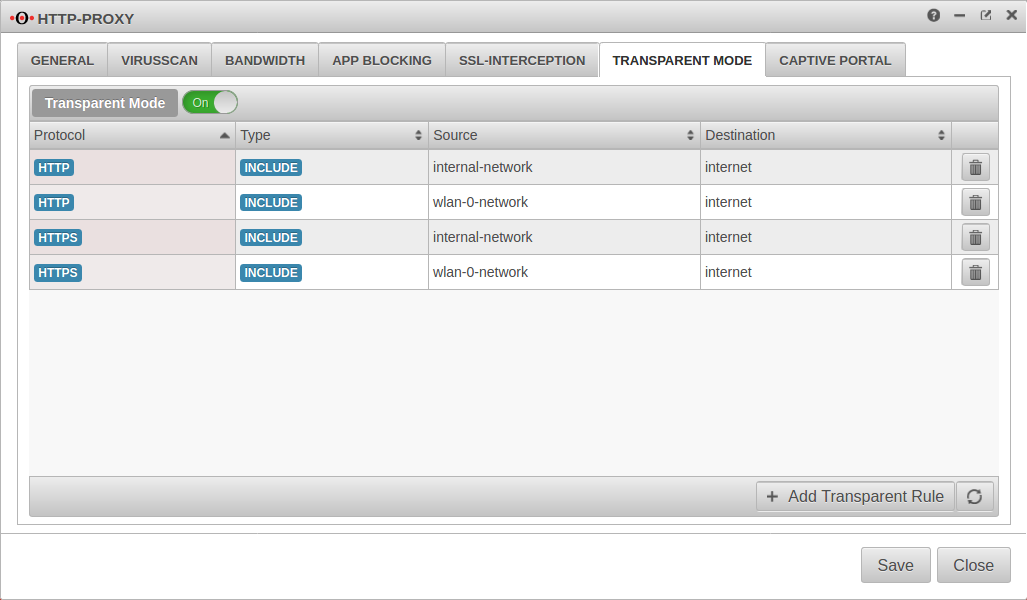
    To access the Internet via the required HTTP proxy, at least one rule is necessary (HTTP), better two (additionally HTTPS)

    Caption Value
    Button Add transparent rule
    Protocol: HTTP
    Type: include
    Source: wlan-0-network
    Destination: internet
    Caption Value
    Save

    To access https pages, in the tab SSL Interception SSL Interception On must be activated. (Requires a CA certificate of the UTM)
    Protocol: HTTPS
    Type: include
    Source: wlan-0-network
    Destination: internet


    Webfilter

    Finally, the web filter should be configured, since surfing through the proxy is possible without rules in the port filter access to e.g. internal web servers:

    with authentication

    1. → Firewall →PortfilterTab Network objects Button Add group
      Create a group (e.g. grp_CP_webfilter) that contains the wlan-0-network network object
    2. → Applications →Webfilter Button Add profile
    3. Network or user group: grp_CP_webfilter Select the newly created group Save
    4. Edit newly generated rule record
      1. webserver.anyideas.de URL of the (internal) server to which access via the captive portal should be blocked Add URL
      2. Leave action on block
    without authentication

    1. → Applications →Webfilter Button Add profile
    2. Select the user group
    3. Edit newly generated rule record
      1. webserver.anyideas.de URL of the (internal) server to which access via the captive portal should be blocked Add URL
      2. Leave action on block