notempty
- WireGuard attributes under Extended settings (v12.4)
Introduction
AD/LDAP connectivity enables existing directory services such as Microsoft Active Directory® or other LDAProtocol-based systems to be used for authentication, group management, and attribute storage.
Centrally managed users from the directory can thus easily be used for authentication or use of services on the UTM.
This simplifies the administration of complex corporate networks and unifies user management.
Among other things, the Light Directory Access Protocol (LDAP) is used for the connection to the directory..
Using LDAP, information about users, groups and other objects can be read from the directory.
In ADV190023 (Microsoft Guidance for Enabling LDAP Channel Binding and LDAP Signing) it is pointed out and an adjustment of the security settings is given.
In the future, signing and encryption of LDAP traffic will be required (seal).
Alternatively, the entire connection can be secured with SSL.
Starting with version 11.8.10, not only the PDC, but all DCs are used for LDAP requests. Thus, authentication for users from the AD is available even if the PDC is not reachable.
Requirement
To use an AD / LDAP for authentication, users must be created there and organized in groups.
Create user groups in AD
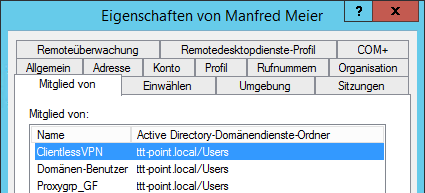
The authorizations for the services contained in the UTM can be managed in groups. The users to be assigned to these groups must first be assigned to corresponding user groups in AD.
In this example, the users for Clientless VPN are to be authenticated via the Active Directory Service.
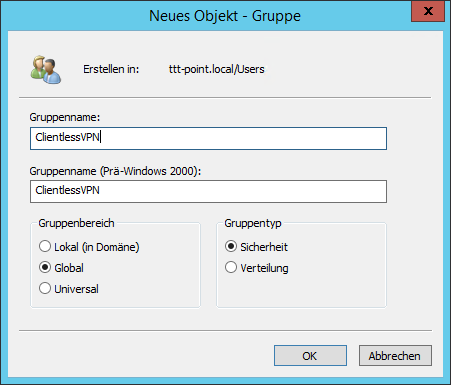
So first of all a group of the type Security Group must be added on the AD, which is given the name ClientlessVPN here.
Add user in AD
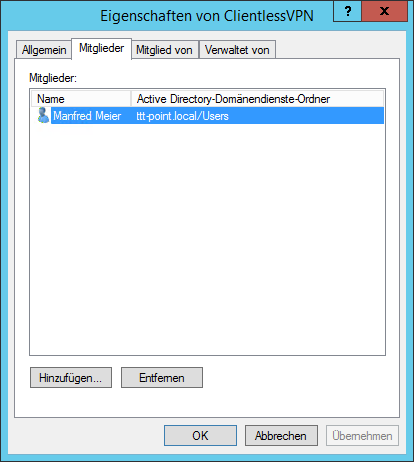
The users to be enabled for Clientless VPN are then added to this group.
Integrate UTM into the domain
In the menu the authentication is configured.
Establishing an AD connection
If there is no AD/LDAP authentication yet, the AD/LDAP authentication wizard opens automatically
Otherwise the wizard can be started with the button
Step 1: Directory type | |||
| Caption | Value | Description | 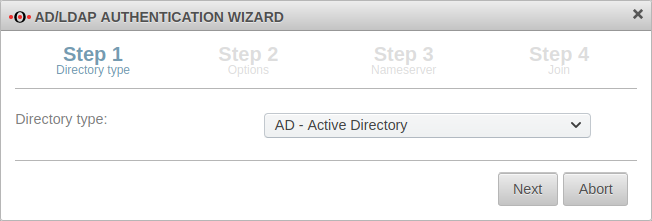 |
|---|---|---|---|
| Directory type: | In any case, the directory type »AD« should be selected if it is an Active Directory environment. Even there is also running an LDAP, the group membership is treated differently in the AD environment than in a pure LDAP server. | ||
Step 2: Options | |||
| IP Address or Hostname: | » ✕192.168.145.1 | (Example address!) | 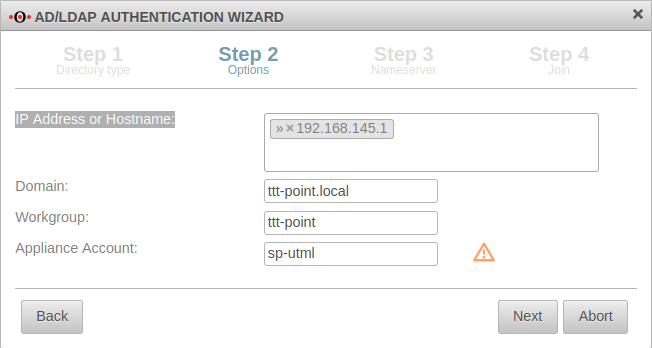 |
| Domain: | ttt-point.local | Domainname | |
| Workgroup: | ttt-point | The NETBIOS name of the AD If this should differ from the base domain, the correct NETBIOS name must be entered here. | |
| Appliance Account: | sp-utml | The name by which the UTM is entered in the AD in the group Computers. A unique name that must not be assigned twice! When operating the UTM in a cluster, the name in the master and spare must be different. The name is not synchronized!
| |
Step 3: Nameserver |
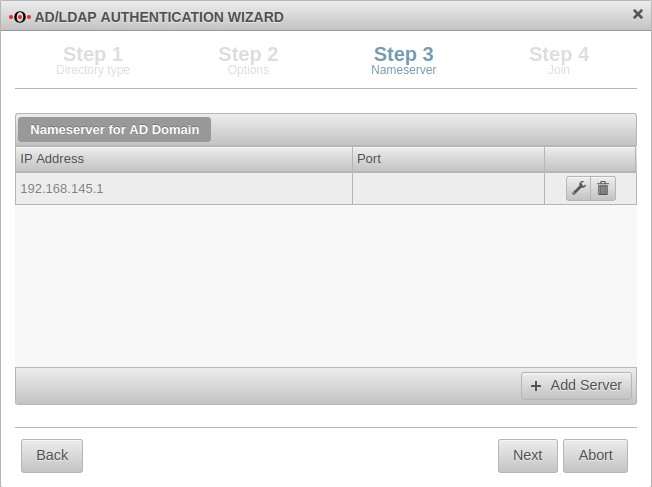 | ||
| If the AD server is not yet entered as the name server, this is done in this step: | |||
| IP address:: | 192.168.145.1 | Sample address! IP address of an AD server of the domain, if necessary additionally the port | |
The AD server is thus added as a relay zone in the name server of the UTM. The entry can be found in the menu in the tab Zones. | |||
Step 4: Join | |||
| Administratorname: | Administrator | To join the domain, a user account with domain administrator permissions is required.
|
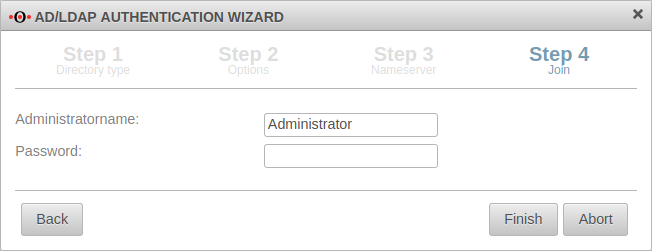 |
| Password: | •••••••• | When operating the UTM in a cluster, the password on the spare UTM must be entered separately under Tab Join. Except of the Appliance Account: (see step 2), all other information in the cluster will be synchronized. Complete with | |
Result of AD connection | |||
| Result in section Status :
| |||
| Enabled:: | On | AD/LDAP authentication is enabled. | 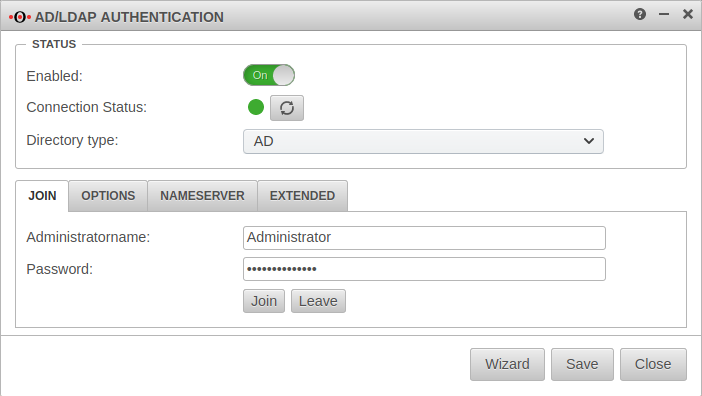 |
| Connection Status: | ⬤ | For confirmation the display changes from grey to green. Update with | |
Extended settings Extended
| |||
| SSL: | Off | The connection to the Active Directory server can be established using SSL encryption. | 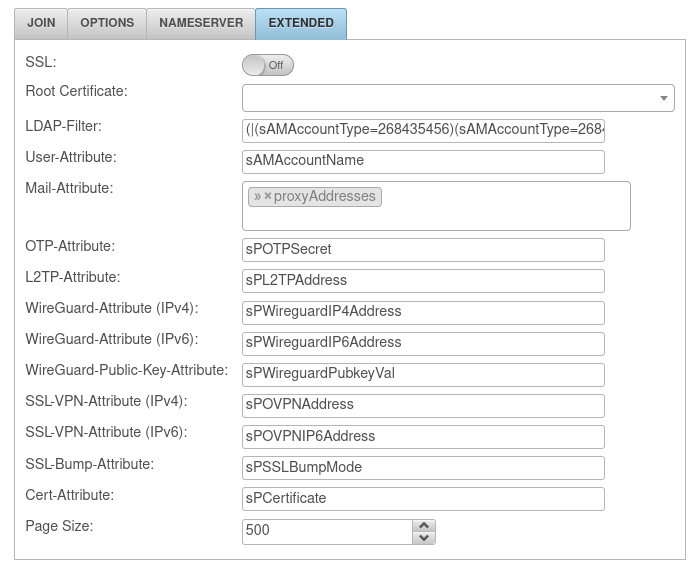 |
|
| |||
| Root certificate: | Certificate | A root certificate can be deposited. | |
| LDAP-Filter: | (|(sAMAccountType=268435456)(sAMAccountType=268435457)(sAMAccountType=805306368)) | sAMAccountType=Restricts authentication to members of the following groups: Further filters are possible
| |
| User-Attribute:: | sAMAccountName | Attributes can be defined under which the AD administration stores the user information and which can then be queried by the UTM: | |
| Mail-Attribute: | » ✕proxyAddresses | ||
The attributes from OTP to Cert-Attribute, which are entered here, usually do not exist in the AD. For example, to store the OTP secret code on the AD, an unused attribute of the AD schema can be used, which contains this secret code of the user. A corresponding instruction can be found in the article Integrating the OTP function into the Active Directory.
|
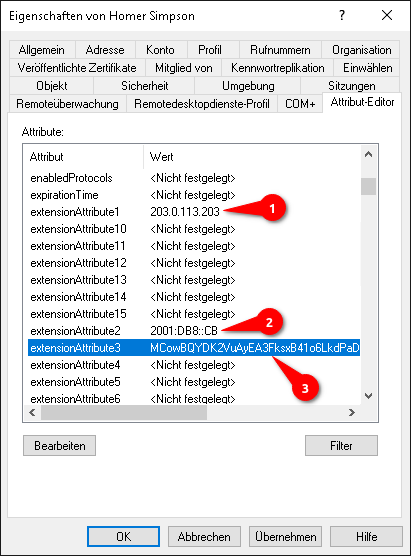 with example values for WireGuard  | ||
| OTP-Attribute: | sPOTPSecret | ||
| L2TP-Attribute: | sPL2TPAddress | ||
| WireGuard-Attribute (IPv4): |
sPWireguardIP4Address | The AD attribute of the IPv4 address of the WireGuard connection. The IPv4 address can be stored in any AD attribute of the user. If the IPv4 address is stored in extensionAttribute1, extensionAttribute1 is entered here. | |
| WireGuard-Attribute (IPv6): |
sPWireguardIP6Address | The AD attribute of the IPv6 address of the WireGuard connection The IPv6 address can be stored in any AD attribute of the user. If the IPv6 address is stored in extensionAttribute2, extensionAttribute2 is entered here. | |
| WireGuard-Public-Key-Attribute: |
sPWireguardPubkeyVal | The AD attribute of the public key of the WireGuard connection.
The public key can be stored in any AD attribute of the user. If the public key is stored in extensionAttribute3, extensionAttribute3 is entered here. | |
| SSL-VPN-Attribute (IPv4): | sPOVPNAddress | ||
| SSL-VPN-Attribute (IPv6): | sPOVPNIP6Address | ||
| SSL-Bump-Attribute: | sPSSLBumpMode | ||
| Cert-Attribute: | sPCertificate | ||
| Page Size: | 500 | In larger environments, LDAP requests may exceed the maximum number of records defined on the server side (1000 in AD). With Page Size you can set that the LDAP query is executed piecewise. A page size of 500 means 500 data records per query. A page size of 0 deactivates a step-by-step LDAP query. | |
AD Grant permissions to user groups
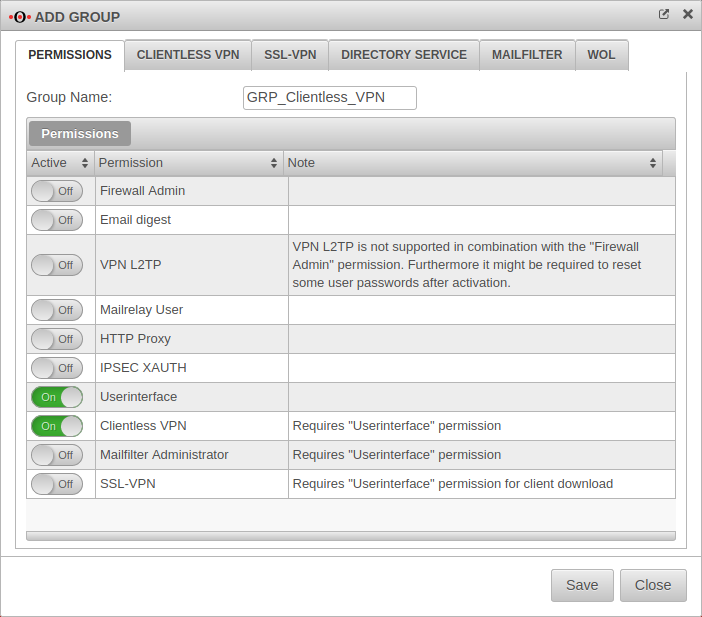
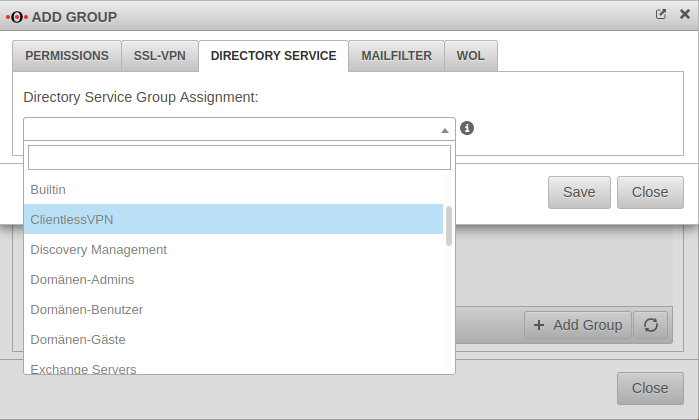
To grant users from the Active Directory the permissions for accessing the UTM user interface and using the Clientless VPN, a group with exactly these permissions is created in the Tab Groups Button menu.
| Active | Permissions | Note |
|---|---|---|
| On | Userinterface | |
| On | Clientless VPN | Gewünschte Berechtigung |
Further information about Clientless VPN permissions can be found in the wiki for Clientless VPN.
Result
After saving, every user who is a member of the AD group ClientlessVPN can log on to the UTM with their Windows domains access data for using the Clientless VPN.
Verifying the AD connection with CLI
The lines below are the output of the UTM for this command.
Joining and leaving the domain
To validate whether the UTM has already joined the domain:
cli> system activedirectory testjoin
Join is OK
cli>
If this is not the case, the following output will take place
cli> system activedirectory testjoin
Not joined
cli>
In this case the domain can be joined with the following command
cli> system activedirectory join password Beispiel-Admin-Passwort
Password for Administrator@TTT-POINT.LOCAL:
Processing principals to add...
Enter Administrator's password:
Using short domain name -- TTT-POINT
Joined 'SP-UTML' to dns domain 'ttt-point.local'
cli>
The command to leave the domain is
cli> system activedirectory leave password Beispiel-Admin-Passwort
Enter Administrator's password:
Deleted account for 'SP-UTML' in realm 'TTT-POINT.LOCAL'
cli>
When entering or leaving the Active Directory, the administrator password must be entered. The password is not stored, but the AD membership is nevertheless rebootable.
Display AD groups
With the following command the groups can be listed in the Active Directory:
cli> system activedirectory lsgroups
member
------
Abgelehnte RODC-Kennwortreplikationsgruppe
Administratoren
Benutzer
Builtin
ClientlessVPN
Discovery Management
Domänen-Admins
Domänen-Benutzer
Domänen-Gäste
Exchange Servers
...
Users
Windows-Autorisierungszugriffsgruppe
cli>
Verification of users and group membership
The following command checks whether an AD user is assigned to an UTM group:
cli> user check name "m.meier" groups grp_ClientlessVPN
matched
cli>
If this is not the case, the output is
not a member
cli>
Command to display the group membership and permissions for an AD user:
cli> user get name m.meier
name   |groups           |permission
-------+-----------------+----------
m.meier|grp_ClientlessVPN|WEB_USER,VPN_CLIENTLESS
cli>
Domain controller behind site-to-site VPN
In some scenarios, the domain controller is located behind a site-to-site VPN tunnel.
If this is the case, a corresponding zone and rule must be configured.
See also DNS-Relay for IPSec-S2S ‖
DNS-Relay for SSL (OpenVPN) -S2S
