notempty
Setting up the DHCP server for an IPv4 network
Last adaptation to the version: 11.8.4 (07.2019)
- New:
- More router options to choose from
- Changes in setting DHCP pool leases
Previous versions: 11.7
Prepare IP address ranges
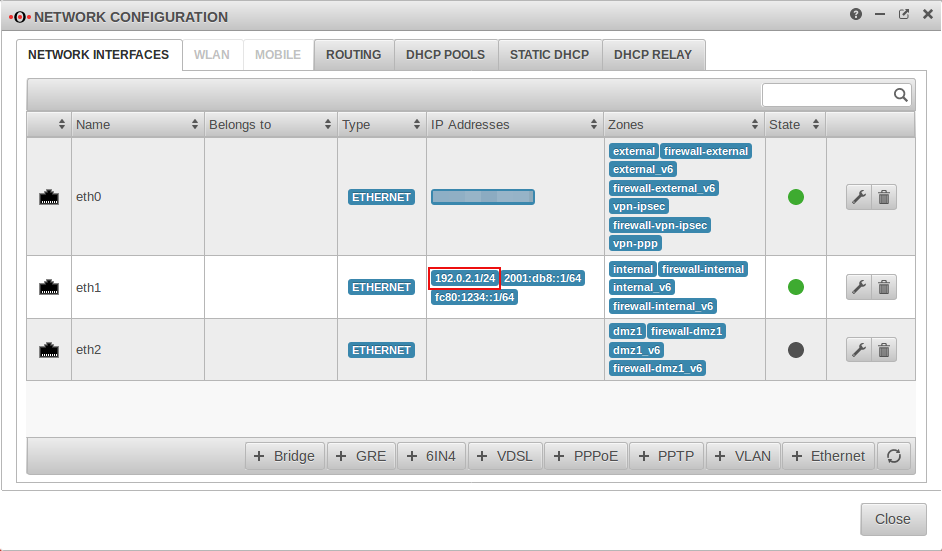
In order for the firewall to function as a DHCP server in a network, a fixed IP from the network area to be assigned must be located on the corresponding interface. In the example, IP addresses are assigned in the network 192.0.2.0/24. To realise this, an IP from this network is added to the interface. → → IP addresses → If necessary, enter an IP from the desired network with the desired subnet mask in the click box. Here 192.0.2.1/24
Set up DHCP server
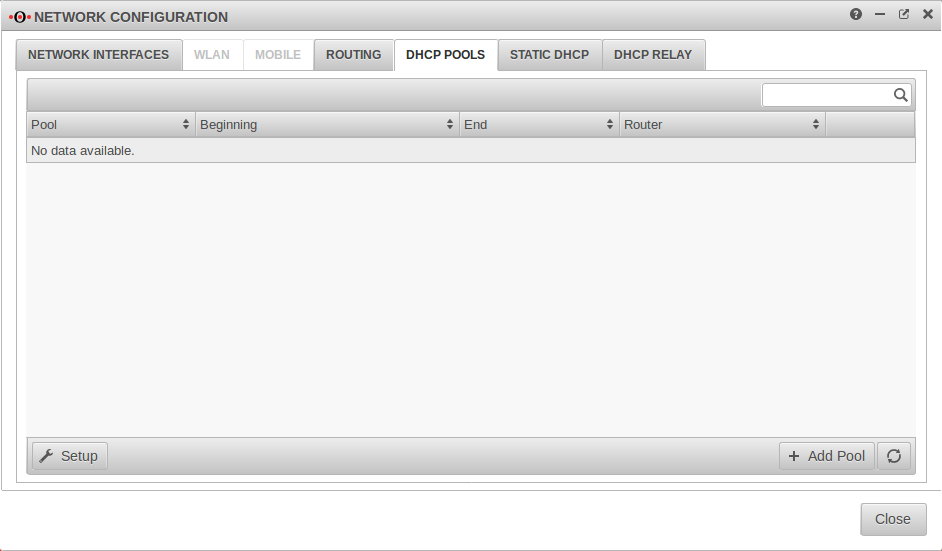
Under ? DHCP Pools multiple DHCP pools can be added.
Installation wizard
After clicking , the setup wizard opens and the DHCP parameters can be specified.
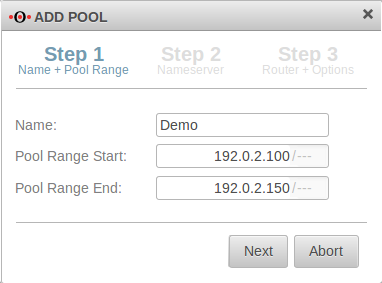
Step 1: Name and IP range
In step 1, the name for the pool and the valid IP range for the DHCP are required. In the example, IP addresses from 192.0.2.100 to 192.0.2.150 are to be assigned.
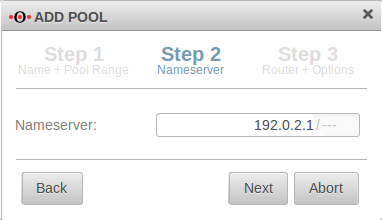
Step 2: Nameserver
In step 2, the DNS server for the DHCP clients can be specified. Either the IP of a public DNS server (e.g. the Google DNS server with the IP 8.8.8.8) or the IP of the firewall itself can be entered here. In this example, the clients use the firewall itself as DNS. In order for the UTM to also answer the DNS queries from the internal network, a corresponding rule is required.
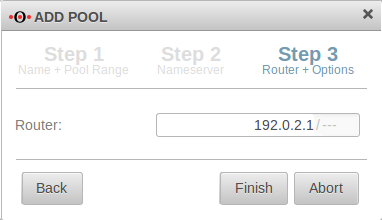
Step 3: Router
In step 3 of the wizard, the default gateway of the DHCP clients is specified.
Caution: Normally, the IP of the firewall is always entered here. An incorrect entry in this field may prevent access to the Internet.
Step 4: Further settings
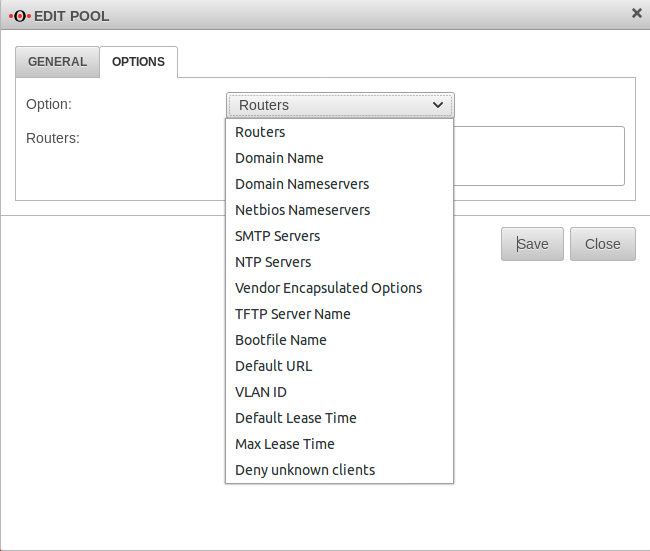
DHCP Options
| Option | Option number | Example parameters | Comments |
|---|---|---|---|
| Router | 3 | 192.168.175.1 | Router, wie in Schritt 3 konfiguriert |
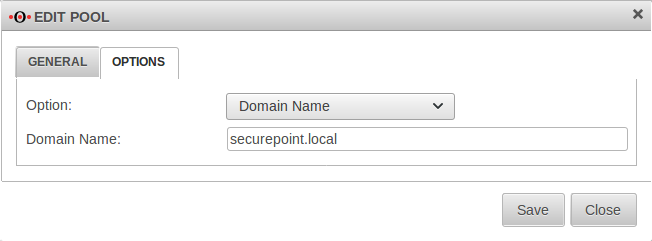
| Domain name | 15 | securepoint.local | Name of the domain in which the DHCP leases are assigned |
| Domain name server | 5 | 192.168.175.1 | Name server as configured in step 2 |
| Netbios name server | 44 | NetBIOS over TCP/IP Name Server Option | |
| SMTP-Server | 69 | Simple Mail Transport Protocol (SMTP) Server Option | |
| NTP Server | 41 | Servers should be listed in order of preference. | |
| Vendor Encapsulated Options | 43 | Values must be given coded. | |
| TFTP Server Name | 66 | i.e.: profile.gigaset.net | option tftp-server-name text; |
| Bootfile Name | 67 | option bootfile-name text; | |
| Default URL | 114 | https://teamwork.gigaset.com/gigawiki/display/GPPPO/DHCP+option+114 | option default-url string; |
| VLAN ID | 132 | option vlan-id code 132 = text ; option vlan-id "128"; | |
| Default Lease Time | 51 | 600 | Default validity period of the IP address in seconds if the client has not requested an explicit duration. |
| Maximal Lease Time | 7200 | Maximum validity period of the IP address in seconds that the client may receive when explicitly requested. | |
| Reject unknown clients | DHCP is only applied to clients that are known with static leases. |
Static leases
If hosts with static leases (i.e. fixed IPs bound to the MAC address but assigned by the UTM) are to be connected to the UTM, proceed as follow:
- → Static DHCP
- Here a fixed IP is configured for a host with .
- Subsequently, a DHCP pool containing this address(es) must be entered at DHCP Pools.
- It is currently not possible to use static and dynamic leases at the same time.
- To prevent IPs from a static pool from being assigned to other hosts requesting a lease via DHCP, Edit Pool → tab Settings the option must be provided with Yes.
