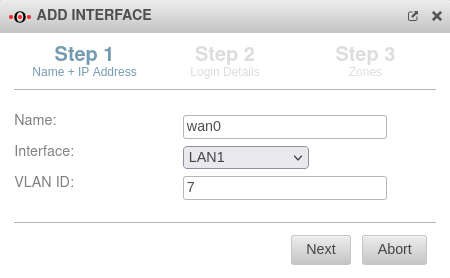
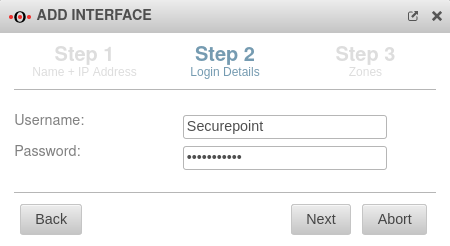
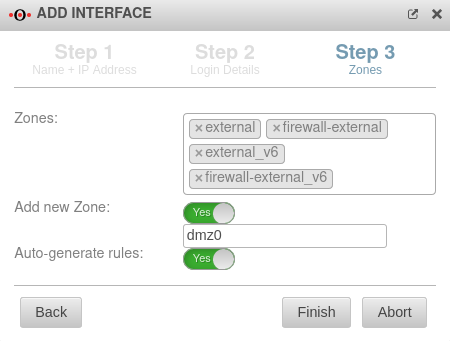
notempty
- Name of the VLAN interface in the wizard and default route now match each other
Introduction
This article describes how to create a VDSL interface for a VDSL modem connection.
Either the web interface of the firewall or the CLI can be used for this purpose.
Requirements
The following is required:
- An unused Ethernet interface
- Corresponding zones
- Access data from the internet provider
In this example configuration, VLAN ID 7 is used, but this can vary between providers. Before setting up the VDSL connection, the VLAN ID used by the provider should be requested.
Known VLAN IDs for VDSL connections are:
| Provider | VLAN-ID |
|---|---|
| EWETEL | 2011 |
| EWETEL (Business - without voice) | - (no VLAN) |
| M-Net | 40 |
| NetColone | 10 |
| Telekom | 7 |
| Vodafone | 132 |
| Vodafone lines through Telekom | 7 |
| Willi Tel | 2511 |
If the modem to be used already takes care of VLAN tagging on its own, the connection is handled by the UTM as a normal PPPoE connection. The setup of such a connection is described in a separate article.
Setup via web interface
To access the network configuration of the UTM, an administrator login must be performed on the firewall.
Then, click on Tab Network Interfaces Button .
Setup via CLI (Command Line Interface)
Setting up a VDSL connection is also possible via CLI.
The connection can be established via the web interface, directly on the appliance, or through an SSH connection.
Create VLAN interface
- Login with the user Admin.
- Subsequently, the VLAN interface is created with the following command, via which the PPPoE connection is established later.
interface new name "eth0.7" type VLAN options [ vlan_id=7 vlan_parent=eth0 ]
- Where the number 7 used here represents the VLAN ID, which may need to be changed.
Create VDSL interface
- To link the wanX interface with the VLAN interface and the provider data, the following command is entered:
interface new name wan0 type PPPOE flags [ DYNADDR ] options [ ppp_user=Securepoint ppp_password=insecure pppoe_parent=eth0.7 ppp_lcp=1 mtu=1492 ]
- For ppp_user=, enter the login name for the VDSL dial-in (here: "Securepoint").
- For ppp_password=, enter the corresponding password (here: "insecure").
- Subsequently, the zones external, firewall-external, external_v6, firewall-external_6 and vpn-ipsec are bound to the wan0 interface:
inteface zone get interface zone set id "X" interface "wan0"
The command Interface zone get is used to determine the IDs of each respective zone.
These IDs are then used as parameters instead of 'X' in the second command to bind the external, firewall-external, external_v6, firewall-external_6 and vpn-ipsec zones to the wan0 interface.
- Finally, the command system update interface is executed.
Create default route
Click Tab Routing Button to add a default route:
| Gateway-interface: | wan0 Off IPv6 |
Select interface to which VDSL is connected | 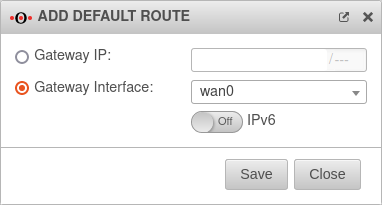 |
| Saves the route | |||
| If everything worked, then the entry in the Routing tab will look like the one shown on the right. | 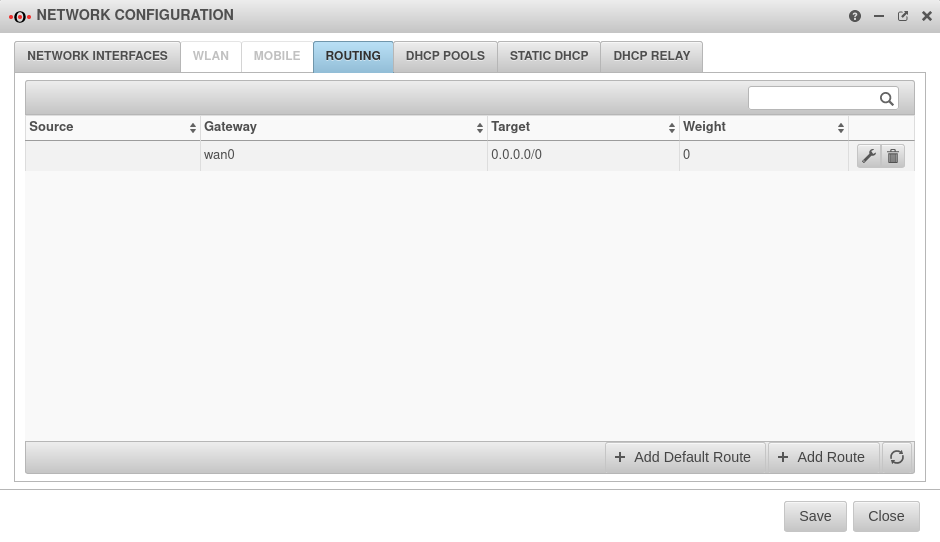 | ||
Network objects and portfilter rules
notempty
Auto-generated rules cannot be edited, so new rules must be created.
| # | Source | Destination | Service | NAT | Action | Active | |||
| 4 | HN | Accept | On |
Select the VDSL modem
- Many DSL providers no longer offer the option to configure routers as modems, or the routers may function as DSL modems but not as VDSL modems.
It is best to contact the manufacturer of the router/modem for more information.
