notempty
- Defaultwert für Verschlüsselungs-Algorithmus geändert
- Defaultwert für Hashverfahren geändert
Introduction
- SSL-VPN can also be used to establish site-to-site connections. Since this requires the corresponding instance of the service to run explicitly in client or server mode, it is possible to create multiple instances of the SSL-VPN service.
Site-to-Site Server
- This method is used when the remote terminal is the initiator of the connection. For this, the service must explicitly start in server mode.
Site-to-Site Client
- This method is used when the UTM itself is the initiator of the connection. For this, the service must explicitly start in client mode.
Site-to-site server configuration
SSL-VPN connection
Set up the connection in the Button menu.
Installation wizard
Step 1
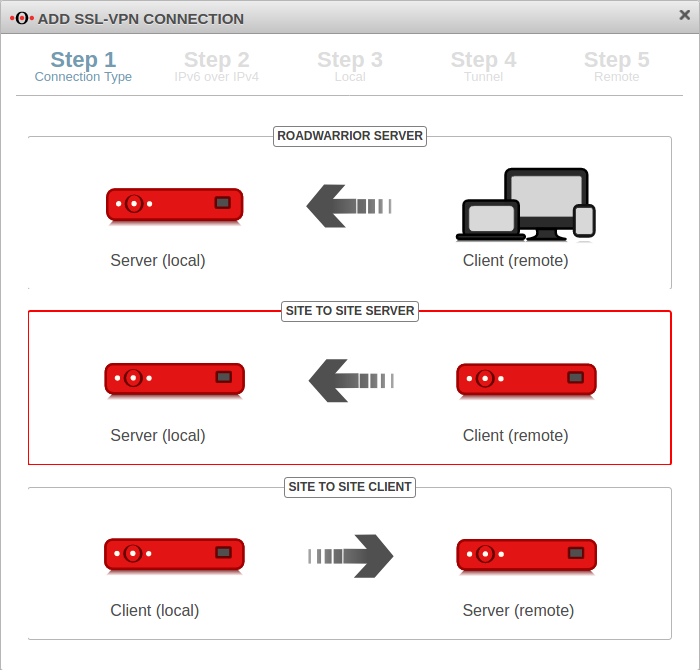
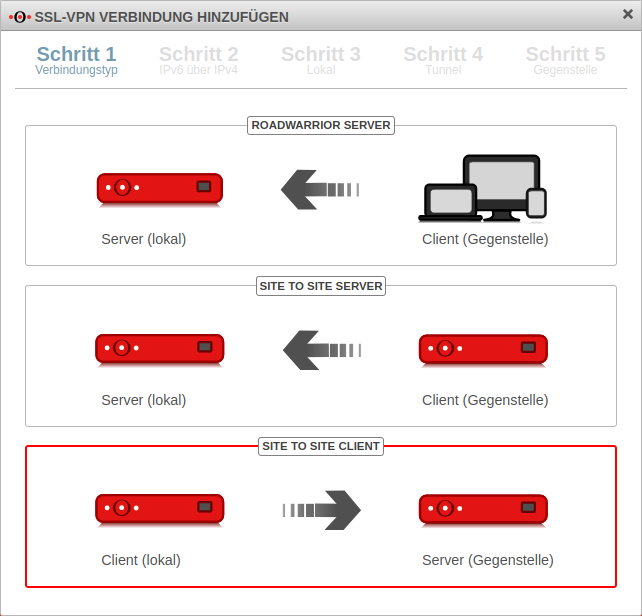
In installation step 1 the connection type is selected, the following connections are available:
- Roadwarrior Server
- Site-to-Site Server
- Site-to-Site Client
For the configuration of the Site-to-Site server this is selected.
Step 2
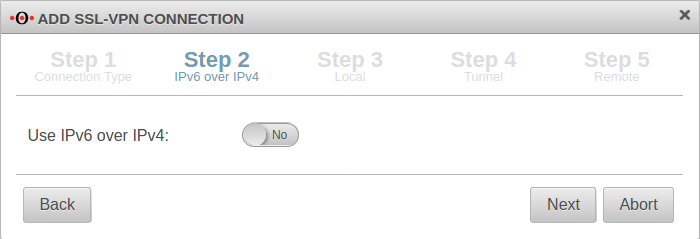
If a local IPv6 network is to be connected, the option Use IPv6 over IPv4: must be enabled Yes.
Step 3
Local settings for the site-to-site server
| Caption | Value | Description | 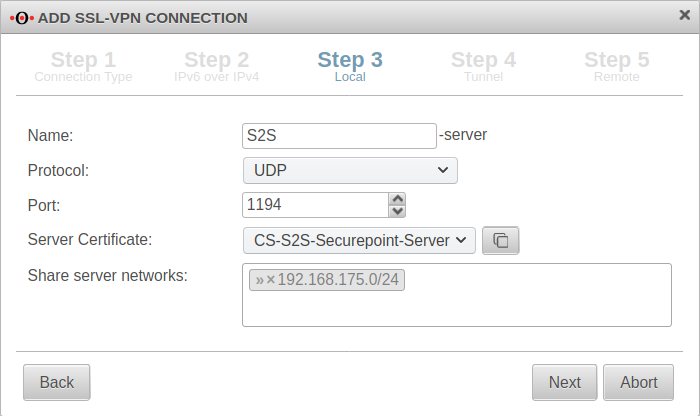 |
|---|---|---|---|
| Name: | S2S-server | Unique name | |
| Protocol: | Desired protocol | ||
| Server certificate: | Selection of the certificate with which the server authenticates itself If a server certificate does not yet exist, it can be created (and if necessary also a CA) in the certificate management. Open with
Both certificates must be created with the same CA!
The Client certificate and the associated CA are also needed to configure the remote terminal (client). They must be exported with the button. For use with a UTM as client, the -format is required. Further notes in the Wiki article on the use of certificates. | ||
| Share server networks: | » ✕ 192.168.175.0/24 | Network located at this appliance (VPN server) that is to be accessible via SSL-VPN. |
Step 4
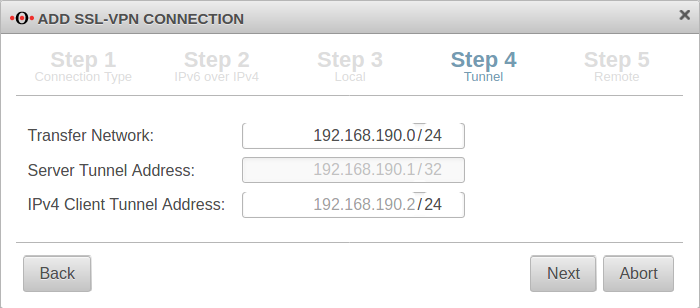
In installation step 4, the transfer network for the site-to-site server is entered.
Step 5
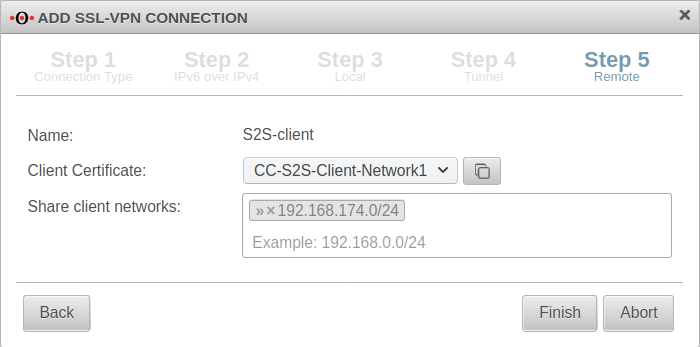
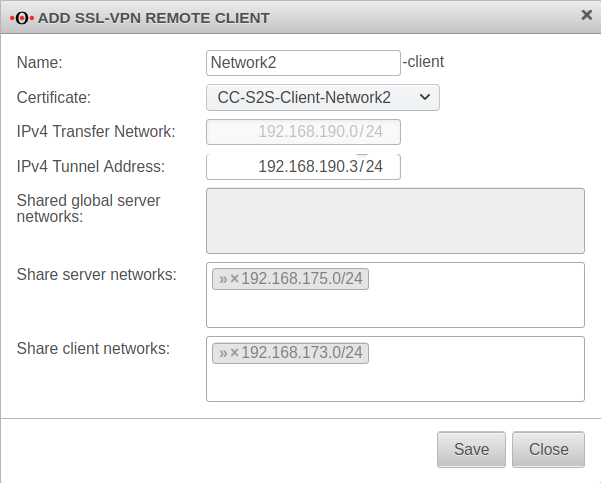
Other client remote terminals
Additional remote sites that are to be connected via this site-to-site server can be added via the button.
Display of remote sites by clicking on the folder icon
Rulebook
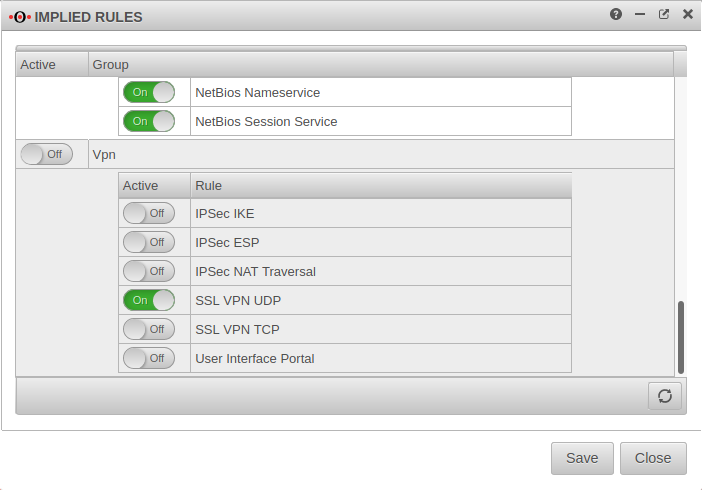
Implied rules
Under section VPN the protocol used for the connection can be enabled. Here On SSL-VPN UDP. This implicit rule frees the ports used for SSL-VPN connections on the WAN interface.
Network objects
A TUN interface was created when the connection was set up. It automatically receives the first IP from the transfer network configured in the connection and a zone "vpn-ssl-<servername>".
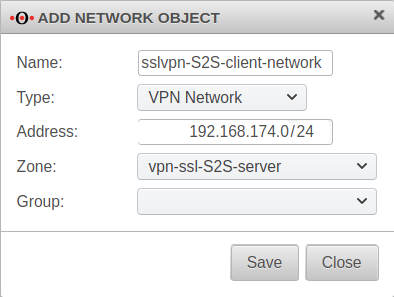
To be able to reach the client network of the remote terminal, a network object must be created for this purpose.
The TUN interface of the site-to-site client also receives an IP from this network. This serves as a gateway to the subnet of the site-to-site client. The subnet of the client must be created as a network object and is located in the zone on the associated TUN interface.
| Caption: | Value | Description |
|---|---|---|
| Name: | sslvpn-S2S-client-network | Freely selectable name |
| Type: | If only a single host is to be shared in the client network, can also be selected here. | |
| Address: | 192.168.174.0/24 | The network address that was shared as the client network in step 5.
If multiple client networks have been shared, a separate network object must be created for each of these networks. Subsequently, the network objects can then be combined into a group.
|
| Zone: | The zone on the S2S server through which the S2S client network is accessed. | |
| Group: | Optional |
Portfilter rules
Menu Tab Portfilter Button
Two rules allow access to or from the S2S client network:
| Caption: | Value | Description |
|---|---|---|
| 1. Rule | ||
| Source: | sslvpn-S2S-client-network | Inbound rule |
| Destination: | internal-network | |
| Service | required service | Only services that are actually needed should be shared !
|
| 2. Rule | ||
| Source: | internal-network | Outbound rule |
| Destination: | sslvpn-S2S-client-network | |
| Service: | required service | Only services that are actually needed should be shared !
|
Routen
The routes are set automatically.
However, when using VoIP through the tunnel, routes should be set to ensure that the phones connect correctly to the PBX.
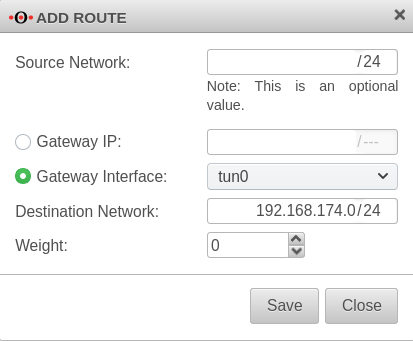
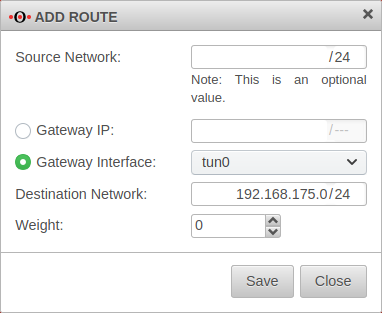
Menu Tab Routing Button A route should be set so that the network of the remote terminal can be found reliably.
| Caption: | Value | Description |
|---|---|---|
| Gateway interface: | A TUN interface was created when the connection was set up and must be specified here. | |
| Target network: | 192.168.174.0/24 | The network of the remote terminal (S2S Client) |
Site-to-site client configuration
SSL-VPN connection
Installation wizard
Step 1
In installation step 1 the connection type is selected, the following connections are available:
- Roadwarrior Server
- Site-to-Site Server
- Site-to-Site Client
For the configuration of the Site-to-Site Client this is selected.
Step 2
If a local IPv6 network is to be connected, the option Use IPv6 over IPv4: must be enabled Yes.
Step 3
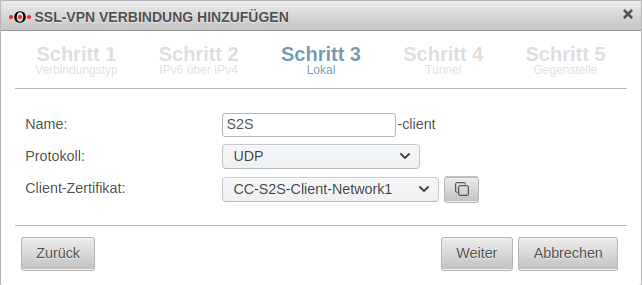
Local settings for the Site-to-Site Client can be made in step 3. Here you can enter a name for the connection, select protocol, choose a server certificate - by clicking the button with the window you can import a CA and a certificate.
Step 4
This installation step is omitted for the site-to-site client.
Step 5
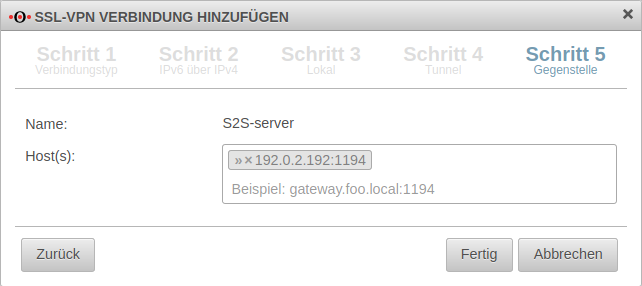
In step 5, the public remote gateway IP address or SPDyn address of the site-to-site server is entered as the remote site.
If port 1194 is used, this specification can be omitted.
Rulebook
Implied rules
Since the site-to-site client establishes the connection to the S2S server and outgoing connections from the firewall itself are always allowed by default, no implicit rules are necessary.
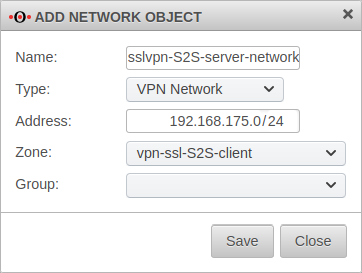
Network objects
Portfilter rules
Menu Tab Add rule Button
Two rules allow access to or from the S2S server network or from the network:
| Caption: | Value | Description |
|---|---|---|
| 1. Rule (#7) | ||
| Source | internal-network | Outbound rule |
| Destination | sslvpn-S2S-server-network | |
| Service | required service | Only services that are actually needed should be shared !
|
| 2. Rule | ||
| Source | sslvpn-S2S-server-network | Inbound rule |
| Destination | internal-network | |
| Service | required service | Only services that are actually needed should be shared !
|
Routen
The routes are set automatically.
However, when using VoIP through the tunnel, routes should be set to ensure that the phones connect correctly to the PBX.
Menu Tab Routing Button
| Caption: | Value | Description |
|---|---|---|
| Gateway interface: | A TUN interface was created when the connection was set up and must be specified here. | |
| Target network: | 192.168.175.0/24 | The network of the remote terminal (S2S Server) |
Note
Encryption
By default, an AES128-CBC method is used. The encryption method can be customized in the server or/and client profile.
Hash method
By default, a SHA256 hash method is used. The hash method can be customized in the server or/and client profile.
QoS
For the VPN connection, the TOS fields for automatic QoS can be set in the packets.
This setting can be changed in the VPN connection settings in the Advanced tab under Pass TOS: On must be enabled.
Multipath
For multipath on the client side, the VPN connection in the client must be bound to an interface.
To bind a client connection to an interface, the CLI command must be used
openvpn get
to locate the ID of the connection.
The command
openvpn set id $ID_DES_TUNNELS local_addr $IP_DES_INTERFACES
can then be used to set the outgoing IP.
In addition, a rule route via the corresponding tunX interface is required in the outgoing rule (internal-network → VPN network → $DIENST).
Search Domain
The search domain can be submitted automatically.
The entry can be found in the VPN connection settings in the General tab under Search Domain: .
Transmit DNS/WINS
IPv6 for inbound connections
In the settings of the site-to-site server, the protocol UDP6 or TCP6 for IPv6 can be activated under General -> Protocol.
The transparent HTTP proxy
When accessing a server behind the site-to-site connection from the internal network via HTTP, the transparent HTTP proxy may filter the packets. This can lead to errors in the accesses to the target.
To prevent this from happening a rule must be added in the Tab Transparent Mode Button menu:
| Caption: | Value |
|---|---|
| Protocol: | |
| Type: | |
| Source: | |
| Destination: |
If SSL interception is used, this should be done additionally for the protocol.
