Last adaption: 03.2022
- Creating the Group Policy Object in Windows Server described in more detail
- The option Installation with Portal-Config has been removed
- Menu navigation changed in AV Portal
- No more editing of the .msi file required
- 09.2024
- Show buttons in section Installation scripts fixed
- Translation in section Preparations completed
Introduction
This article describes the automated installation of Securepoint Antivirus Pro. Only the MSI installation file can be used for the automated installation.
Requirements
- A valid Antivirus Pro license is required for the automated Installation of Securepoint Antivirus Pro.
- There must be no GuardX Service (from a previous installation) present.
If necessary, the AV-Remover must be executed beforehand. (Available in the Download area of the reseller portal)
Preparations
Preparations client
Download MSI installation file
The Antivirus Pro portal provides the download of the installation file. During the download, the MSI installation file including the portal config is downloaded. The portal config does not need to be used for the installation.
→ or → actions downloadMSI
- Login to the Reseller Portal
- Open the AV portal
- Open Licenses or Groups menu
- Download the MSI installation file for the license or group (group is recommended).
Preparation for installation with Portal Config
The portal configuration is always included in the ZIP archive when downloading the MSI installation file.
Preparation for installation with client configuration

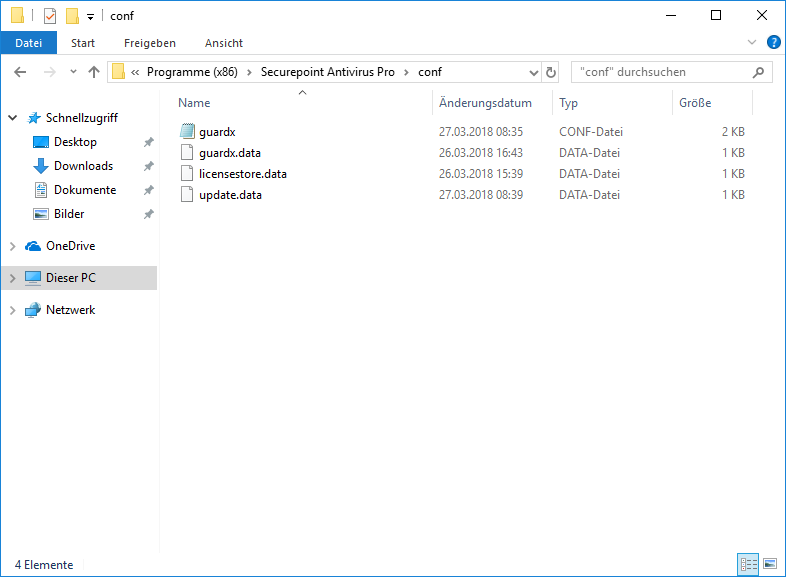
Creating a custom configuration file:
- Sample Installation: Perform Securepoint Antivirus Pro Installation
- Make the desired settings on the client
- Save the configuration file
Windows Server preparations
Release directory
For the automated installation a release directory is needed.
For this purpose, a new share or a folder is created in an existing NETLOGON share:
- Open Server Manager
- File/storage services
- Shared Folder
- Right click "New share" → Run through the wizard here
New organizational unit
- Open Server Manager
- Open Group Policy Management under Tools
- Right click on the domain, then select "Create new organizational unit".
Computer administration
- Open Server Manager
- Under Tools →Active Directory → Open user and computer
- Under "Computers" select the devices on which the AV should be installed with CTRL + left clic
- Move and then select the new organizational unit
Creating and linking a Group Policy Object
- Right click on the organizational unit
- Create and link a new Group Policy object there
- Edit the group policy object you have just created by right-clicking on it
- Computer Configuration → Policies → Windows Settings → Scripts (Startup/Shutdown) → Startup → Properties: Add the installation script below
- Accept the data and close the dialogue.
Installation scripts
The following scripts will install Securepoint Antivirus Pro without the need for a Windows command prompt or wizard GUI.
Installation script with client config
Installation of the client with the defaults of the sample installation see above
- Installation log is created
- Scans, exclusions etc. as stored in the client
- Setting of the license key (via parameter TID=)
- Confirmation of the license conditions (via parameter ACCEPTLICENSEAGREEMENT="yes")
- Confirmation of the privacy policy (via parameter ACCEPTPRIVACYPOLICY="yes")
- Further settings via parameters can be found in the wiki article about Silent Installation.
Creating the Installation Script
Create an install.bat file with the following content:
@echo off
tasklist /nh /fi "imagename eq guardxservice_x64.exe" | find /i "guardxservice_x64.exe" >nul && (
exit
) || (
start /wait msiexec /l* "[Path\to\file]\setuplog_%COMPUTERNAME%.txt" /i "[Path\to\file]\SetupAV.msi" ACCEPTLICENSEAGREEMENT="yes" ACCEPTPRIVACYPOLICY="yes" TID="00000000-0000-0000-0000-000000000000" CONFIG="[Path\to\directory]\" /q
)
exit
Save script
Save script as *.bat and copy it to the folder
- Open release directory
- Save script
- Copy MSI installation file to the folder
- Copy client config (guardx.conf) to the folder
Edit group policy
Setting up the DC
- Open Server Manager
- Open Group Policy Management under Tools
- Edit the group policy object you have just created by right-clicking on it
- Computer Configuration → Policies → Windows Settings → Scripts (Start/Shutdown) → Right-click Start → Properties
- Add → Browse → Select script
Installation script with parameters
Installation of the client takes place exclusively with manual parameters
- Installation log is created
- Defining the license key (via parameter TID=)
- Confirmation of the license conditions (via parameter ACCEPTLICENSEAGREEMENT="yes")
- Confirmation of the privacy policy (via parameter ACCEPTPRIVACYPOLICY="yes")
- Further settings via parameters can be found in the wiki article about Silent Installation
Creating the Installation Script
Create an install.bat file with the following content:
@echo off
tasklist /nh /fi "imagename eq guardxservice_x64.exe" | find /i "guardxservice_x64.exe" >nul && (
exit
) || (
start /wait msiexec /l* "[Path\to\file]\setuplog_%COMPUTERNAME%.txt" /i "[Path\to\file]\SetupAV.msi" ACCEPTLICENSEAGREEMENT="yes" ACCEPTPRIVACYPOLICY="yes" TID="00000000-0000-0000-0000-000000000000" PROPERTY="value" /q
)
exit
Save script
Save script as *.bat and copy it to the folder
- Open release directory
- Save script
- Copy MSI installation file to the folder
Edit group policy
Setting up the DC
- Open Server Manager
- Open Group Policy Management under Tools
- Edit the group policy object you have just created by right-clicking on it
- Computer Configuration → Policies → Windows Settings → Scripts (Start/Shutdown) → Right-click Start → Properties
- Add → Browse → Select script
| Parameter | Description |
|---|---|
| /l* "[Path\to\file]\setuplog_%COMPUTERNAME%.txt" | Creates an installation log with the Windows varriable of the computer name |
| /i "Path\to\file\SetupAV.msi" | Path to the installation file |
| /q | Performs the installation in "Silent" mode. notempty Syntax change ! Switch /quiet or /q as last parameter! |
| ACCEPTLICENSEAGREEMENT="yes" | Accepting the Terms of License |
| ACCEPTPRIVACYPOLICY="yes" | Accepting the Privacy policy |
| TID="00000000-0000-0000-0000-000000000000" | License |
| GROUPID="11111" | notempty 3.2.50 The GROUPID can be taken from the address line of the AV portal when the corresponding group is called or from the setup.conf of the installation ZIP archive. |
| CONFIG="[Path\to\the filing_directory]\" | The path to the storage location of the configuration file. The configuration file must be named guardx.conf. |


