Last adaptation to the version: 12.6.0
- Updated to Redesign of the webinterface
User authentication on the HTTP proxy
In addition to the transparent mode of the HTTP proxy, it is also possible that users must authenticate in advance for Internet use. This authentication can be performed either using the user management of the UTM or an authentication server such as Active Directory, LDAP or Radius.
To use authentication on the HTTP proxy, it is necessary to enter the proxy in the browser and make changes to the packet filter settings.
Proxy setting in the browser
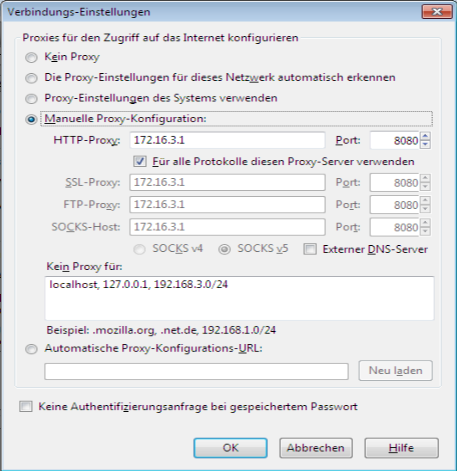
In the connection settings of the used browser, the IP address of the corresponding interface of the UTM can be entered under Manual proxy configuration.
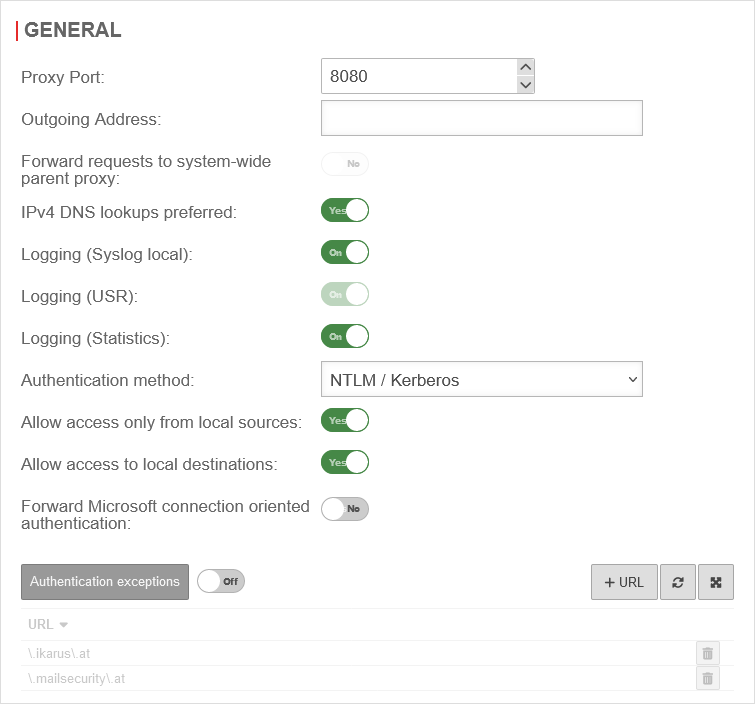
In addition, the port must be entered, which is set in the UTM under . When the UTM is delivered, this is port 8080.
In order for web pages accessed via HTTPS to be routed through the proxy as well, the function use this proxy server for all protocols must be enabled.
Packet filter settings
The UTM is shipped with a packet filter rule set to allow access from the internal network to the Internet with all services (any).
Since users might get the idea to change the browser's proxy settings to bypass authentication, this rule should be disabled or an appropriate service group should be created instead of any for this rule.
| # | Source | Destination | Service | NAT | Action | Active | ||
| HN | Accept | Off | ||||||
| Accept | On |
More information on the packet filter rules can be found here.
Authentication via the user management of the UTM
Create proxy user group | |||
| First of all, a user group is needed. To do this, click on Area Groups button . |
UTMuser@firewall.name.fqdnAuthenticationUser 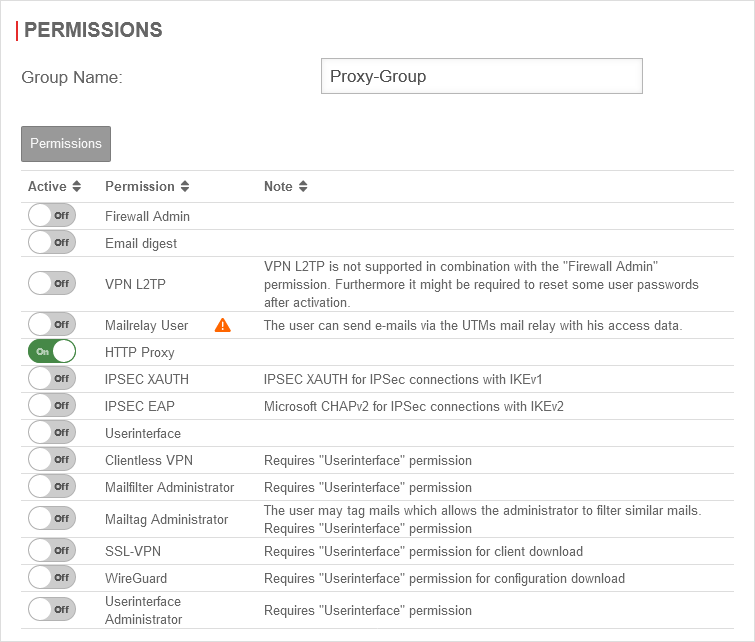
| ||
| Group name: | Proxy-Group | Choose a unique name | |
| HTTP-Proxy: | On | Enable HTTP proxy function | |
| Save and close | Saves the settings and closes the dialog | ||
| If different proxy users are to be treated differently later, then additional groups can be created. | |||
Create user | |||
| Next, under Area Add User button must be clicked. | UTMuser@firewall.name.fqdnAuthenticationUser 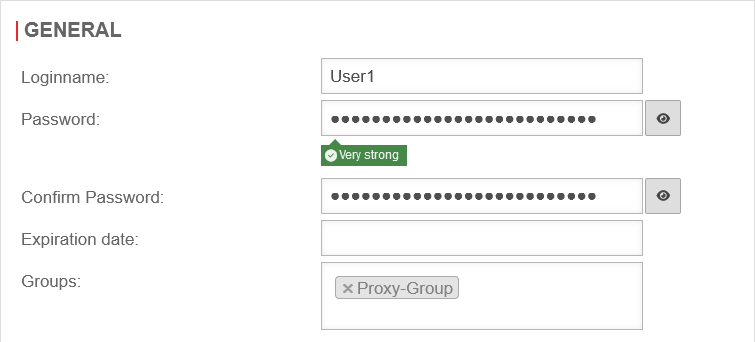 Edit group and enable HTTP proxy Edit group and enable HTTP proxy
| ||
| Login name: | User1 | Assign login name | |
| Password: | Assign a secure password | ||
| Confirm password: | Re-enter password | ||
| Groups: | »Proxy-Group | Select pre-set group | |
| Save and close | Saves the settings and closes the dialog | ||
| This process must be repeated for each user that is to be created. More information about user management can be found here. | |||
Enable authentication in HTTP proxy | |||
| Authentication in the HTTP proxy can be enabled under Area General. | UTMuser@firewall.name.fqdnApplications 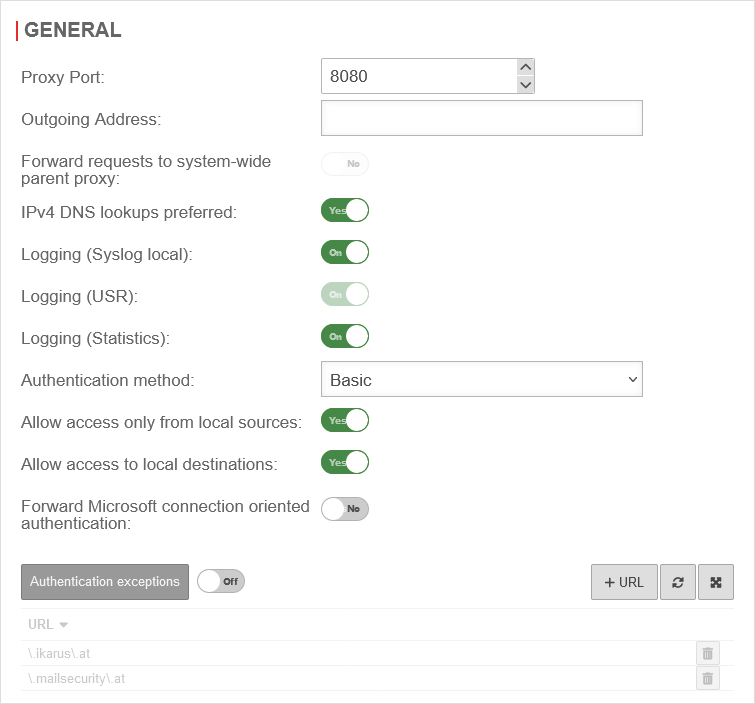 Authentication method "Basic" Authentication method "Basic"
| ||
| Authentication method: | Select method in drop-down menu | ||
| Save | Saves the settings | ||
| If now a browser (prepared as above) is started, an authentication prompt appears before the first web page that is called is displayed. |  | ||


