Last adaption: 11.2024
- Correction in the IPv4 address in Step 2 - Interface
- Added note that the Fritz!Box must be restarted after changing the configuration.
- Note added for NetBIOS in the Fritz!Box
This article includes descriptions of third-party software and is based on the status at the time this page was created.
Changes to the user interface on the part of the manufacturer are possible at any time and must be taken into account accordingly in the implementation.
All information without warranty.
Introduction
This HowTo describes the configuration of a WireGuard site-to-site VPN connection of a Securepoint UTM with a Fritz!Box.
Add key
The following keys are necessary to enable communication between the UTM and the Fritz!Box:
- Type x25519 key for the UTM
- x25519 key for the Fritz!Box
From both keys the public and the private part is needed.
| Add key | |||
| Open key management under with button | |||
| Caption | Value | Description | UTMuser@firewall.name.fqdnAuhthenticationKeys 
|
|---|---|---|---|
| Name: | x25519_a.vpn | Assign a unique name Here the key name for the UTM | |
| Type: | Select X25519 as type | ||
| Close dialog with Save and close button. | |||
| Fritz!Box-Key | |||
| Repeat the above procedure for a key named x25519_fritzbox-1. | |||
|
UTMuser@firewall.name.fqdnAuhthentication 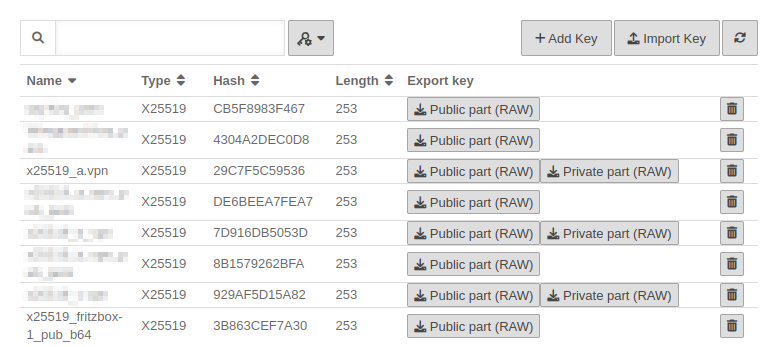 The finished state of both keys The finished state of both keys
| ||
| Click the button and import the public part of the Fritz!Box key. | |||
Add WireGuard Connection
WireGuard configuration on the UTM
Under click on the button
Step 1 -Step 1 - | |||
| notempty It is recommended to create the WireGuard connection via the UTM. You should therefore skip Step 1 - Import configuration. | |||
| Caption | Value | Description | UTMuser@firewall.name.fqdnVPNWireGuard 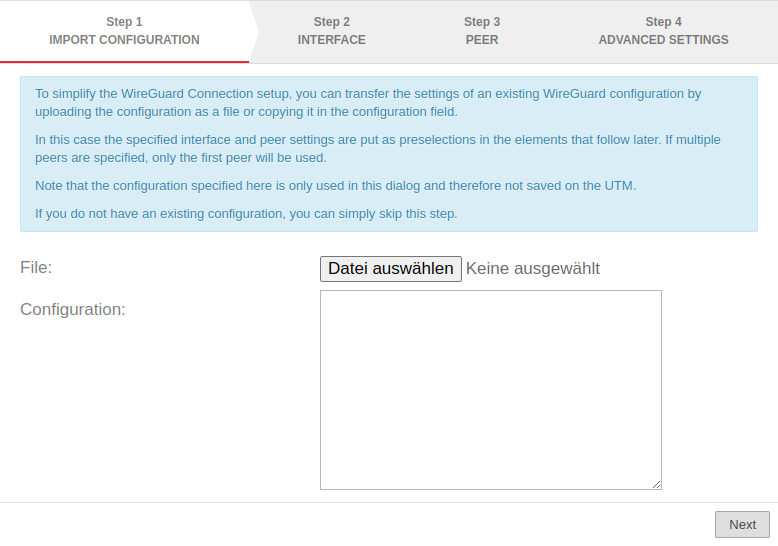 WireGuard Wizard - Step 1 WireGuard Wizard - Step 1
|
|---|---|---|---|
| File: | If the WireGuard connection was created via the Fritz!Box, the corresponding configuration file can be uploaded here. The configuration file is generally named wg_config.conf. The configuration field is filled in accordingly under Configuration:. | ||
| Configuration | If a WireGuard connection was created via the Fritz!Box, the configuration can be copied to this configuration field. [Interface]
PrivateKey = #private key value
ListenPort = #The port used
Address = #The remote network of the UTM
DNS = #DNS IP address
DNS = #DNS FQDN
| ||
Step 2 - InterfaceStep 2 - Interface | |||
| Caption | Value | Description | 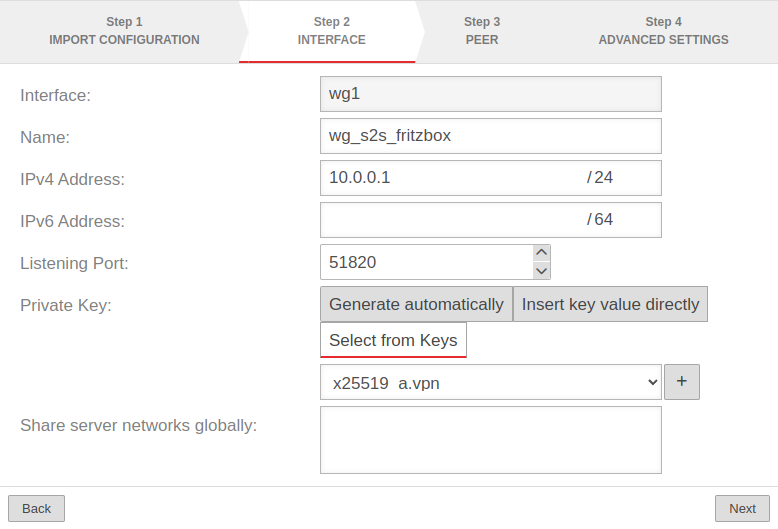 |
| Interface: | wg1 | Name of the interface that will be created for the connection (automatic default, cannot be changed) | |
| Name: | wg_s2s_fritzbox | Unique name for the connection | |
| IPv4 address: | 10.0.0.1/24 | IPv4 address for the network interface of the UTM's transfer network | |
| IPv6 address: | IPv6 address for the network interface of the UTM's transfer network (optional) | ||
| Listening Port: | 51820 | Default-Port for WireGuard connections | |
| Private key: | |||
| Private key of the UTM in x25519 format. Only those keys that also have a private key part can be selected. | |||
| Share server networks globally: | Additional networks for the (local) server side, which can be accessed by the WireGuard tunnel of the peers | ||
Step 3 - PeerStep 3 - Peer | |||
| Use AD users as peers: | Off | The use of An AD users as peers is recommended if they are connected to an AD/LDAP server and have the correct attribute settings. Furthermore, a user group on the UTM must be linked to a user group in AD/LDAP and this user group must have WireGuard authorization. Further information can be found in the wiki article AD/LDAP Authentication. |
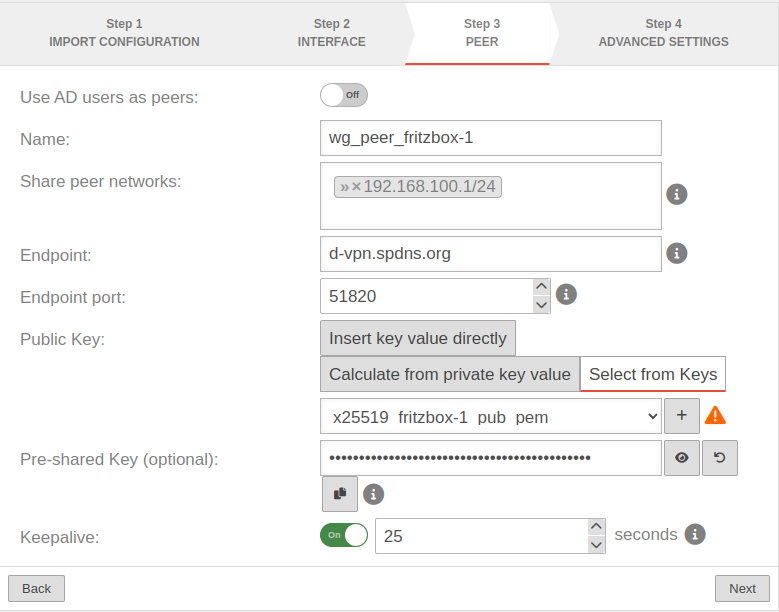 |
| Name: | wg_peer_fritzbox-1 | Description of remote terminal for the Fritz!Box | |
| Share peer networks: | »192.168.178.1/24 | The internal network of the Fritz!Box to be accessed | |
| Endpoint: | d-vpn.spdns.org | Public DNS resolvable FQDN of the Fritz!Box | |
| Endpoint port: | 51820 | The Listening Port of the Fritz!Box | |
| Public key: | |||
| Select the public key part of the Fritz!Box Only keys for which there is not yet a connection on this interface can be selected. The PublicKey must be unique within a connection, as the routing of incoming packets is carried out via it. If the same PublicKey is to be used for a peer, e.g. for a fallback, another WireGuard connection must be created for this. | |||
| Pre-Shared Key (optional): | …8DmBioPyPNqZ7Rk= | Pre-shared key for further securing the connection | |
| Show Hide |
Show / Hide the pre-shared key | ||
| Generate | Generates a very strong pre-shared key | ||
| Copy to clipboard | Copies the PSK to the clipboard | ||
| Keepalive: | Off | Regularly sends a signal. This keeps connections open on NAT routers. On Activation is recommended. | |
| 25 Seconds | Interval in seconds at which a signal is sent | ||
Step 4 -Step 4 - | |||
| Create routes to the peer's networks: | No | Activation is recommended. Routes are created to the networks / hosts that were entered in step 3 under Allowed IPs with the interface as gateway that was displayed in step 2. |
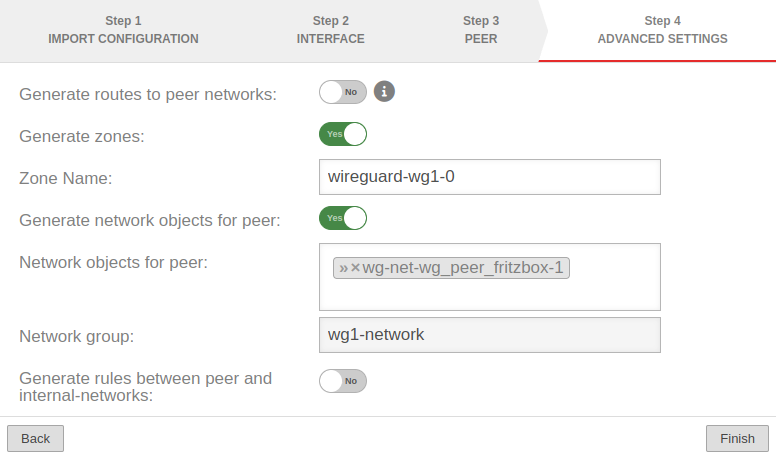 |
| Generate zones: | Yes | Generates a new zone for the WireGuard port | |
| Zone Name: | wireguard-wg0-1 | Enter a name for the zone | |
| Generate network objects for peer: | Yes »wg_peer_fritzbox-1-0 |
Creates Yes button when enabled for network objects (IPv4 and if necessary IPv6) of the remote terminal. Automatic suggestion can also be changed. | |
| Generate rules between peer and internal-networks: | No | Generates autogenerated rules that facilitate implementation. notempty It is essential to replace these rules with your own rules that allow only necessary services with necessary network objects. | |
| The settings are applied with the button. | |||
| Then the Restart button restarts the WireGuard service. The UTM will not be restarted. | |||
WireGuard configuration on the Fritz!Box
Step 1 - Public key
Step 1 - Public key
Export the public part of the key of the UTM x25519_a.vpn in .raw format.
Step 2 - Create configuration file
Step 2 - Create configuration file
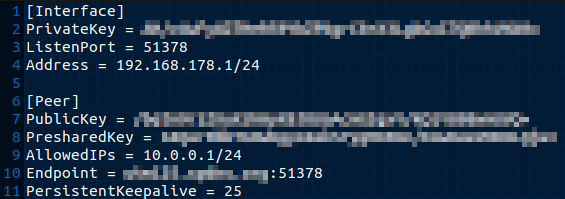
A configuration file with the following content is created. To do this, open a file in any editor.
[Interface]
PrivateKey = $PRIVATE_KEY_FRITZBOX
ListenPort = $LISTENPORT_WIREGUARD_FRITZBOX
Address = $LOCAL_IP_FRITZBOX/$NETMASK

[Peer]
PublicKey = $PUBLIC_KEY_UTM
PresharedKey = $PRESHAREDKEY
AllowedIPs = $NETWORK_SECUREPOINT/$NETMASK
Endpoint = $HOSTNAME_UTM:$LISTENPORT_WIREGUARD_UTM
PersistentKeepalive = 1
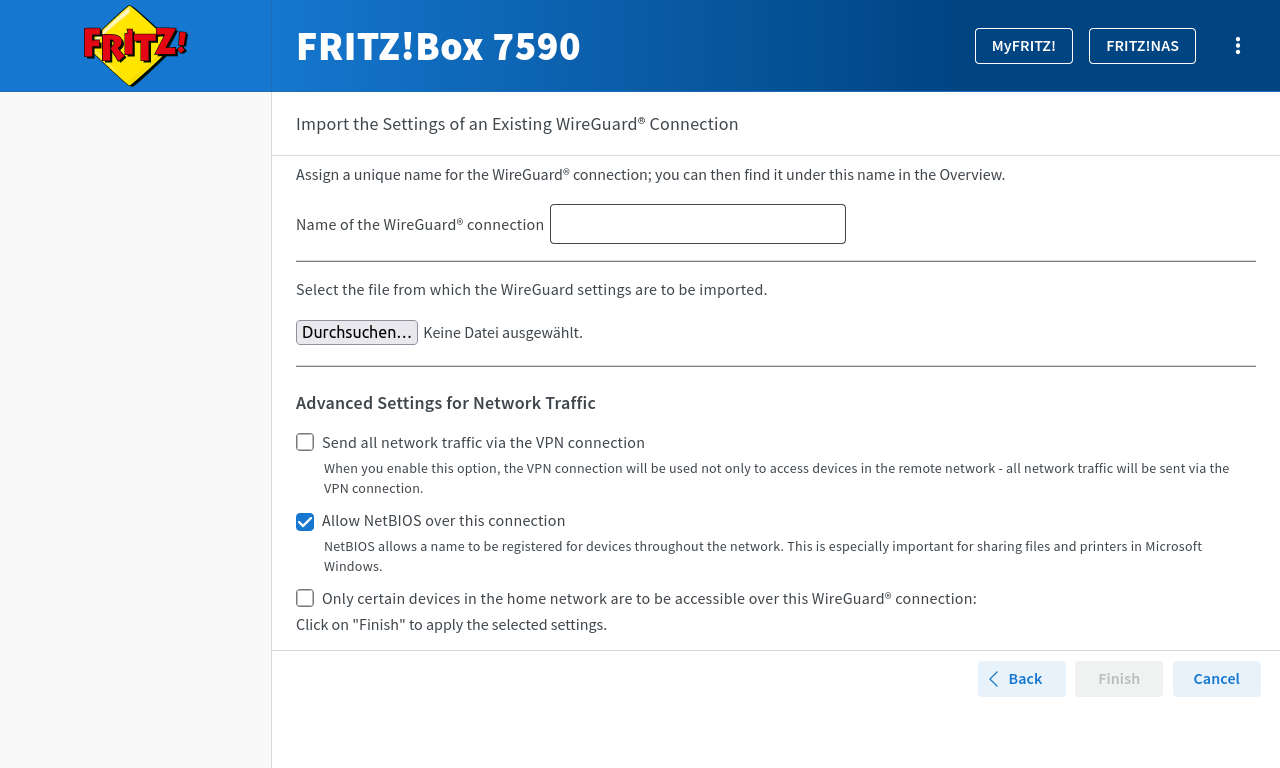
Step 3 - Upload configuration file
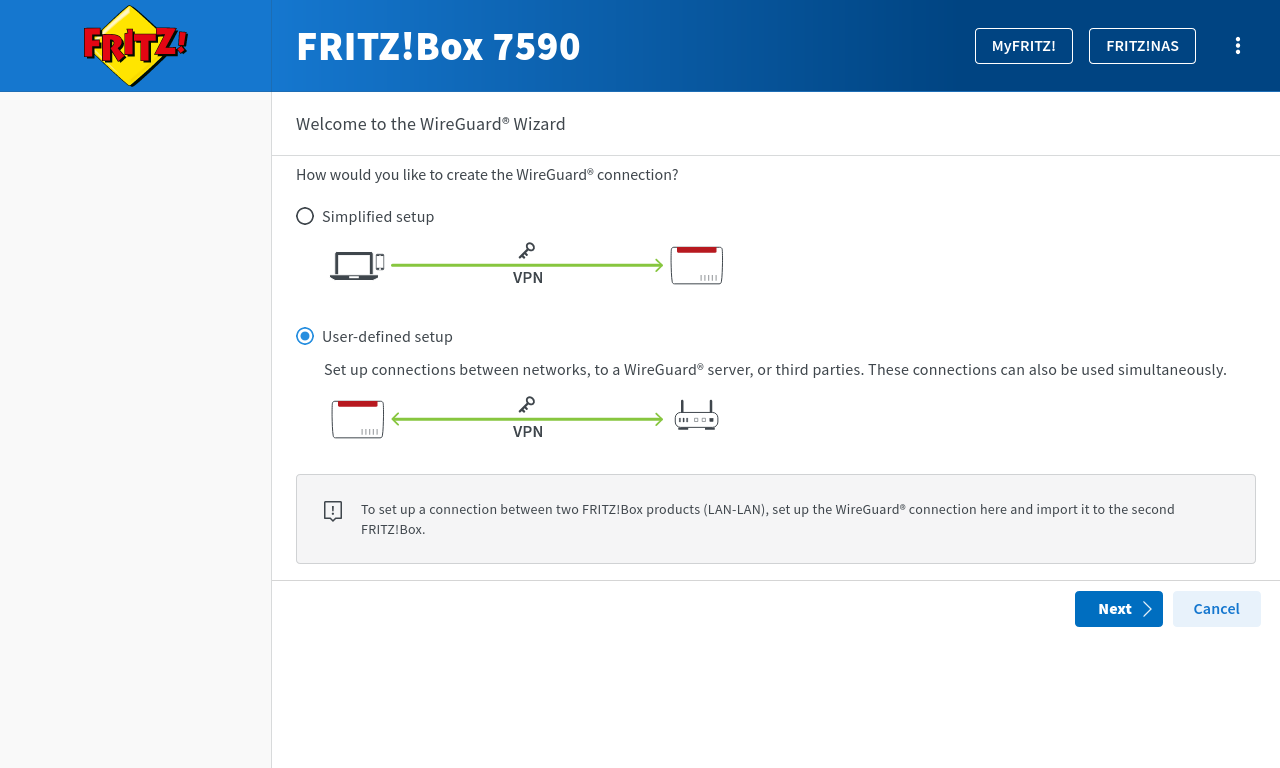
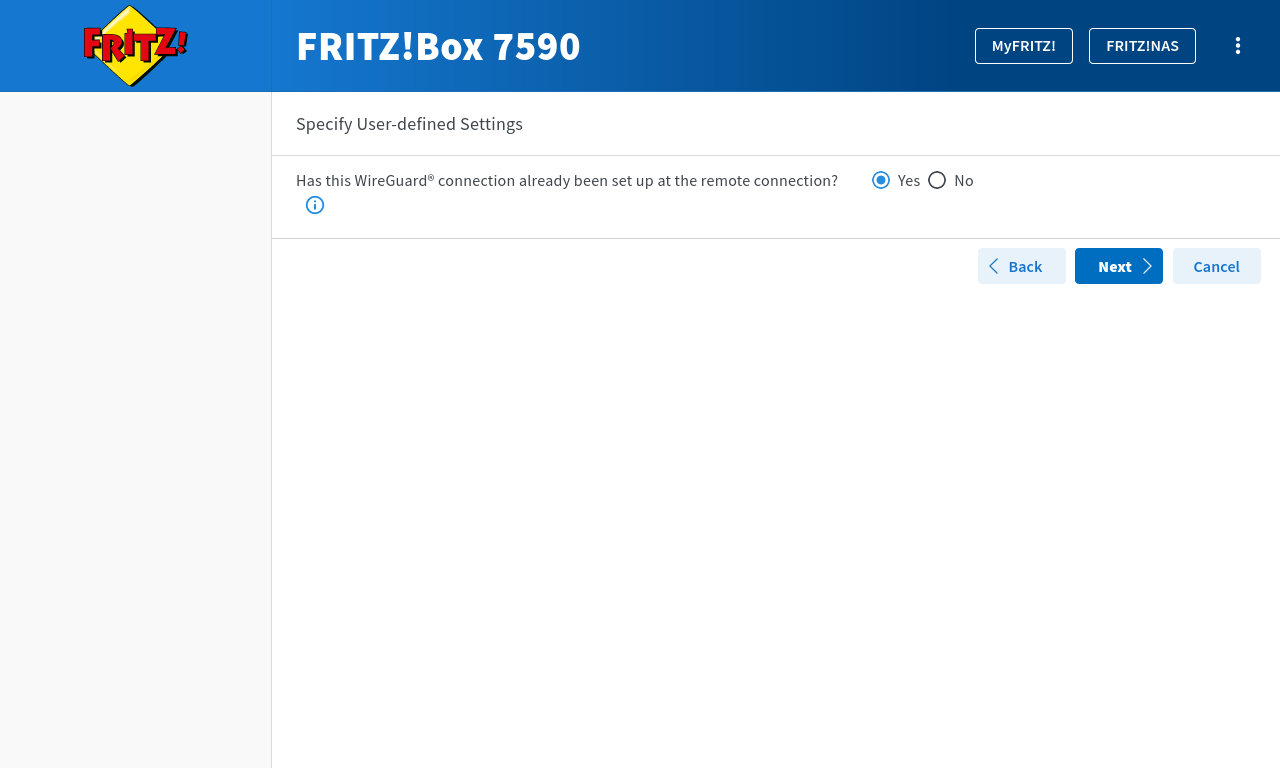
Step 3 - Upload configuration fileLog into the Fritz!Box interface and go to Internet → Share→ Tab VPN (WireGuard).
Click there.
After the automatic switch to the VPN (WireGuard) dialogue, click Refresh and the WireGuard connection is active.
If, among other things, an error occurs when uploading the configuration file, the corresponding error message is displayed under System → Event Log.
Troubleshooting the port after importing the configuration file
When importing the configuration file, it can happen that the Fritz!Box ignores the port entered and assigns its own port independently.
- In Internet → Share→ Tab VPN (WireGuard) the button Edit opens the configuration dialog of the corresponding WireGuard connection
- In the section Used Internet address of the remote terminal and your Fritz!Box you can read which end port (after the colon) is used
- If this port was changed, enter it as listening port in the WireGuard connection of the UTM


