notempty
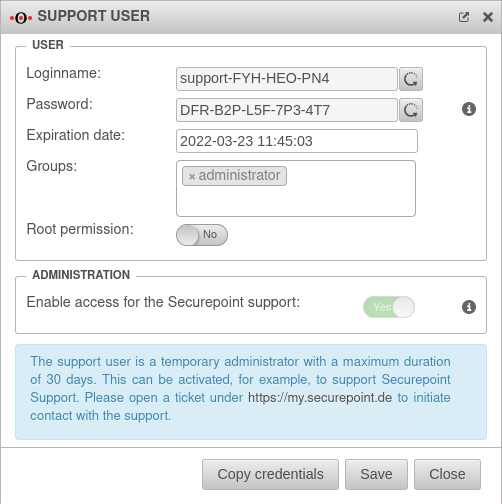
- The Support User Credentials can be copied to the clipboard
- The format for the Expiry Date via CLI has been extended
Preamble
Call user configuration in the navigation bar under
The users entered here are stored in a local database on the appliance.
The authentication configured at this point is also performed against the local database.
In addition, local user groups can be assigned to an AD/LDAP group.
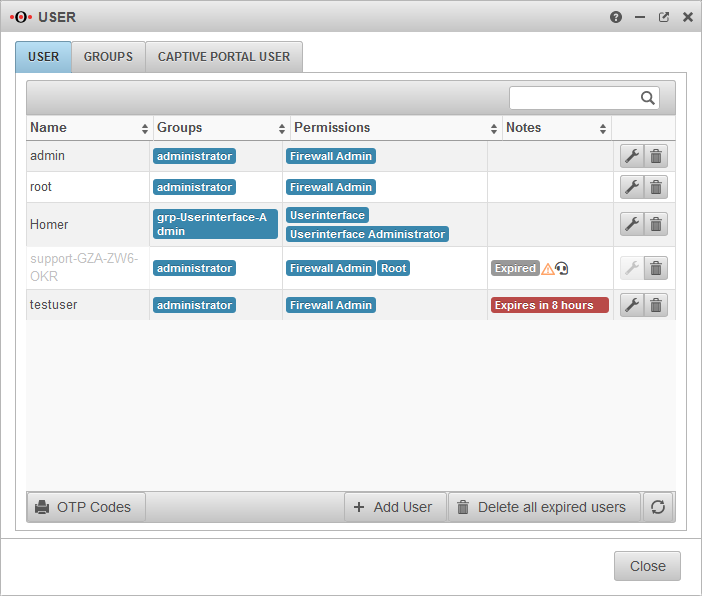
User overview
| Caption | Value | Description |
|---|---|---|
| Name | admin |
Login name of the user |
| Groups | administrator | Group membership of the respective user |
| Permissions | Firewall Administrator | Authorizations, configuration under Groups |
| Notes | Expires in 8 hours | After expiration the user can no longer log in. |
| Edit or delete the user | ||
| Generates a pdf document with OTP codes in QR format and plain text for all users except the user admin. | ||
| Creates a new user. [[#{#var:Benutzer hinzufügen}} | see below]] | ||
| Does exactly that. Support users are automatically removed 24 after the expiry date at the latest. | ||
Support user
The support user is a temporary administrator who can be activated, for example, to be supported by Securepoint support.
The button for creating a support user is located in the upper right corner of the dashboard. (Headset icon)
General User
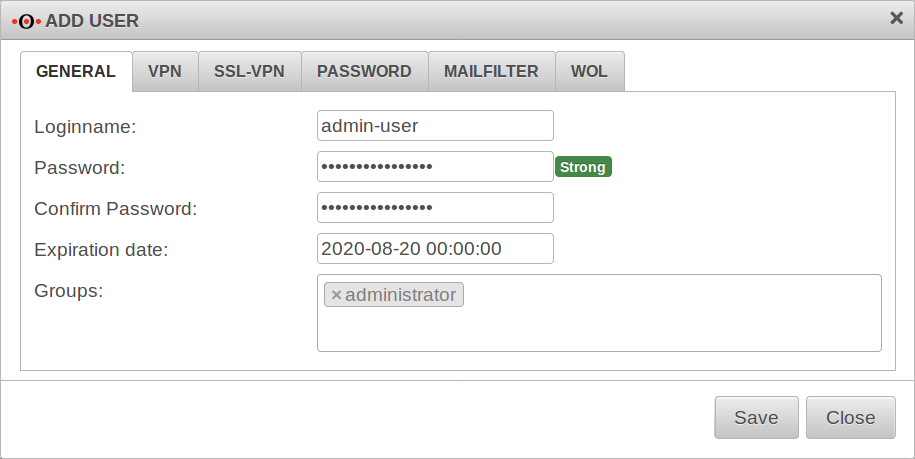
Add / edit user
/
The dialog Add user opens. This dialog contains several tabs. There is no need to make entries in all tabs. With the entries are accepted.
User General
root user
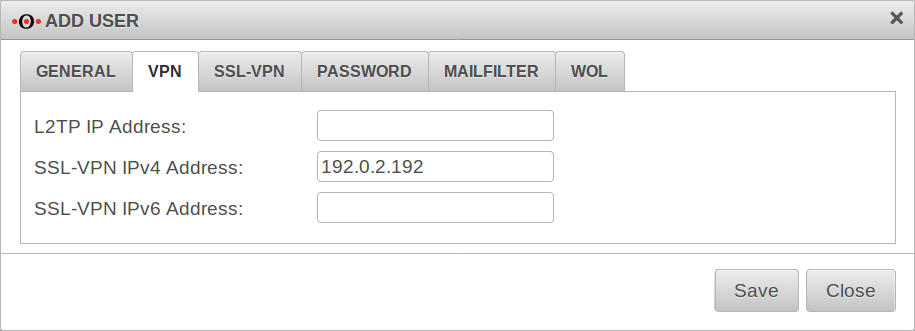
VPN
Here fixed IP tunnel addresses can be assigned to the users.
L2TP IP Address:
SSL-VPN IPv4 Address:
SSL-VPN IPv6 Address:
PPTP is no longer available because it has been proven to be an insecure protocol.
SSL-VPN
UTM/AUTH/Benutzerverwaltung SSL-VPN v12.2.3
Password:
The Password tab defines the strength of the password and whether the password can be changed by the user.
| Caption | Default | Description |
|---|---|---|
| Password change allowed: | Off | Determines whether the user can change his or her password in the user interface. |
| Minimum password length: | 8 | The minimum password length can be set to more than 8 characters. |
Passwords must meet the following criteria:
| ||
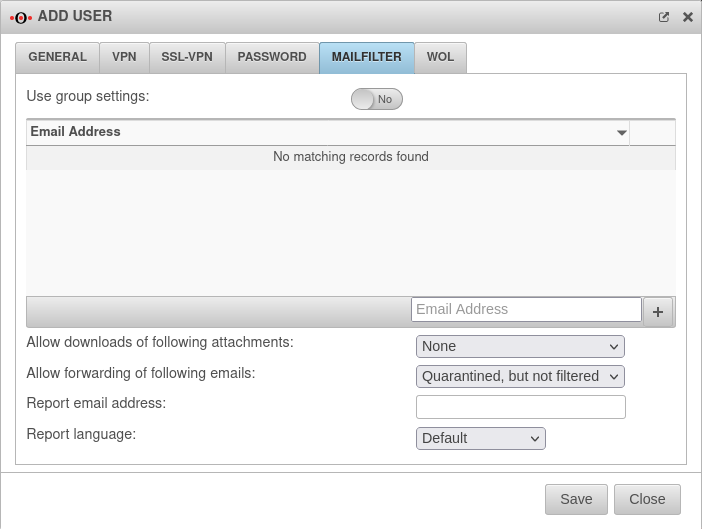
Mailfilter
| Caption | Default | Description |
|---|---|---|
| Use group settings: | No | If the user is a member of a group, the settings can be applied from there. The following settings are then hidden here and can be configured in the menu / Groups. |
| email address | ||
| user@ttt-point.de | E-mail accounts that can be viewed by this user to control the mail filter. Delete with | |
| email address | Adding an email address to the list | |
| Allow downloads of following attachments: | (Default) | In the user interface, the user can download/u> attachments of mails that meet certain criteria. |
| This function may allow the downloading of viruses and should therefore only be allowed for experienced users! | ||
| This function may allow the downloading of viruses and should therefore only be allowed for experienced users! | ||
| Allow forwarding of following emails: | (Default) | In the user interface, the user can forward/u> attachments of mails that meet certain criteria. |
| This function may allow the forwarding of viruses and should therefore only be allowed for experienced users! | ||
| This function may allow the forwarding of viruses and should therefore only be allowed for experienced users! | ||
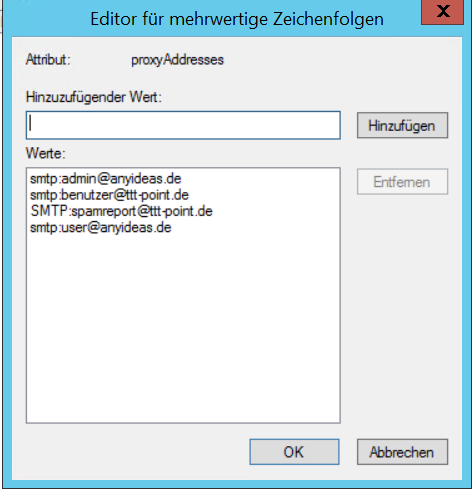
| Bericht E-Mail-Adresse: | E-Mail-Adresse, an die ein Spam-Report versendet wird. Wenn hier kein Eintrag erfolgt, wird der Spam-Report an die erste E-Mail-Adresse der Liste gesendet. New in 11.8.8 If several mail addresses for a user are stored in an AD, the entry configured there as Primary SMTP address is used as the default address.
| |
| Report language: | Default under → Firewall → language of reportsIt can be specifically selected: or |
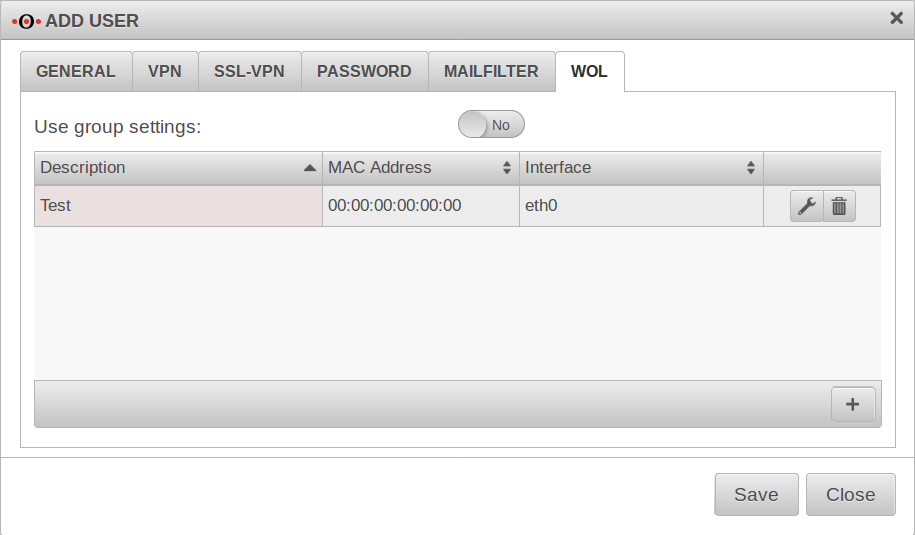
WOL
WOL stands for Wake on LAN and switches on a computer via the network card. In order to start the computer via data packet, the computer must also support this. This is usually configured in the BIOS or UEFI.
After logging into the user interface, the user can trigger a WOL for devices entered here.
| Caption | Default | Description |
|---|---|---|
| Description: | Free text | |
| MAC address: | __:__:__:__:__: | MAC address of the computer to be activated via Wake on Lan. |
| Interface: | Interface of the appliance via which the WOL packet must be sent. |
Calls the entry for editing.
Deletes the item
Groups
Some settings described in the Users section can also be set for the entire group. However, the settings for the individual user replace the group settings.
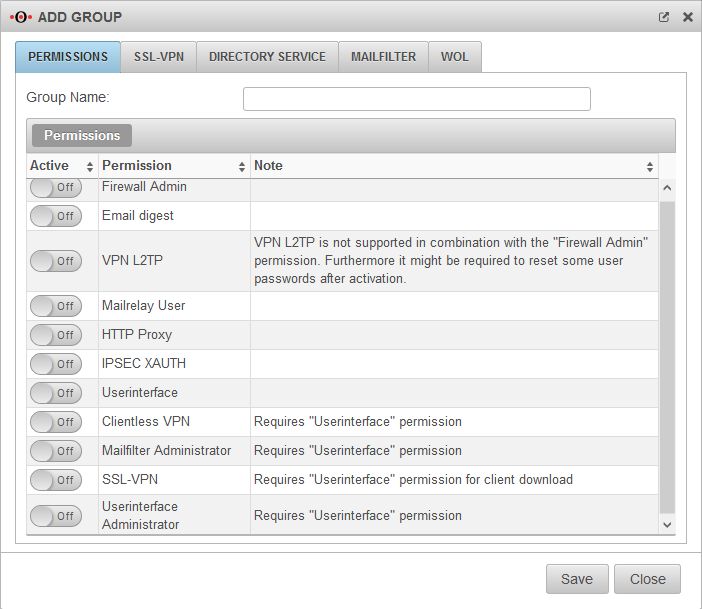
Permissions
| Caption | Description |
|---|---|
| Group Name: | Freely definable name |
| Permissions | |
| Firewall Admin | Members of this group can call the admin interface (by default accessible on port 11115. There must always be at least one firewall administrator. |
| Spamreport | Members of this group can receive a spam report |
| VPN-L2TP | Members of this group can establish a VPN-L2TP connection. |
| Mailrelay User | Members of this group can use the Mailrelay |
| HTTP Proxy | Members of this group can use the HTTP proxy. |
| IPSEC XAUTH | Members of this group can authenticate themselves with IPSEC. |
| Userinterface | Members of this group have access to the user interface |
| Clientless VPN | Members of this group can use Clientless VPN |
| Mailfilter Administrator | Members of this group, in combination with the User Web Interface right, have access to all emails that are temporarily stored in the UTM's mail archive. - regardless of whether they are legitimate recipients or senders of these emails. |
| SSL-VPN | Members of this group can establish an SSL VPN connection. |
| ab v12 Userinterface Administrator | Members of this group can access the Captive Portal user administration via the user interface. |
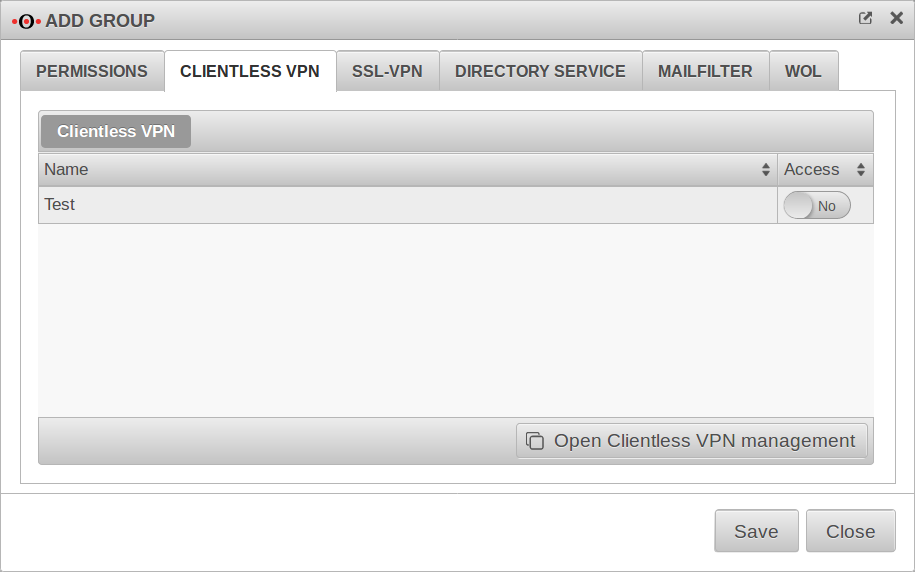
Clientless VPN
This tab is only displayed if Permissions Clientless VPN has been activated Ein in the Permissions tab.
Connections created under are displayed here.
| Clientless VPN | ||
|---|---|---|
| Name | Name of the connection | |
| Access | No | If Yes is activated, members of this group can use this connection. |
Here you can configure and add connections.
Call alternatively via
Further information in the article to Clientless VPN.
SSL-VPN
UTM/AUTH/Benutzerverwaltung-Gruppen-SSL-VPN v12.2.3
Directory Service
Here you can specify which directory service group the members of this user group should belong to.
In order for a group to be selected here, a corresponding connection must be configured under .
Selection of an AD/LDAP group
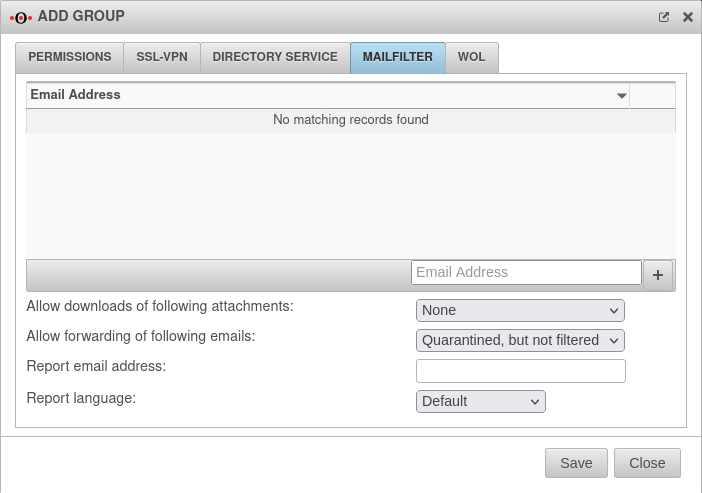
Mailfilter
The authorization Userinterface Ein is required.
| Email address | ||
| Caption | Default | Description |
|---|---|---|
| support@ttt-point.de | Email accounts that can be viewed by members of this group to control the mail filter. Delete with | |
| Email address | Adding a mail address to the list | |
| Allow downloads of following attachments: | (Default) | Members of this group can download attachments from mails in the user interface that meet certain criteria. |
| Allow forwarding of following emails: | (Default) | Members of this group can forward emails in the user interface that meet certain criteria |
| Report email address: | Email address to which a spam report is sent. If no entry is made here, the spam report is sent to the first email address in the list. If several mail addresses for a user are stored in an AD, the entry configured there as Primary SMTP address is used as the default address..
| |
| Report language: | Default under → Firewall → language of reportsIt can be specifically selected: or |
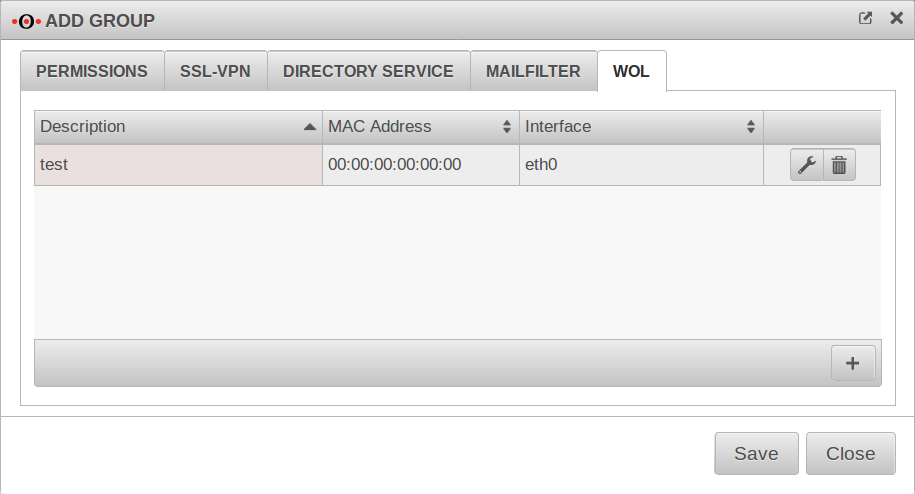
WOL
WOL stands for Wake on LAN and switches on a computer via the network card. In order to start the computer via data packet, the computer must also support this. Usually this is configured in the BIOS or UEFI.
Members of this group can switch on hosts entered here via WOL after logging into the user interface.
| Caption | Default | Description |
|---|---|---|
| Description | Free text | |
| MAC address: | __:__:__:__:__: | MAC address of the computer to be activated via Wake on Lan. |
| Interface: | Interface of the appliance via which the WOL packet must be sent. |
Calls the entry for editing.
Deletes the item
notempty
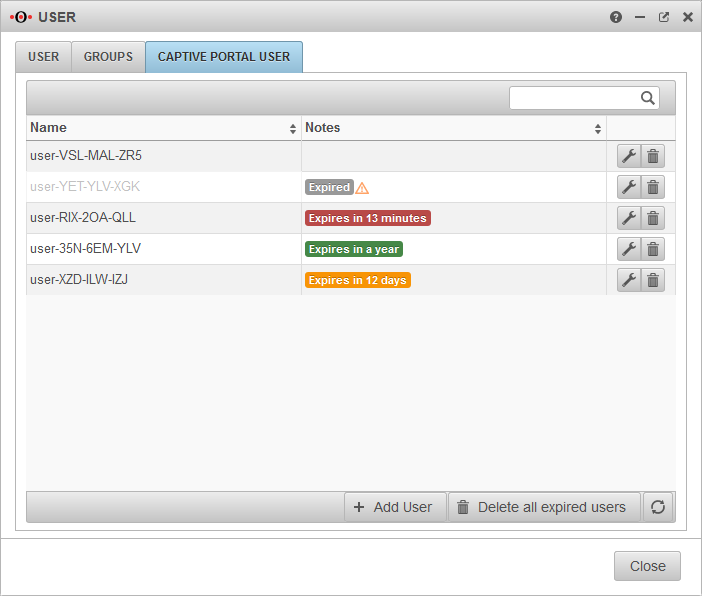
Captive Portal User
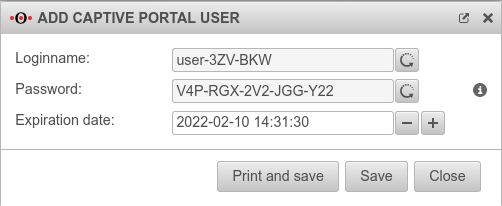
Captive Portal users must authenticate themselves and agree to the terms of use when they connect to an appropriately configured network. Only then is the network access released - according to the port filter rules.
Add user
Captive Portal users can be managed by:
- Administrators
- Users who are members of a group with the permission Userinterface Administrator .
They reach the user administration via the user interface.
