notempty
notempty
notempty Dieser Artikel bezieht sich auf eine nicht mehr aktuelle Version!
notempty
Der Artikel für die neueste Version steht hier
Zu diesem Artikel gibt es bereits eine neuere Version, die sich allerdings auf eine Reseller-Preview bezieht
Configuration of a bridge in connection with eth interfaces
Last adaptation to the version: 11.8.7
New:
- Layout adjustments
notempty
This article refers to a Resellerpreview
Introduction
A bridge (network bridge) connects two physical networks to a common one.
The interfaces connected in this way have an IP and the IP addresses of the connected devices are in the same subnet.
The connection to the admin interface is lost as soon as the IP address is removed from the interface currently used to access the UTM.
If all available internal interfaces are to be added to a bridge (e.g. eth1 and eth2 for a Black Dwarf), external access to the firewall must be via eth0.
Port forwarding from an internal network via an external IP address is not possible via a bridge.
This could be remedied by setting up a forward zone in the UTM name server, provided that the UTM is set up as the name server for the internal clients. In this case, the external URL called by Internal refers directly to the internal target server.
Instructions for setting up the forward zone can be found under Forward-Zone in the Nameserver Wiki.
The interfaces connected in this way have an IP and the IP addresses of the connected devices are in the same subnet.
The firewall must not be administered via the interface that is to be added to a bridge!
The connection to the admin interface is lost as soon as the IP address is removed from the interface currently used to access the UTM.
If all available internal interfaces are to be added to a bridge (e.g. eth1 and eth2 for a Black Dwarf), external access to the firewall must be via eth0.
Port forwarding from an internal network via an external IP address is not possible via a bridge.
This could be remedied by setting up a forward zone in the UTM name server, provided that the UTM is set up as the name server for the internal clients. In this case, the external URL called by Internal refers directly to the internal target server.
Instructions for setting up the forward zone can be found under Forward-Zone in the Nameserver Wiki.
Prepare administration access
- Identify an interface on the firewall that should not be bridged.
- In the menu IP Addresses note down or assign existing IP address of this interface (e.g. 10.0.10.1/24 or 10.10.10.193/29).
- Find a free IP address from the corresponding network.
- Add this IP address or the entire associated network (e.g. 10.0.10.0/24 or 10.10.10.192/29) in the menu tab Administration and authorize it for administration
- Establish access on the selected interface via this IP address or this network (e.g.: 10.0.10.1:11115 or 10.10.10.193:11115)
Prepare interfaces
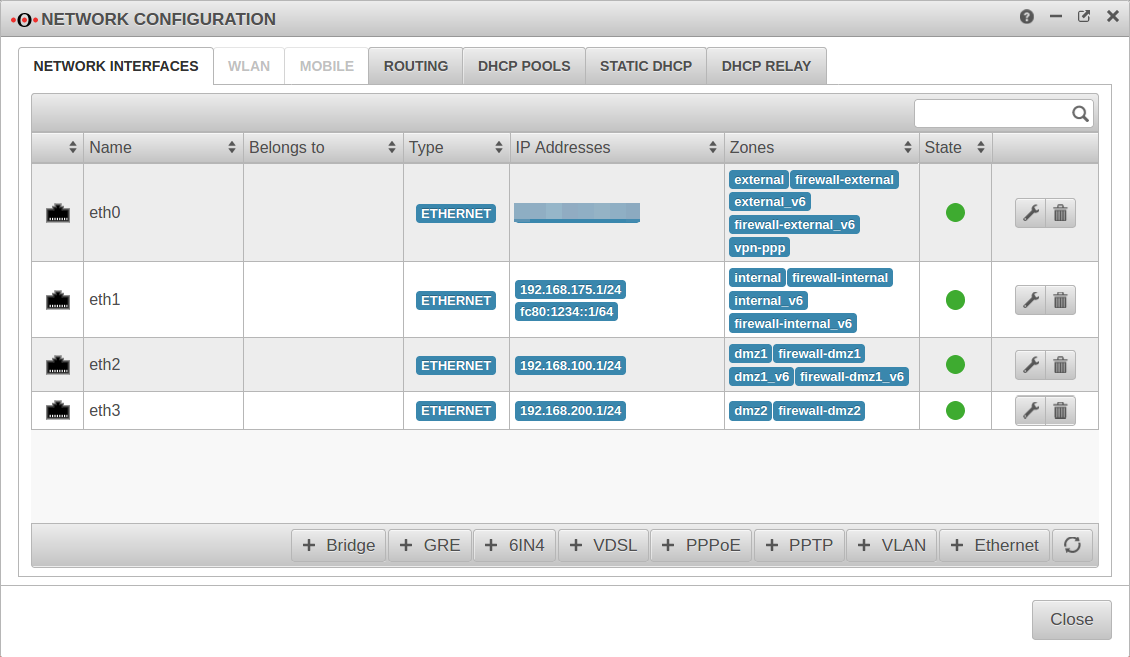
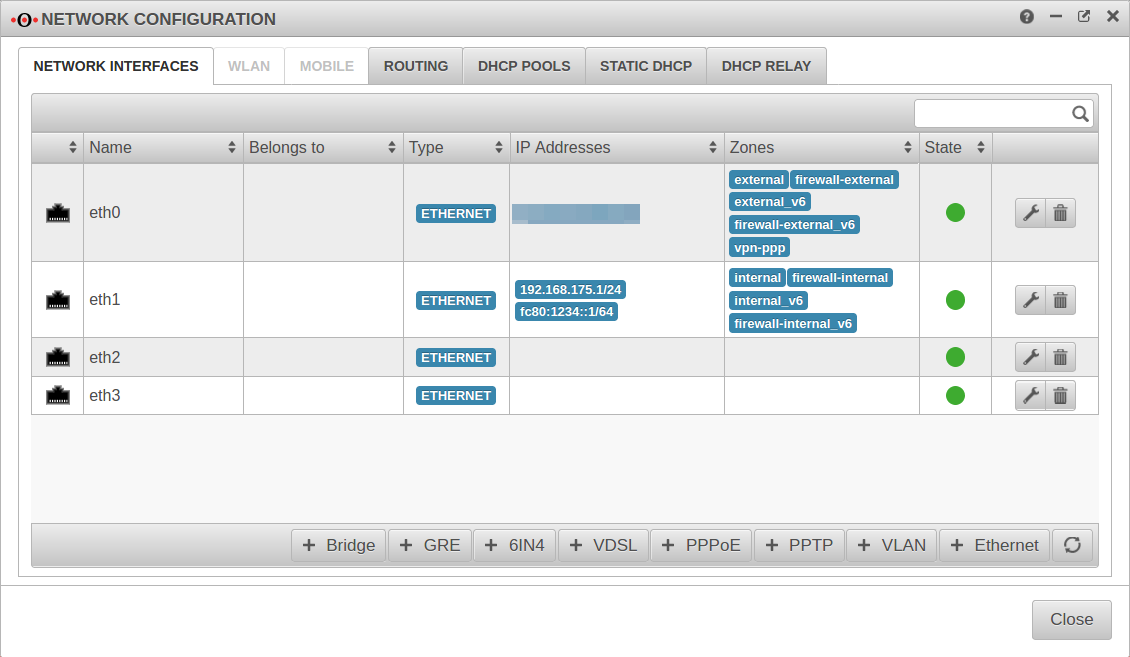
First, remove all IP addresses from the interfaces to be used for the bridge.
→ in the corresponding interface → Tab IP Addresses.
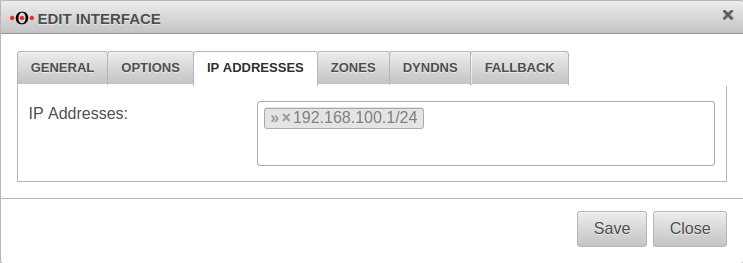
Remove IP addresses. In the example » ✕192.168.100.1/24 by clicking on
→ in the corresponding interface → Tab Zones.
Remove the zones by clicking on . In the example » ✕dmz1 » ✕firewall-dmz1 » ✕dmz1_v6 » ✕interface-dmz1_v6}
Then
Then
→ in the corresponding interface → Tab IP Addresses.
Remove IP addresses. In the example » ✕192.168.100.1/24 by clicking on
Under no circumstances may the IP address be removed which is used for the current access!
→ in the corresponding interface → Tab Zones.
Remove the zones by clicking on . In the example » ✕dmz1 » ✕firewall-dmz1 » ✕dmz1_v6 » ✕interface-dmz1_v6}
Then
Under no circumstances may the zone be removed which is used for the current access!
Then
Create a Bridge
In the example, the interfaces eth2 and eth3 are to be combined to a DMZ.
Start the wizard in the menu Tab Network interfaces Button
Step 1Step 1
| |||
| Caption | Value | Describtion | 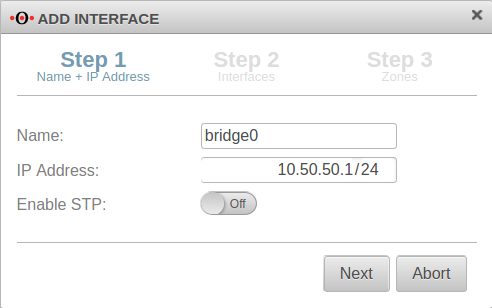 |
|---|---|---|---|
| Name: | bridge0 | Name of the bridge interface | |
| IP address: | 10.50.50.1/24 | Example-IP address of the bridge interface | |
| Activate STP: | Off | In addition, the Spanning Tree Protocol can be activated. | |
Step 2Step 2
| |||
| Interfaces: | » ✕eth2 » ✕eth3 | Interfaces that are to be combined. Available interfaces can be selected in the click box. | 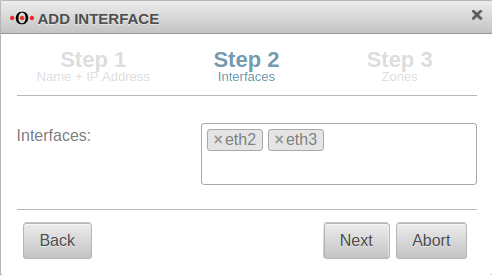 |
Step 3 Step 3
| |||
| Zones: | » ✕dmz1 » ✕firewall-dmz1 » ✕dmz1_v6 » ✕firewall-dmz1_v6 | Zones that are to be linked with the bridge interface. In our example dmz1 and firewall-dmz1. |
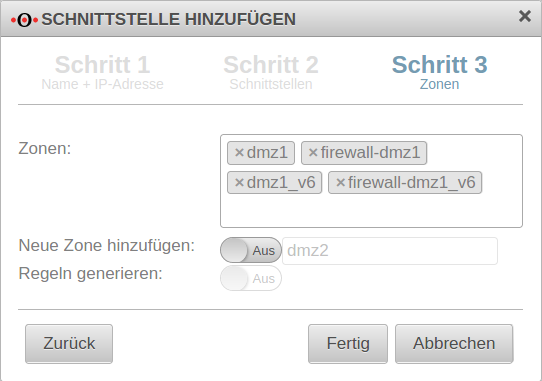 |
| Add new zone: | Off dmz2 | If activated On, a new zone can be added to the bridge alternatively or additionally. | |
| Generate Rules: | Off | Port filter rules are automatically created for the new zone. These rules first allow any network traffic (any rules) and must be replaced unconditionally by customized rules!
| |
| Finishes the process | |||
| Configured bridge | 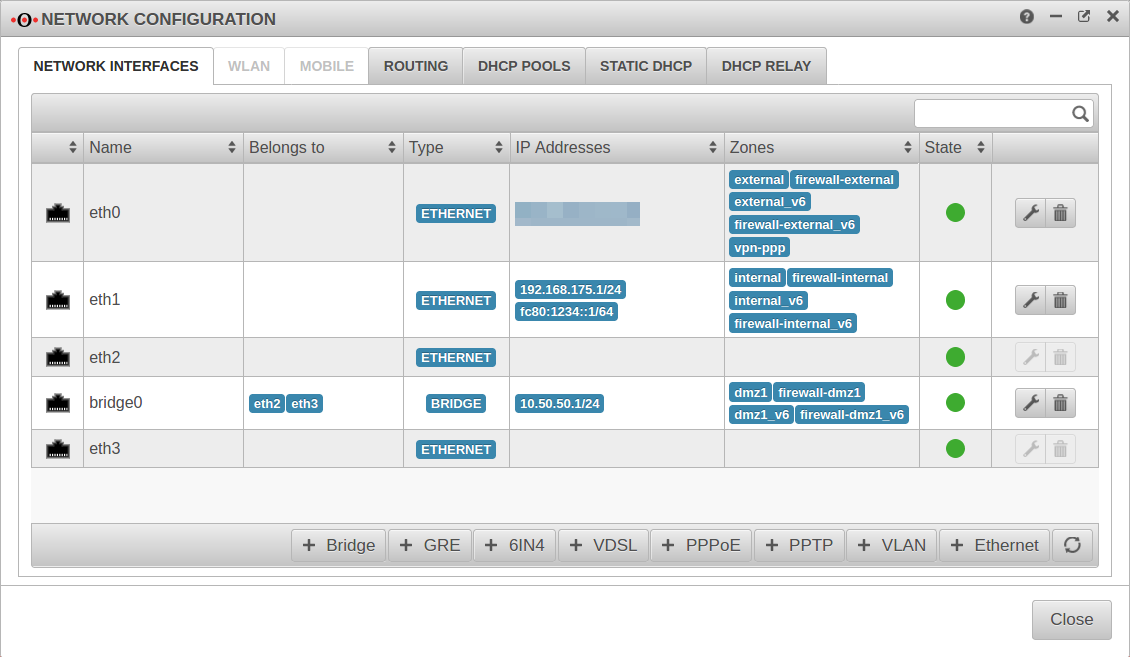 | ||
Customize network objects
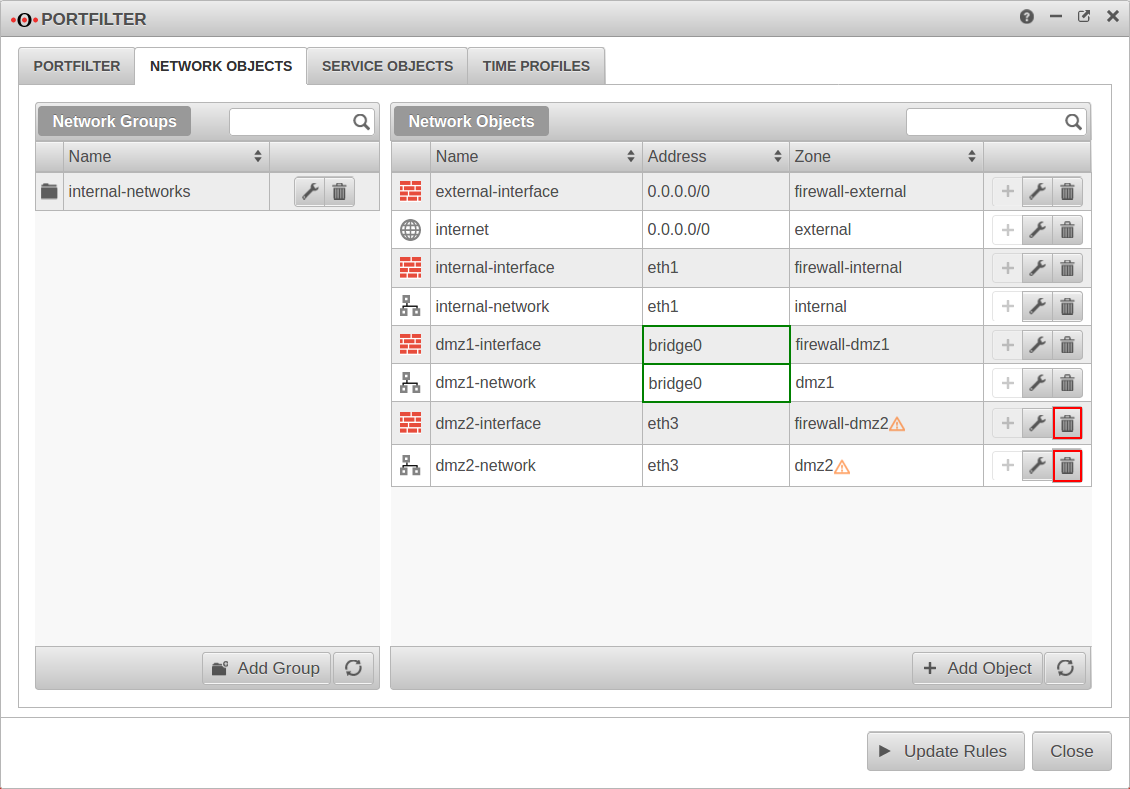
After setting up the interface, the network objects whose zones have been assigned to the bridge must be adapted. The bridge must be entered there as the interface.
Under Tab Network objects → Button for each network object belonging to the bridge.
Change Interface to
This step can be skipped for automatically created zones:
- Two new network objects are created for each of these zones:
- The network objects are each linked to a zone:
- zone-interface with the zone and
- zone-network with the zone
Orphaned network objects whose zones are no longer assigned to an independent interface should be removed.
Set up port filter rule
A port filter rule is required to allow network traffic between the interfaces belonging to the bridge.
A new network object is created for this purpose.
| Name: | all-dmz | Choose unique name | 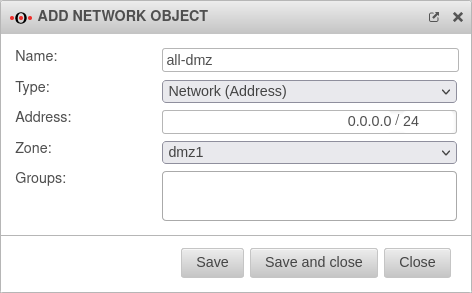 |
| Type: | Choose fitting type | ||
| Address: | 0.0.0.0/0 | Any network traffic should be possible. | |
| Zone: | Zone linked to the bridge. | ||
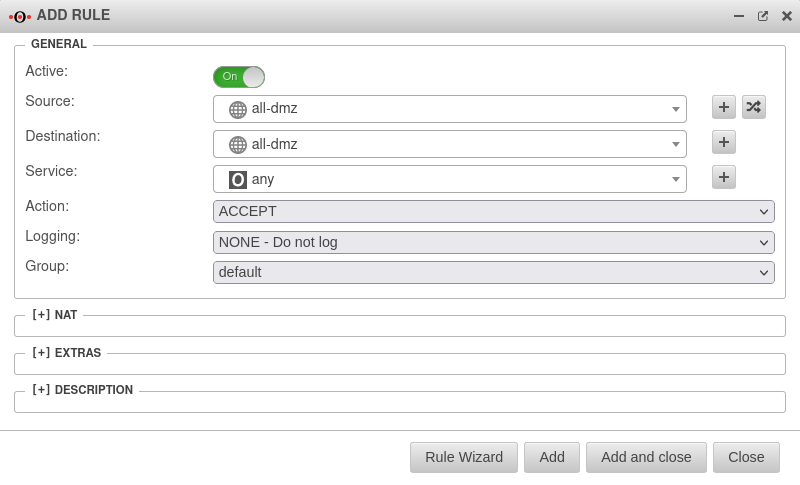
Finally, only the port filter rule with the network object just created has to be created.
At this point a any-rule may actually be used so that the interfaces can communicate completely with each other.
| # | Source | Destination | Service | NAT | Action | ||||
| 4 | Accept | On | |||||||
