Last adaptation to the version: 14.1.1 (11.2025)
- BetaFor participants on the Beta Channel only:
- Hinweis ergänzt, dass die UTM vor dem Enrollment auf die neuste Version geupdatet werden kann
- Es wird ggf. auch bei bestehenden Installationen nach dem Login eine Änderung des Initialpasswortes erzwungen
Keyboard and screen on the UTM
Display of Zero Touch information
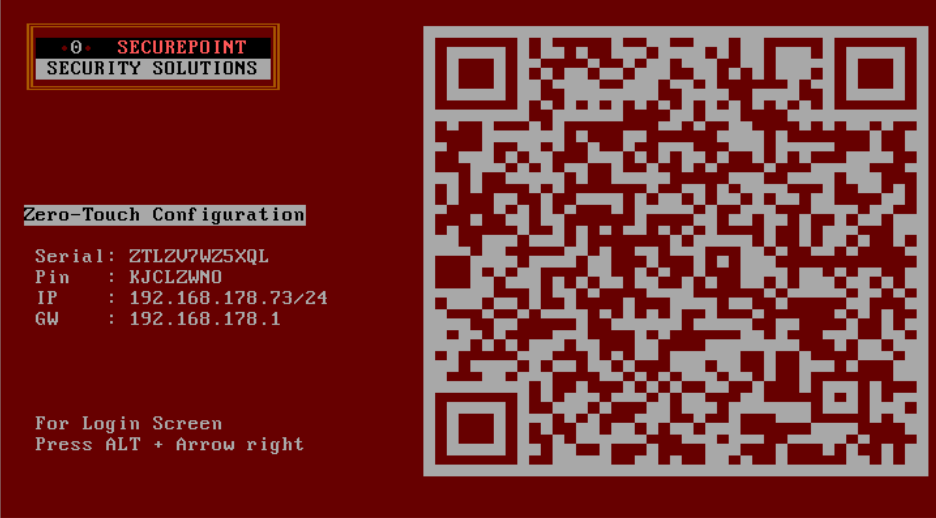
- Serial number (a serial number is created for VMs)
- Zero Touch PIN
- IP address notemptyNew as of v.14.0.1
- Gateway notemptyNew as of v.14.0.1
The information for Zero Touch is required in Unified Security Portal under → Wiki Zero Touch
- Zero Touch allows a UTM to receive a complete configuration, e.g., from a cloud backup, without requiring any input on the device itself.
- In Unified Security Console (USC), a UTM Zero Touch Profile must first be stored, linked to the serial number, the PIN from the startup screen, a license, and, if applicable, a configuration file .
- The UTM attempts to connect to our portal (requiring a DHCP server accessible on LAN1/ A0) and automatically downloads the Zero Touch profile.
- notemptyIf a configuration has been stored in the Zero Touch profile and the Update to the latest UTM version option is enabled, the UTM will be updated to the latest UTM version before the configuration is imported.new from: 14.1.1
- The UTM restarts with the stored license and, if applicable, the stored configuration, and is accessible via USC Websession
- The displayed QR code allows our shipping department to pre-send the serial number and PIN to a reseller
Login mask
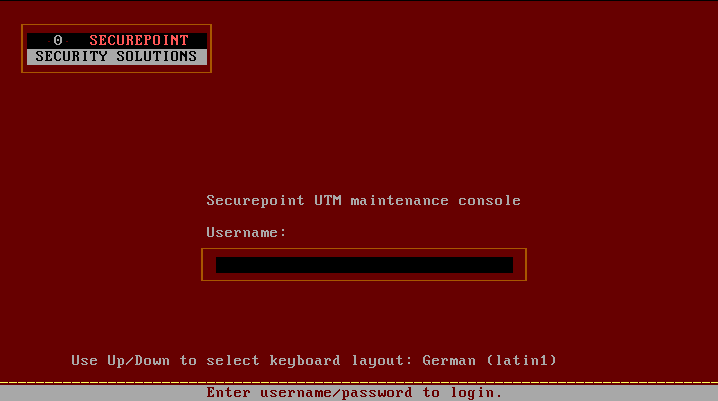
Using the key combination Alt → (Cursor/Right arrow key) respectively → you can access the login mask
Factory Setting:
- Username: admin
- Password: insecure
Web interface
Open the web interface via the IP address of the UTM (factory setting: https://192.168.175.1) and the respective port:
Administration Interface
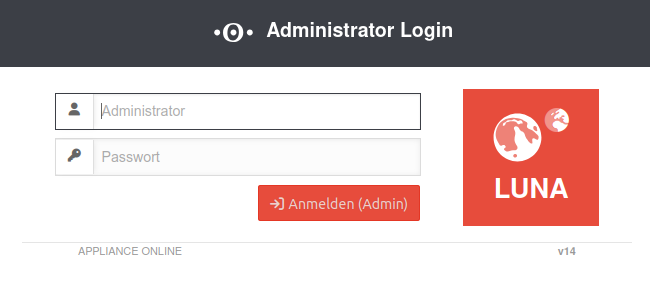
Box
- The start of e.g. Google Chrome or Edge is done with the start parameter --explicitly-allowed-ports=xyz.
- For Firefox, a string variable with the value of the port to be released is created in the configuration (about:config in the address bar) under network.security.ports.banned.override.
- It is possible to create a temporary policy for chromium-based browsers to allow its use.
This is strongly discouraged for safety reasons!
Factory setting: https://192.168.175.1:11115
- Username: admin
- Password: insecure
Change in menu Tab Administration Button
or via CLI:
name.firewall.local> manager new hostlist 192.0.192.192/32
system update rule
Passwort ändern
Passwort ändern notempty
- at least 8 characters length
- at least 3 of the following categories:
- Upper case
- Lower case
- Special characters
- Digits
User-Webinterface
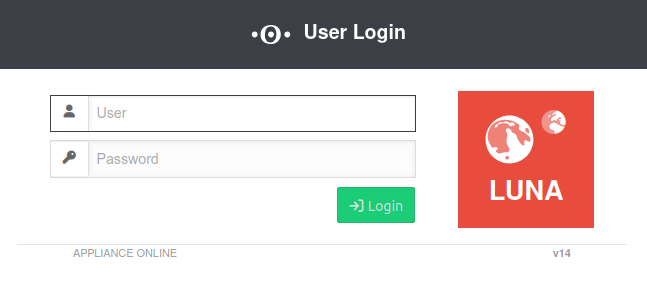
- User web interface: Port 443 (factory setting) Setting in menu Area Appliance Settings
BoxWebserverUser Web Interface Port: 443
Factory setting: https://192.168.175.1:443
- A user must be created
- The user must be a member of a group that has the permission Userinterface (see User Management)
- If the access is not from the internal network (zone internal) a firewall rule or an implicit rule is required Section VPN
CLI
Command Line Interface
Command overview here.
Webinterface

Open in the menu
SSH

Access as an administrator is also possible via SSH.
With the SSH client under Linux, the command ssh user@<IP address>
Further notes in the article about access with SSH is sufficient.
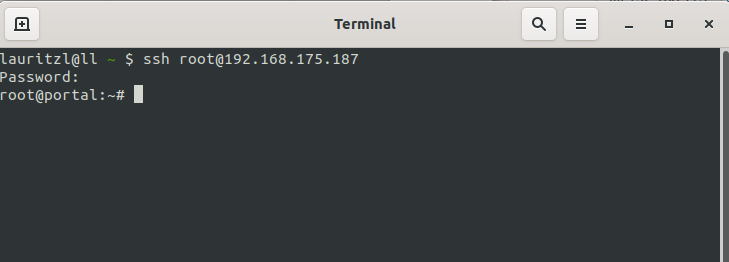
Users with root permission get directly to the Linux console of the UTM.
Call Command Line Interface with the command spcli.
Root permission is given to
- Support-User, if it was specified when creating
- Users with the user name root and membership of a group with Administrator permission
Serial interface
When using the serial interface, the connection is established with a suitable program, e.g. Putty on Windows ( ) Minicom on Linux.
The following settings must be used to use the serial interface:
- 38400 baud (for CLI)
- 115200 baud (for Bios)
- 8 data bits
- 1 stop bit
- No parity/handshake
Websession
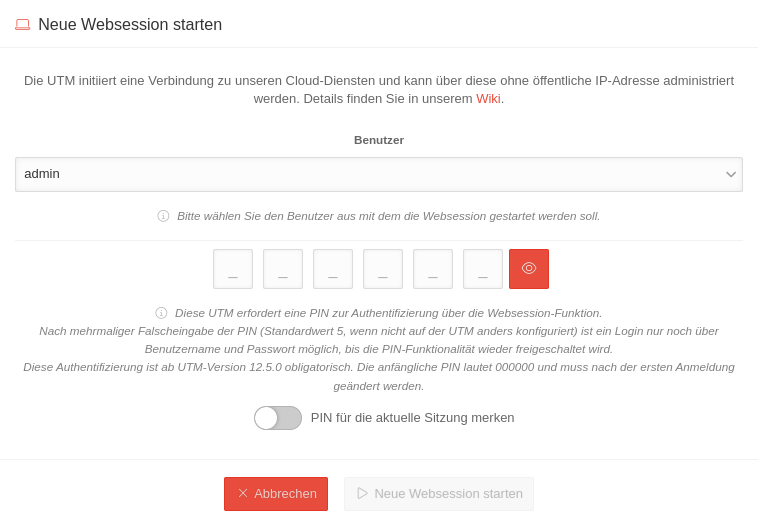
A Websession to a UTM can be established via Unified Security Console (USC).
Access via https://portal.securepoint.cloud / Menü /Select Utm tile / Section Websession / Button start new Websession
Further details can be found in the Wiki under Websessions
Monitor failed logins
The log can be viewed in the web interface under .
Alternatively, the data can also be retrieved with the following CLI command:
alertingcenter alerts get
Limitation / throttling of login attempts

In addition to the blocking of login attempts in IDS / IPS (activation under BlockChain (Fail2Ban) ) a new automatic throttling of login attempts takes effect for the admin and user interface:
- After 8 consecutive failed login attempts, the login function via the admin and user interface will be blocked for a certain time.
- This throttling takes effect on all interfaces and cannot be deactivated
- The block time is initially a few seconds and increases for each additional failed login attempt
- A corresponding message is displayed as a pop-up window
Lockouts via the IDS/IPS can be configured individually for each login service
Depending on the number of login attempts and the duration of the ban set there, a combination is created with the login attempt limitation described here.
Connection Rate Limit
Throttling of access from certain source IPs to recurring ports
notempty
The function can initially only be configured via the CLI
SSL-VPN accesses can be protected against aggressive scans or login attempts, for example.
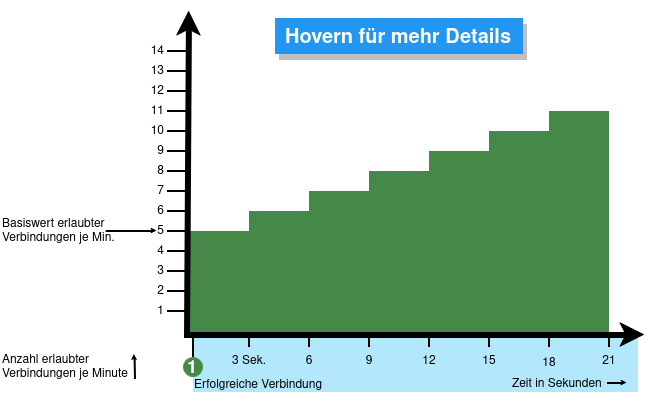
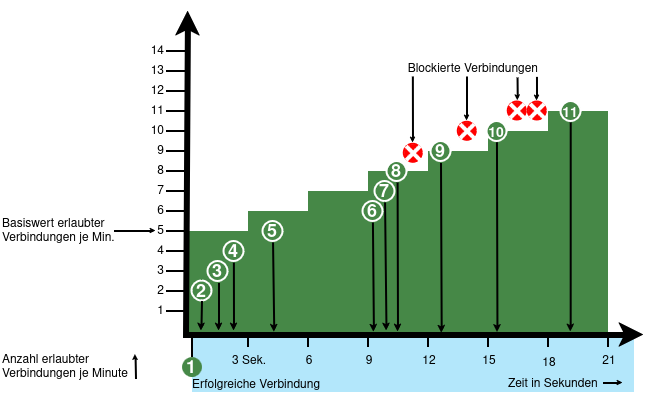
From v12.6.2, the UTM can limit the number of TCP and/or UDP connections from an external IP address to one port.
The following conditions apply:
- Only incoming connections for which a default route exists are monitored
- The connections from an IP address to a port of the UTM are counted within one minute
- When activated, 5 connections / connection attempts per minute are permitted.
The connections are then limited:- The additionally permitted connections are distributed evenly within 60 seconds of the first connection.
- With a CONNECTION_RATE_LIMIT value of 20, an additional connection is added every 3 seconds.
- 10 seconds after the first login, 3 further connections could be established (each from the same IP address to the same destination port)
- Blocking an IP address only affects access to the port that has been used too often.
Other ports can still be accessed.
- The function is activated by default for new installations on 20 UDP connections / minute on all ports
- For Updates the function must be manually activated
| extc-Variable | Default | Description |
|---|---|---|
| CONNECTION_RATE_LIMIT_TCP | 0 | Number of permitted TCP connections of an IP address per port 0 = Function deactivated, no blocking is performed |
| CONNECTION_RATE_LIMIT_TCP_PORTS | Ports to be monitored. Empty by default=all ports would be monitored (if activated). Individual ports are separated by spaces: [ 1194 1195 ] | |
| CONNECTION_RATE_LIMIT_UDP | 20 / 0 Default setting for new installations from v12.6.2: 20 For update installations the value is 0, so the function is deactivated. |
Number of permitted UDP connections of an IP address per port |
| CONNECTION_RATE_LIMIT_UDP_PORTS | Ports to be monitored. Empty by default=all ports are monitored (only for new installations!). Individual ports are separated by spaces: [ 1194 1195 ] |
Configuration with CLI commands
| CLI command | Function |
|---|---|
| extc value get application securepoint_firewall Alternatively as root user: spcli extc value get application securepoint_firewall | grep RATE |
Lists all variables of the securepoint_firewall application. The variables beginning with CONNECTION_RATE_LIMIT_ are responsible for the connection limit. application |variable |value --------------------+-------------------------------+----- securepoint_firewall |… |… |CONNECTION_RATE_LIMIT_TCP |0 |CONNECTION_RATE_LIMIT_TCP_PORTS| |CONNECTION_RATE_LIMIT_UDP |20 |CONNECTION_RATE_LIMIT_UDP_PORTS| |
| extc value set application securepoint_firewall variable CONNECTION_RATE_LIMIT_TCP value 20 system update rule |
Limits the allowed number of TCP connections from a single IP address to a specific port to 20 per minute
A change is made directly by a rule update. The value must not be set to 0 first! |
| extc value set application securepoint_firewall variable CONNECTION_RATE_LIMIT_TCP value 0 system update rule |
Deactivates the monitoring of TCP connections |
| extc value set application securepoint_firewall variable CONNECTION_RATE_LIMIT_TCP_PORTS value [ 443 11115 ] system update rule |
Restricts the monitoring of TCP connections to ports 443 and 11115 There must be spaces before and after the square brackets [ ]! |
| extc value set application securepoint_firewall variable CONNECTION_RATE_LIMIT_TCP_PORTS value [ ] system update rule |
There must be spaces before and after the square brackets [ ]! |
| extc value set application securepoint_firewall variable CONNECTION_RATE_LIMIT_UDP value 20 system update rule |
Limits the allowed number of UDP connections from a single IP address to a specific port to 20 per minute Default setting for new installations from v12.6.2: 20 For update installations the value is 0, so the function is deactivated. The value must not be set to 0 first! |
| extc value set application securepoint_firewall variable CONNECTION_RATE_LIMIT_UDP value 0 system update rule |
Deactivates the monitoring of UDP connections |
| extc value set application securepoint_firewall variable CONNECTION_RATE_LIMIT_UDP_PORTS value [ 1194 1195 ] system update rule |
Restricts the monitoring of UDP connections to ports 1194 and 1195. (Example for 2 created SSL-VPN tunnels). There must be spaces before and after the square brackets [ ]! |
| extc value set application securepoint_firewall variable CONNECTION_RATE_LIMIT_UDP_PORTS value [ ] system update rule |
There must be spaces before and after the square brackets [ ]! |
extc value set application securepoint_firewall variable CONNECTION_RATE_LIMIT_TCP value 20 notempty Finally, the CLI command system update rule must be entered so that the values in the rules are applied. |
For example, to allow a maximum of 20 connections per minute per IP address and port. For TCP, monitoring is restricted to ports 443 and 11115. All ports are monitored for UDP connections. |


