Last adaption: 06.2022
Preparation
Have login information ready
- When operating on a modem or fiber optic connection:
- Have login information of the Internet service provider ready
- Who has the current login information of the ISP?
- Is the login information available at the installation site?
- Is the login information available at the time of installation?
- if applicable: Is the person who has the login information available at the time of installation?
- When operating with a router:
- What is the IP address of the router?
- Can the UTM get a fixed IP?
- For new installations, DHCP is activated on the external interface
- Local network:
- What is the network IP of the local network(s)?
- Which IP addresses should the interfaces of the UTM in these networks receive?
As a rule, this should always be a fixed IP address!
Prepare firmware update
- If an existing configuration file is to be used, the installed firmware version must be identical or newer.
- Latest features and patches are available immediately.
Several firmware versions may have been released between the manufacturing and delivery. - Damage due to manipulation of the firmware in transit (unlikely, but not impossible) can thus be excluded.
- A USB stick with the UTM image is required.
This Securepoint Imaging Tool can be used. (Resellerportal → Menu → Tools x ) - Connect keyboard and monitor
(not Autoinstall or Autoupdate)
- The prepared USB stick must be connected to the UTM
- Switch on the UTM
- Under Save & Exit execute
The USB stick should then be listed at the top of the boot menu of the device, preceded by the TAG UEFI - Execute under Save & Exit
- Perform installation/ update
Installing the firmware
The firmware is installed in just a few steps. The preselection options only need to be confirmed.
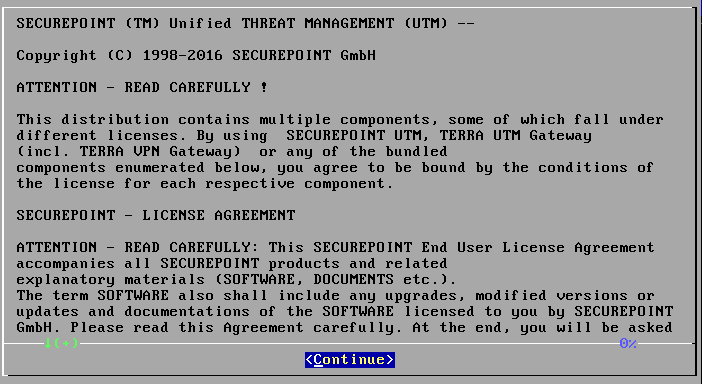
- Display and confirmation of the license conditions
- Decision as to whether an upgrade should be carried out
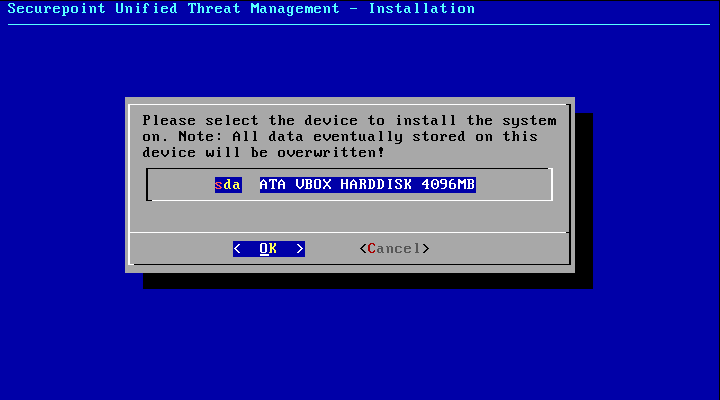
Default: Upgrade - Selection of the hard disk on which the firmware is to be installed
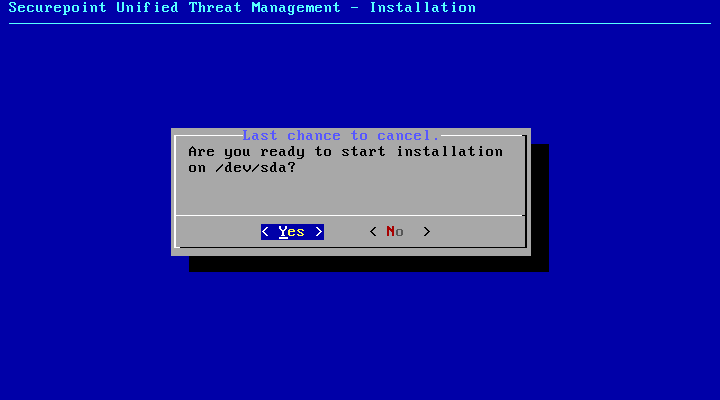
- Starting the installation
- Request to remove the USB stick
- Reboot
- Display of the login console
| 1. | 2. | 3. |
| Abb.1 | Abb.2 | Abb.3 |
| Abbildungen | ||



| Port name of casing | Port type | Portname software v11 | Portname software v12 |
|---|---|---|---|
| A0 | RJ45 | eth0 | A0 |
| A1 | RJ45 | eth1 | A1 |
| A2 | RJ45 | eth2 | A2 |
| A3 | RJ45 | eth3 | A3 |
| A4 | RJ45 | eth4 | A4 |
| A5 | RJ45 | eth5 | A5 |
| A6 | RJ45 | eth6 | A6 |
| A7 | RJ45 | eth7 | A7 |
| A8 | SFP | eth8 | A8 |
| A9 | SFP | eth9 | A9 |
| Connection | Type | ||
| Monitor | VGA | ||
| Keyboard | USB | ||
| Console | RJ45 |

| Port name of casing | Port type | Portname software v11 | Portname software v12 |
|---|---|---|---|
| A0 | RJ45 | eth0 | A0 |
| A1 | RJ45 | eth1 | A1 |
| A2 | RJ45 | eth2 | A2 |
| A3 | RJ45 | eth3 | A3 |
| A4 | RJ45 | eth4 | A4 |
| A5 | RJ45 | eth5 | A5 |
| A6 | RJ45 | eth6 | A6 |
| A7 | RJ45 | eth7 | A7 |
| A8 | SFP | eth8 | A8 |
| A9 | SFP | eth9 | A9 |
| B0 | RJ45 | eth10 | B0 |
| B1 | RJ45 | eth11 | B1 |
| B2 | RJ45 | eth12 | B2 |
| B3 | RJ45 | eth13 | B3 |
| B4 | RJ45 | eth14 | B4 |
| B5 | RJ45 | eth15 | B5 |
| B6 | RJ45 | eth16 | B6 |
| B7 | RJ45 | eth17 | B7 |
| Connection | Type | ||
| Monitor | VGA | ||
| Keyboard | USB | ||
| Console | RJ45 |

| Port name of casing | Port type | Portname software v11 | Portname software v12 |
|---|---|---|---|
| A0 | RJ45 | eth0 | A0 |
| A1 | RJ45 | eth1 | A1 |
| A2 | RJ45 | eth2 | A2 |
| A3 | RJ45 | eth3 | A3 |
| A4 | RJ45 | eth4 | A4 |
| A5 | RJ45 | eth5 | A5 |
| A6 | RJ45 | eth6 | A6 |
| A7 | RJ45 | eth7 | A7 |
| A8 | SFP | eth8 | A8 |
| A9 | SFP | eth9 | A9 |
| B0 | RJ45 | eth10 | B0 |
| B1 | RJ45 | eth11 | B1 |
| B2 | RJ45 | eth12 | B2 |
| B3 | RJ45 | eth13 | B3 |
| B4 | RJ45 | eth14 | B4 |
| B5 | RJ45 | eth15 | B5 |
| B6 | RJ45 | eth16 | B6 |
| B7 | RJ45 | eth17 | B7 |
| C0 | RJ45 | eth18 | C0 |
| C1 | RJ45 | eth19 | C1 |
| C2 | RJ45 | eth20 | C2 |
| C3 | RJ45 | eth21 | C3 |
| C4 | RJ45 | eth22 | C4 |
| C5 | RJ45 | eth23 | C5 |
| C6 | RJ45 | eth24 | C6 |
| C7 | RJ45 | eth25 | C7 |
| Connection | Type | ||
| Monitor | VGA | ||
| Keyboard | USB | ||
| Console | RJ45 |

| Port name of casing | Port type | Portname software v11 | Portname software v12 |
|---|---|---|---|
| A0 | RJ45 | eth0 | A0 |
| A1 | RJ45 | eth1 | A1 |
| A2 | RJ45 | eth2 | A2 |
| A3 | RJ45 | eth3 | A3 |
| A4 | RJ45 | eth4 | A4 |
| A5 | RJ45 | eth5 | A5 |
| A6 | RJ45 | eth6 | A6 |
| A7 | RJ45 | eth7 | A7 |
| A8 | SFP | eth8 | A8 |
| A9 | SFP | eth9 | A9 |
| B0 | RJ45 | eth10 | B0 |
| B1 | RJ45 | eth11 | B1 |
| B2 | RJ45 | eth12 | B2 |
| B3 | RJ45 | eth13 | B3 |
| B4 | RJ45 | eth14 | B4 |
| B5 | RJ45 | eth15 | B5 |
| B6 | RJ45 | eth16 | B6 |
| B7 | RJ45 | eth17 | B7 |
| C0 | SFP+ | eth18 | C0 |
| C1 | SFP+ | eth19 | C1 |
| C2 | SFP+ | eth20 | C2 |
| C3 | SFP+ | eth21 | C3 |
| Connection | Type | ||
| Monitor | VGA | ||
| Keyboard | USB | ||
| Console | RJ45 |

| Port name of casing | Port type | Portname software v11 | Portname software v12 |
|---|---|---|---|
| A0 | RJ45 | eth0 | A0 |
| A1 | RJ45 | eth1 | A1 |
| A2 | RJ45 | eth2 | A2 |
| A3 | RJ45 | eth3 | A3 |
| A4 | RJ45 | eth4 | A4 |
| A5 | RJ45 | eth5 | A5 |
| A6 | RJ45 | eth6 | A6 |
| A7 | RJ45 | eth7 | A7 |
| A8 | SFP | eth8 | A8 |
| A9 | SFP | eth9 | A9 |
| C0 | SFP+ | eth10 | C0 |
| C1 | SFP+ | eth11 | C1 |
| C2 | SFP+ | eth12 | C2 |
| C3 | SFP+ | eth13 | C3 |
| Connection | Type | ||
| Monitor | VGA | ||
| Keyboard | USB | ||
| Console | RJ45 |
Integration into the local network
Adjust IP addresses of the UTM via CLI
If administration via the CLI is not an issue, the IP adresses can be provided directly to the UTM via CLI
In this case, the monitor and keyboard remain directly connected to the UTM.
The login is done on the console.
To be able to administer the UTM, the admin interface must be accessed via the IP of the UTM and the port of the admin interface via the interface LAN2.
In the factory settings, the UTM can be reached via https://192.168.175.1:11115.
If the IP or the interface cannot be reached from the local network, changes must be made.
- Connecting keyboard and monitor directly to the UTM
- Log in to the UTM: Username admin / Password: insecure
- the Command Line Interface appears.
- change network configuration:
- Determine the existing interfaces: interface get
- Determine the ID of the IP addresses: interface address get
LAN2 corresponds to the internal interface through which the admin interface can be reached.
The ID is needed for changing the IP address in the next step. - Change the interface IPs: interface address set id 1 address 192.168.12.1/24
system update interface (desired IP of the internal network with subnet mask) - Activate an interface: interface address new device LAN1 or A0 address 192.168.x.y/24
system update interface
- Set up administration access:
In the factory settings, access to the admin interface of the UTM is only possible via the internal interface LAN2. If the admin interface is to be accessible via another interface, the IP of the host (or a net IP with subnet mask) must be released:
manager new hostlist 192.168.168.0/24
system update rule Here: All hosts in the network 192.168.168.0 (no matter at which interface) can access the admin interface
Attention: If e.g. the IP 192.168.175.1 is at LAN1 or A0 and the admin interface should be called from a computer in the network at LAN1, the IP 192.168.175.x must be released extra nevertheless.
Adjust the IP address of your own computer
The IP address of your own computer is temporarily adapted to the default network of the internal interface of the UTM.
This is followed by connecting your own computer to interface A1 (the internal interface) of the UTM.
The correct interface can be seen in the figure and table above.
This is how it works
Change IP address on Windows
- Display of network connections: r ncpa.cpl↵
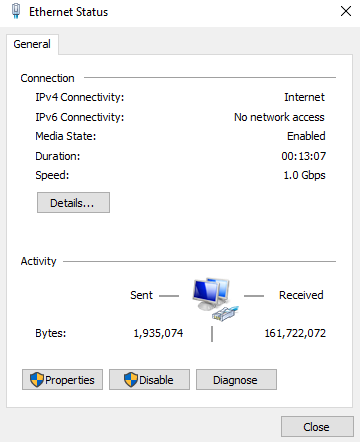
- Show status of Ethernet connection with double click
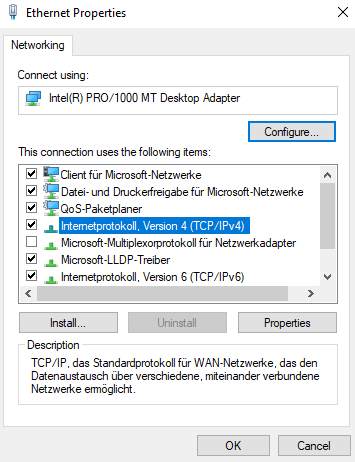
- Show properties of the interface
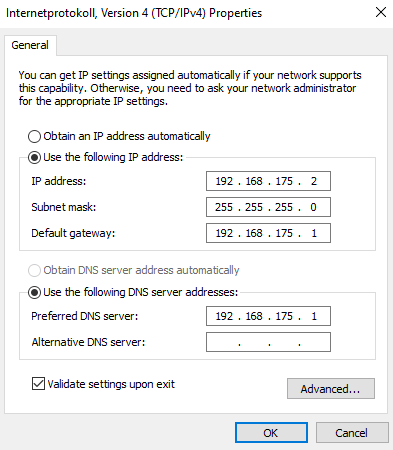
- Show properties of the TCP/IPv4 connection
- Set IP address:
- IP address:192.168.175.2
- Subnet mask:255.255.255.0
- Default gateway:192.168.175.1 (=Default address of the internal interface of the UTM)
| 1. | 2. | 3. |
| Abb.1 | Abb.2 | Abb.3 |
| Abbildungen | ||
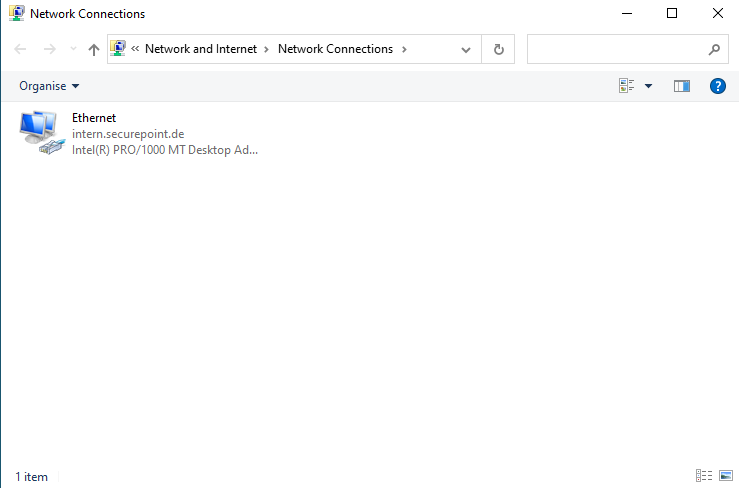
- Access via desktop display:
- Click on the network icon in the taskbar next to the clock
- Click on Network and Internet settings.
- Click on Change adapter options.
- Access by command:
- Windows key r ncpa.cpl
- Double-click on the interface used to display the status of the ethernet connection
Change IP address on Linux
Please refer to the corresponding documentation of the used distribution.
Examples for Ubunutu:
- Opening the terminal
- Identify the name of the interface: ip a
- Change IP address: (In the example enp0s3 is the interface used: sudo ip address add 192.168.175.2/24 dev enp0s3
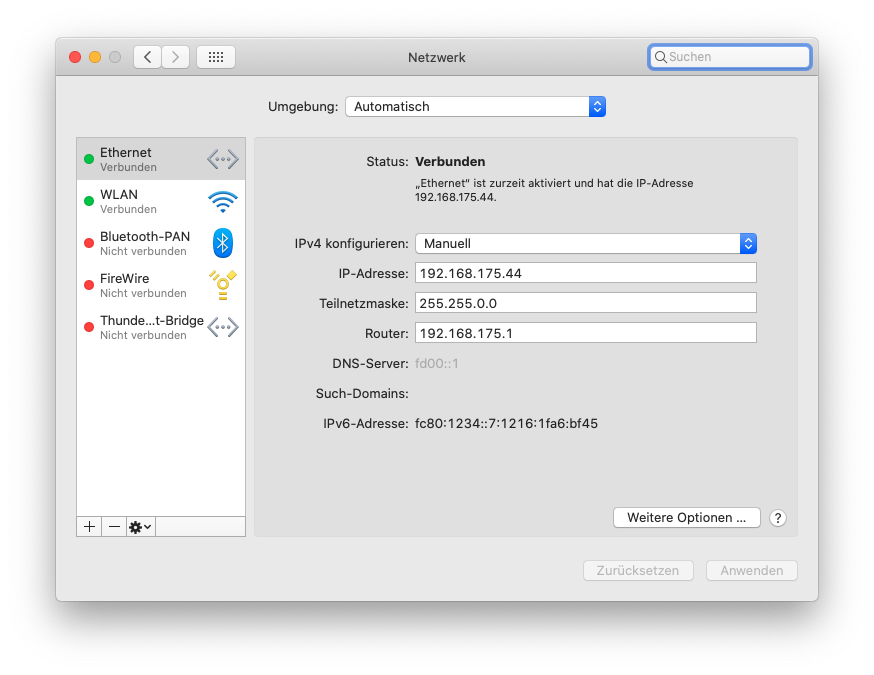
Change IP address on a MAC
Change IP address on a MAC
- Menu System settings / network
- Configure IPv4: Manuell select in the dropdown menu
- IP address:192.168.175.2
- Subnet mask:255.255.255.0
- Router:192.168.175.1 (=Default address of the internal interface of the UTM)
- Button
For further configuration, the IP address of your own computer must then be changed again.
Setting the original IP address:
- Fixed IP Addresses: Enter as described above
- Enable DHCP:
- Windows: Properties Internet Protocol Version 4 (TCPIPv4) → select Obtain an IP address automatically
- Linux: Example for Ubuntu: sudo ip address del 192.168.175.2/24 dev enp0s3
sudo dhclient enp0s3
If necessary, refer to the documentation of the distribution used. - MAC: coming soon...
First access
If not already done, the following connections must be made now physically:
- Connect interface for the external interface (A0) towards the Internet (modem, router, etc.).
- Connect the internal interface (A1)
- with your own computer, if the IP address has been adjusted on it.
- to the network from which the UTM is to be administered, if the IP address of the UTM has been adjusted.
https://192.168.175.1:11115 (Default) or
https://172.16.0.1:11115, if the IP address of the UTM was changed to 172.16.0.1
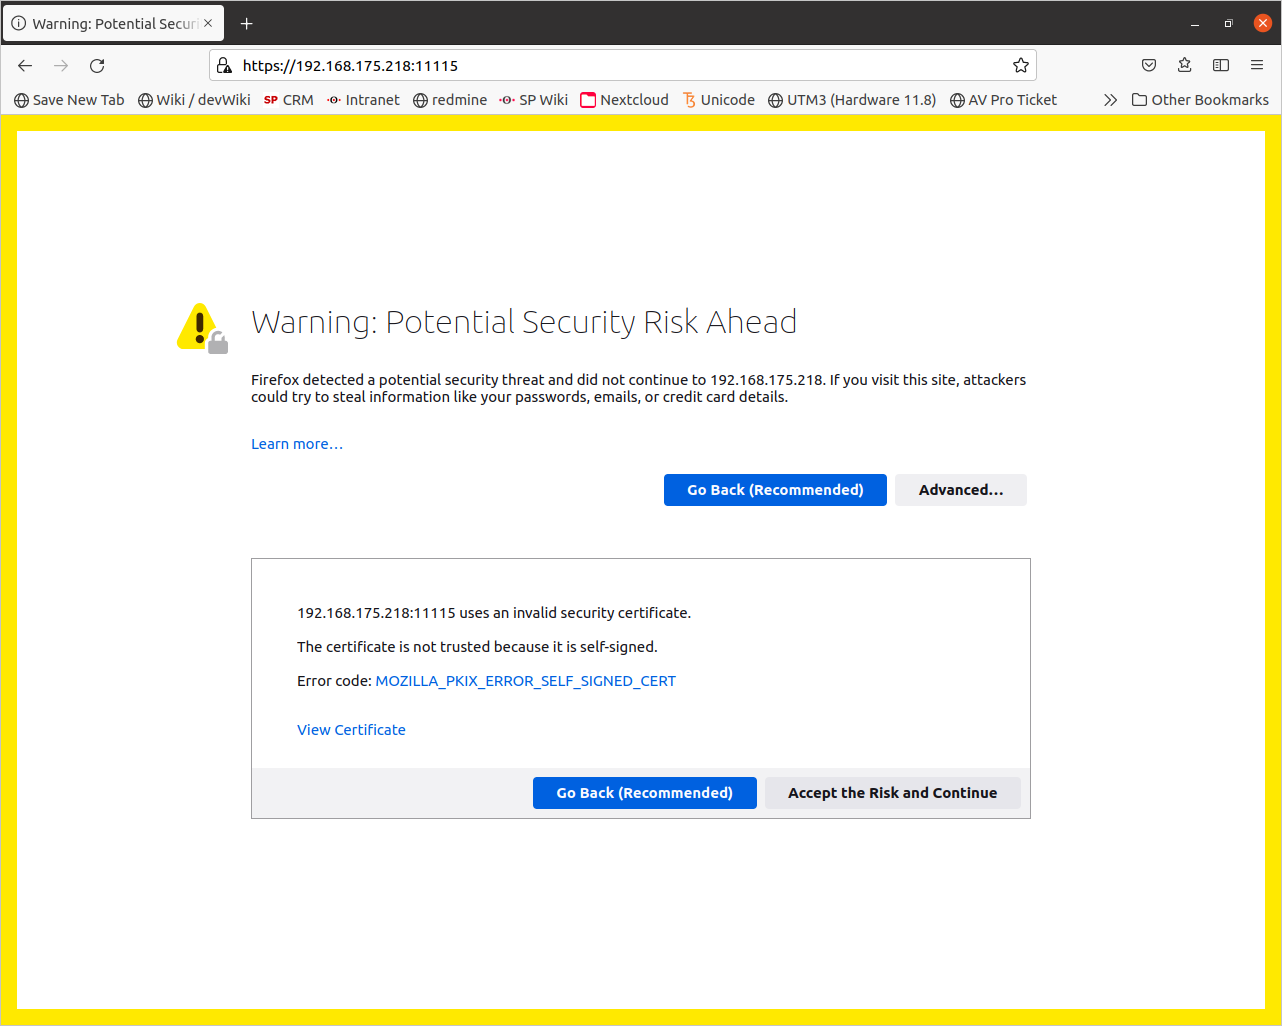
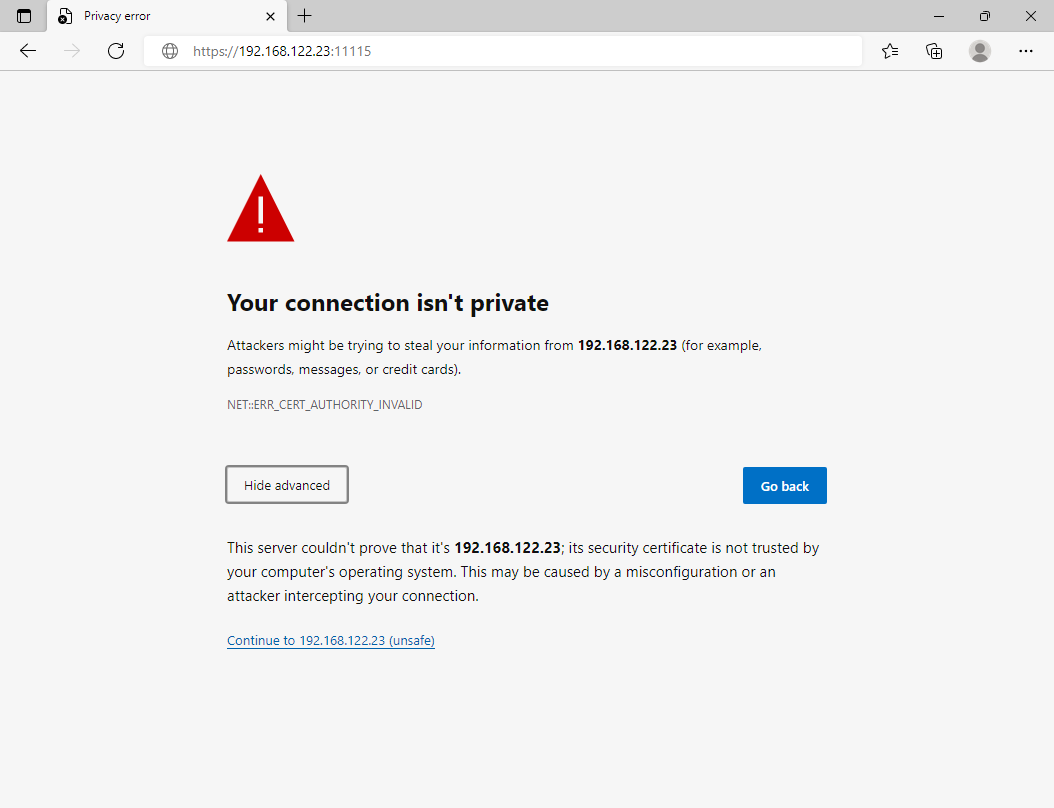
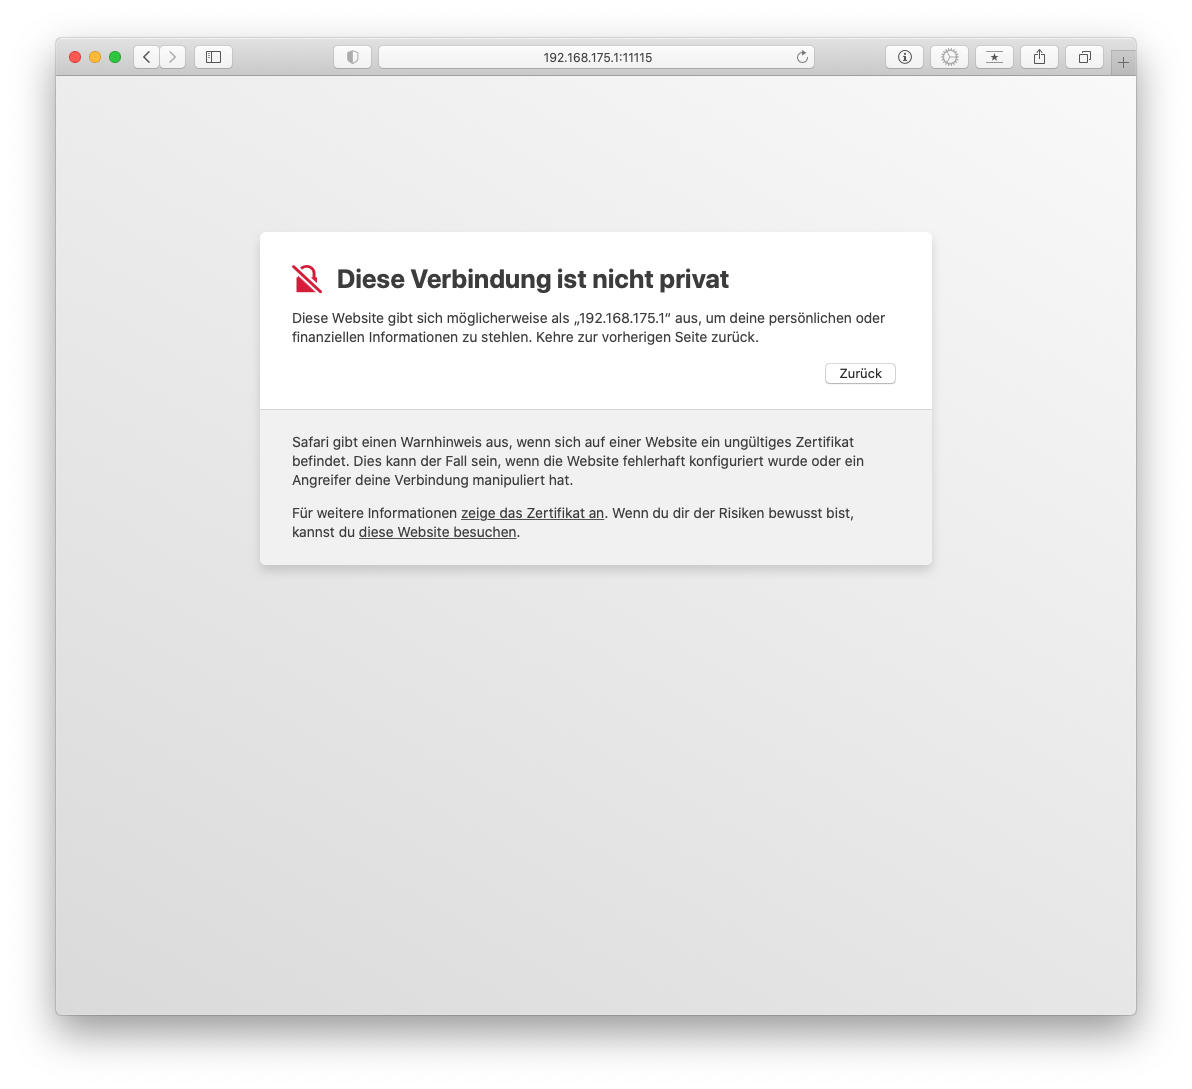
When the admin interface is called up for the first time, a certificate warning appears in the browser.
Since the browser doesn't know the certificate of the UTM, a security warning is issued.
This warning must be ignored.
First registration | |||
| Caption | Value | Description | 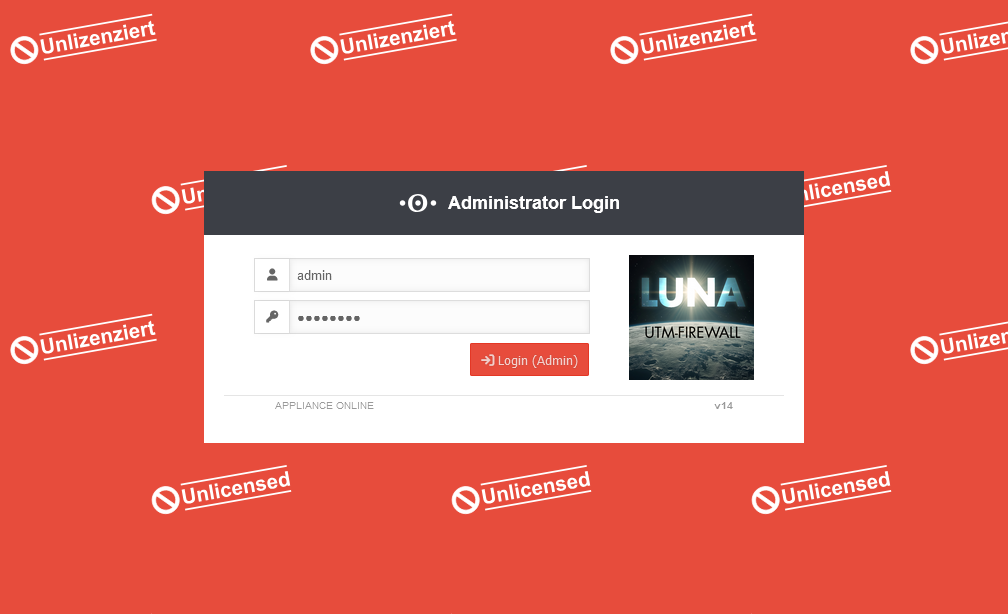 |
|---|---|---|---|
| User | admin | Login with the default login information of the factory settings: admin | |
| Password | insecure | Login with the default login information of the factory settings: insecure | |
| Login (admin) | |||
Agree to license agreement and privacy policy | |||
| The license agreement and privacy policy must be accepted by clicking the button. | UTM 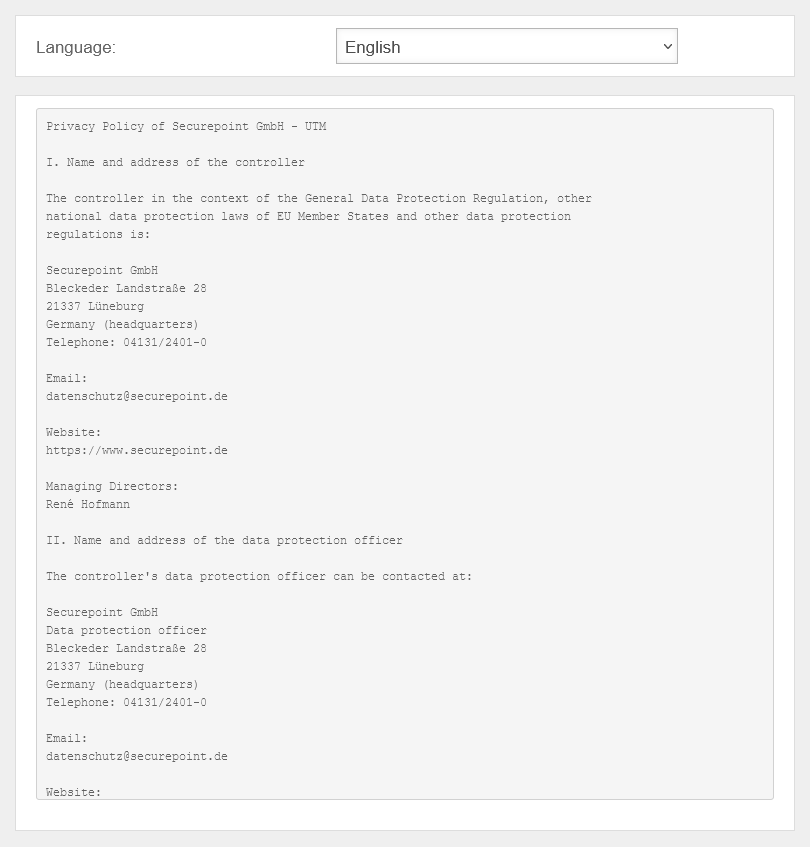 The privacy policy must be agreed to. UTM The privacy policy must be agreed to. UTM 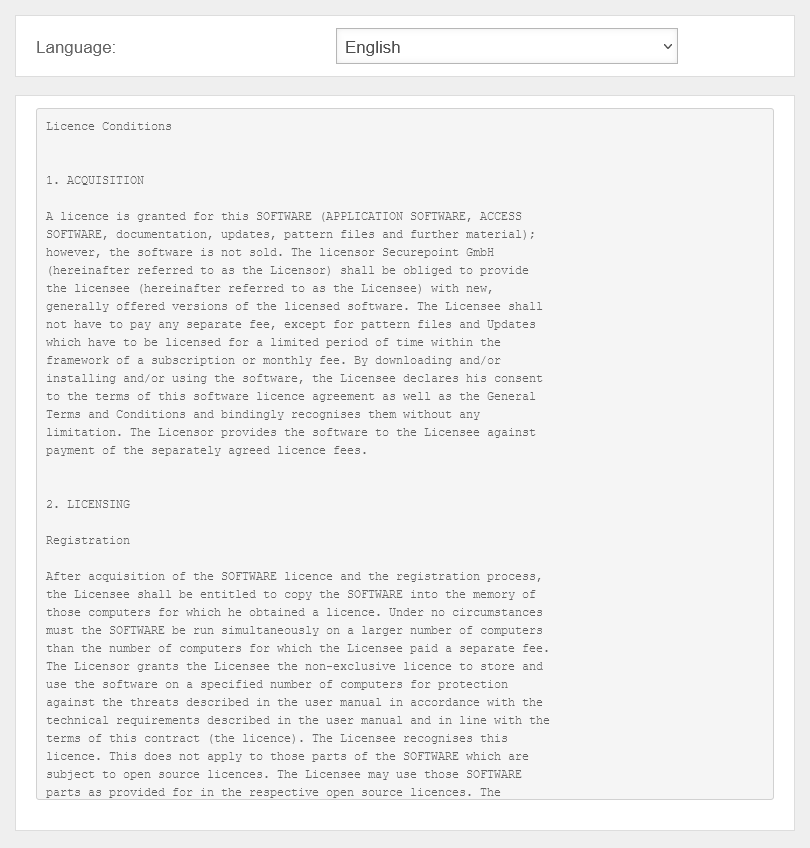 The license agreement must be agreed to. The license agreement must be agreed to.
| ||
Basic configurations | |||
| Firewall name | firewall.ttt-point.local | An individual firewall name must be assigned. |
UTMuser@firewall.name.fqdn 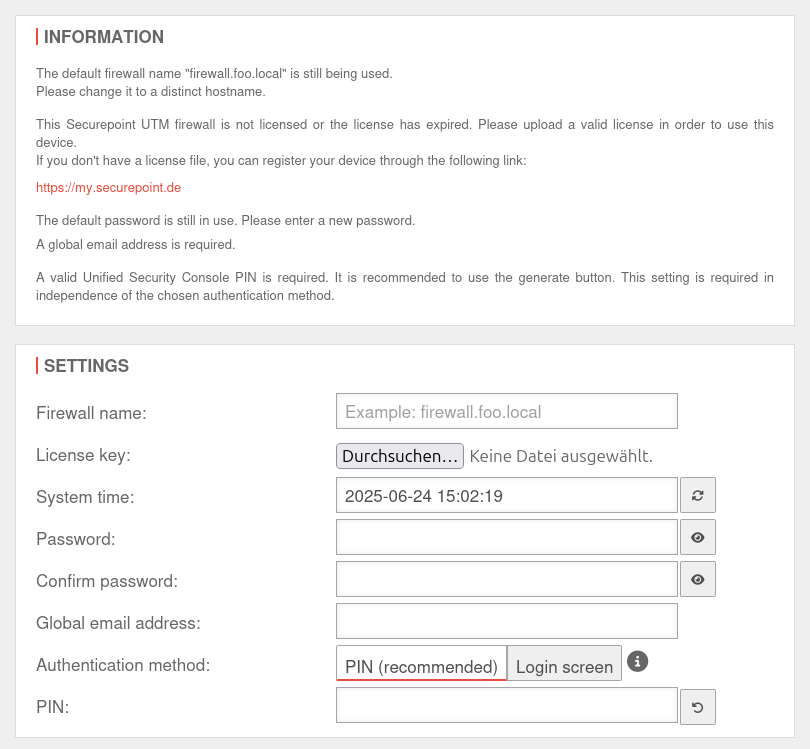 Basic configurations The fields displayed may vary depending on what information is already available on the UTM
|
| License key | Import valid license. | ||
| System time | yyyy-mm-dd hh-m--ss | The system time should be correct. It is compared with other servers, e.g. for user authentication (Kerberos, OTP, etc.). If the deviation is too large, for example, login will not be possible. | |
| Password Confirm password |
|
The default password insecure Passwords must meet the following criteria:
New in v14.0.7: Password change required upon first login | |
| Global email address: notempty New as of v12.4.4 |
admin@ttt-point.de | Required information e.g. for the mail connector and the proxy. Also serves as postmaster address for the mail relay. | |
| Authentication method: notempty New as of v12.5.1 |
Authentication method for Web sessions via USC The web session PIN also secures the use of the following actions within the scope of the USC:
If the PIN is not used, these actions cannot be called up from the Unified Security Portal. | ||
| PIN: | PIN as additional security for Websessions No number sequences or duplications are allowed | ||
| Creates a secure PIN | |||
| Displays the license agreement | |||
| Displays the privacy policy | |||
| Logs off again. No settings are saved! | |||
| Complete | Completes the login process and opens the Welcome window. | ||
Welcome | |||
| Basic settings are completed with the welcome dialog. | UTMuser@firewall.name.fqdn 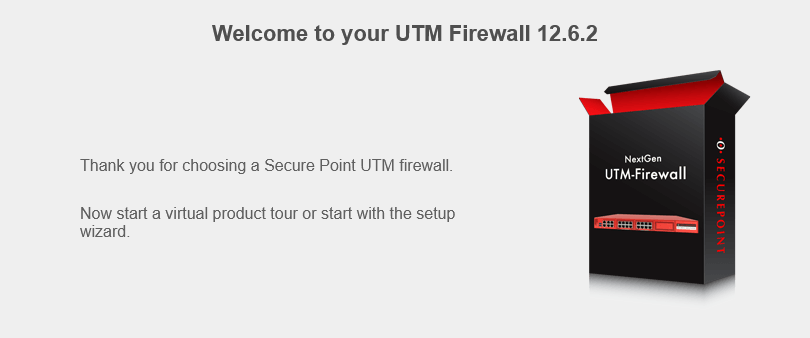 Welcome dialog Welcome dialog
| ||
| Starts the Installation Wizard. | |||
| Starts a tour that explains the admin interface and menus in 15 steps. | |||
Configure interfacesnotemptyNew as of v12.7.0 | |||
| Do you want to configure the interfaces now? | This message appears if not all existing interfaces are configured correctly. However, it is recommended to do this to prevent possible problems. The button opens the network configuration directly. | 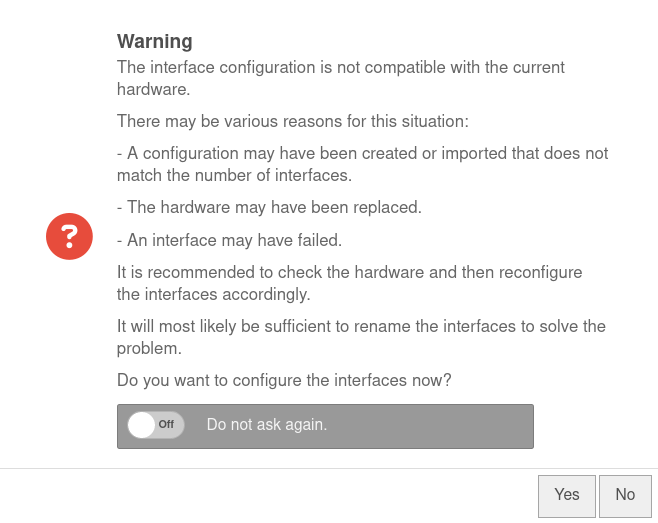 | |
| Do not ask again. | Off | If this message is not desired, it can be set here so that it is not displayed again. | |
Commissioning with a cloud backup
If the restore is to be run with a cloud backup, all that is required is an Internet connection.
Due to the association with the license file, the corresponding cloud backups are automatically displayed in the Area Cloud Backup menu.
Simply start the installation wizard and fill only step 4 (Internet) with the correct data.
Commissioning with locally available configuration backup
If a local backup is available, it can be imported in the Configuration management.
Area Local configurations button


